
Documentation
Listings
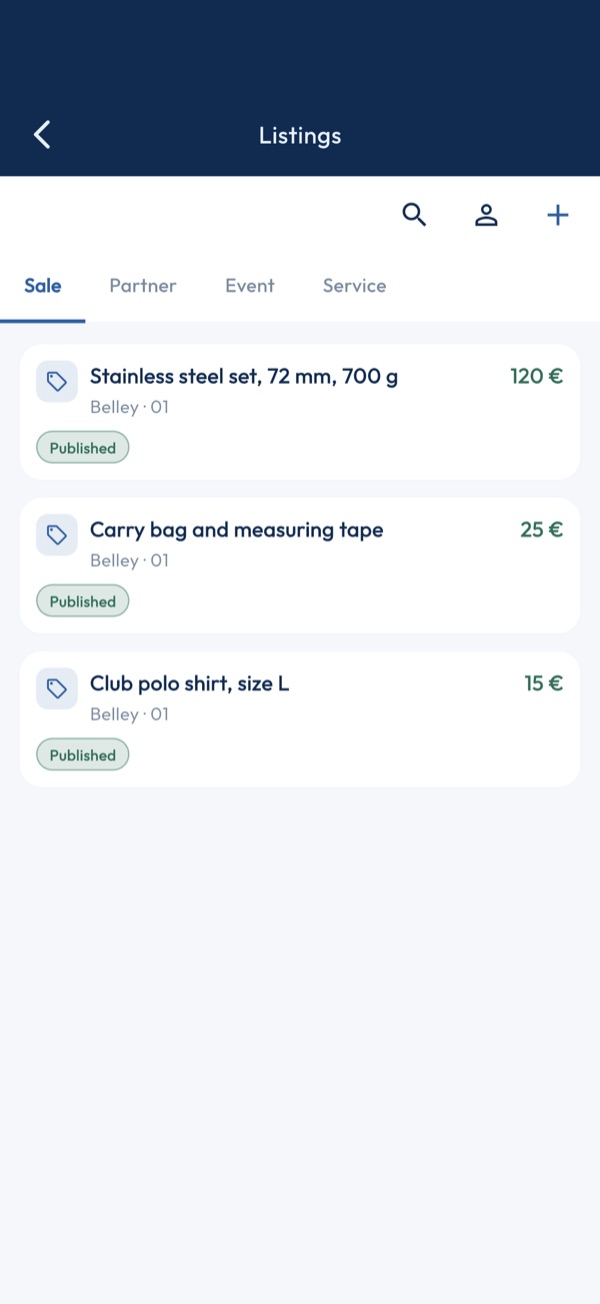
1. Four families
The tabs sort listings by family: sale, partner, event, service. Pulling the list down reloads it from the server.
2. Search
The magnifier opens a field that filters the current tab on title, town, department and description. The cross closes the search.
3. Filter by department
The chips under the tabs restrict the feed to one department, for all four families at once. They only appear from two departments represented.
4. Read a listing
Each card shows the photo, title, price and location; your own listings are marked. A tap opens the full listing. The call button dials the author's number, if given.
5. Post a listing
The plus opens the five-step posting: family and sub-type, family-specific form, title and description, photos, contact and summary. The contact is pre-filled from the owner's card. The listing is reviewed before being published.
6. My listings
The silhouette opens your listings, whatever their status: pending, published or refused with the reason, and the reports received. There you edit, mark as sold or delete a listing, and recover the right to edit it after a reinstall.
My listings
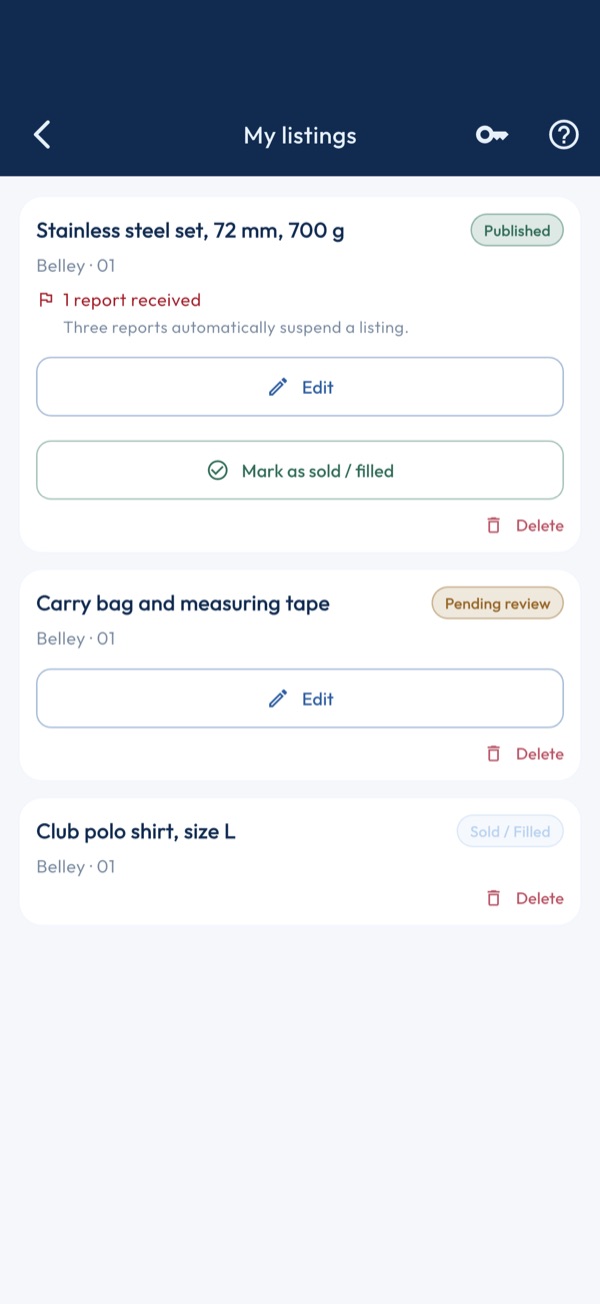
1. Who the author is
The list shows the listings of the owner set in Settings, recognised by their e-mail address. Without an owner or an e-mail, the screen says so and stays empty.
2. The state of each listing
The badge gives the state: awaiting moderation, published, rejected with its reason, expired, sold or suspended. A pending or rejected listing is visible only here.
3. Reports
The number of reports received is shown on the card. Three reports suspend the listing automatically; a suspension you consider unjustified is contested through the contact link.
4. The actions
Edit reopens the posting form with the listing's values; an expired listing offers Renew instead. Mark as sold removes it from the feed. Delete asks for confirmation.
5. Recover after reinstalling
The right to edit a listing is a token kept on the device. After reinstalling or changing phones, the key at the top right recovers it: a code is sent to the owner's e-mail address, to be entered in the dialog.
Post a listing
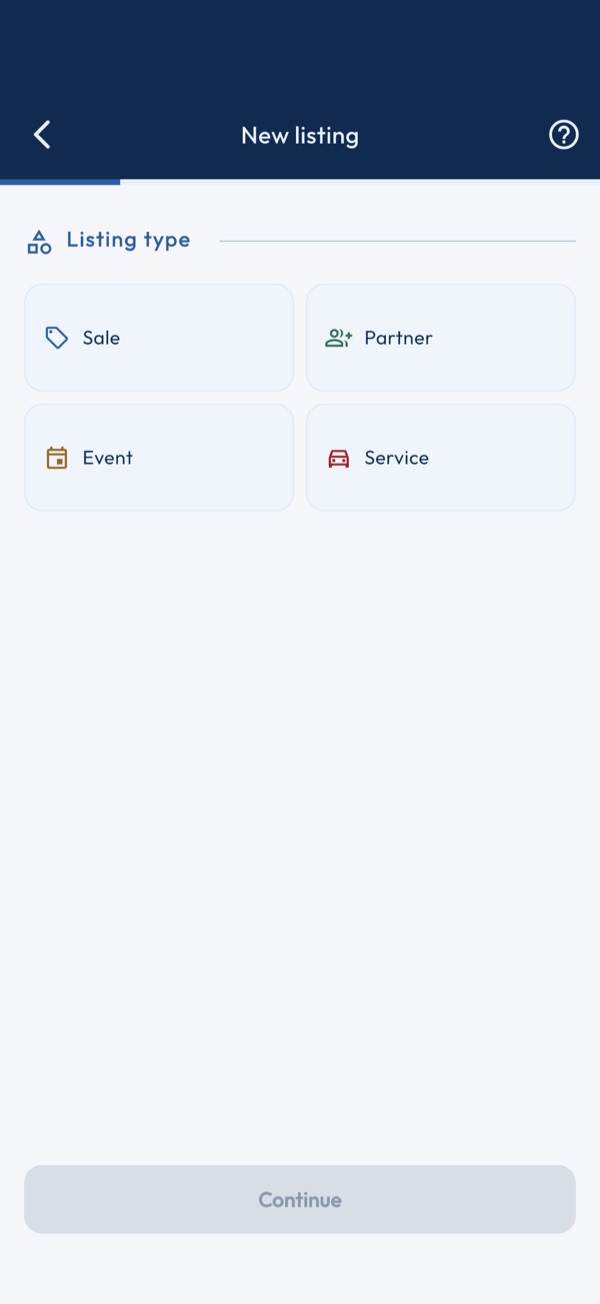
1. Family and subtype
Sale, service, accommodation, event or partner, then the subtype. This choice decides the form of the next step and the tab where the listing will appear.
2. The family's form
Each family has its fields: brand, weight and condition for a sale; nature and terms for a service; bedding, capacity and period for accommodation; date and formation for an event; target tournament and wanted position for a partner. Required fields block the next step.
3. Title and description
A short title and a free description. They are what moderation reads and what the feed shows.
4. Photos
Up to four photos, from the gallery or the camera. They are compressed before sending: a photo from a recent device would otherwise exceed the size the server accepts.
5. Contact and summary
The contact is pre-filled from the profile of the owner set in Settings; you can correct it for this listing alone. A switch offers to carry the correction over to the player profile. The summary shows the listing as it will be sent.
6. Sending and moderation
Sending leads to a confirmation screen. The listing awaits moderation before appearing in the feed; its state is followed in My listings, from where it is edited with this same form.
Club directory
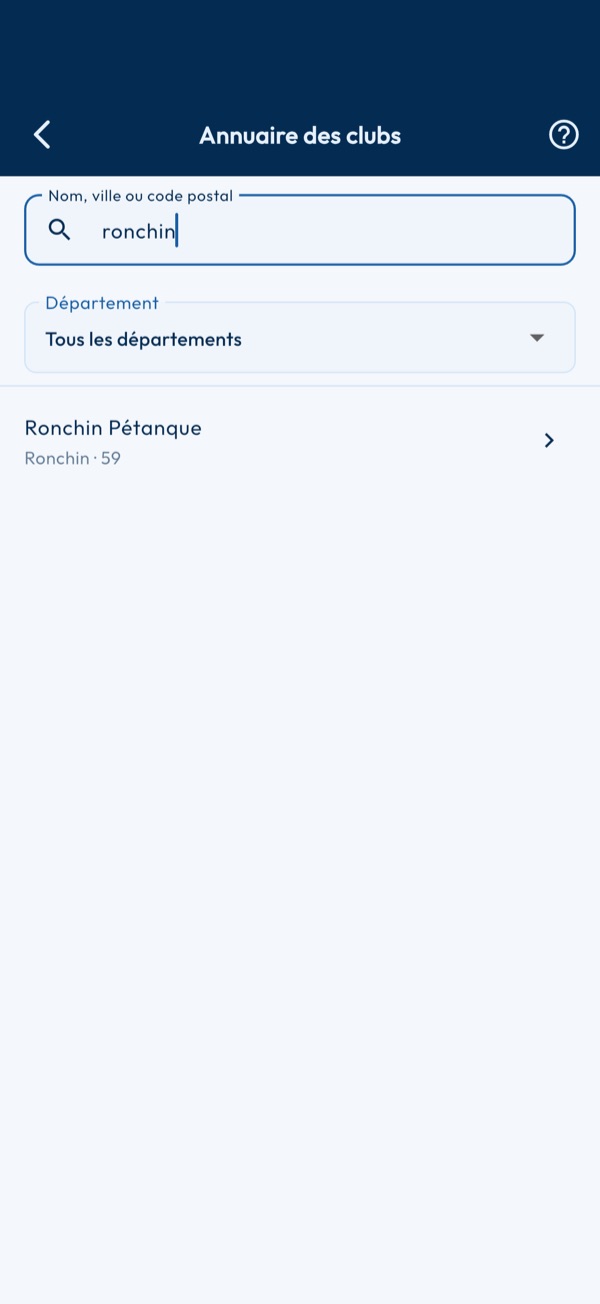
1. Find a club
Type part of the name, the town or the postcode, in any order and without accents; the department narrows the list. Clubs not affiliated with the FFPJP are listed separately, below the others. The directory downloads the first time you open it, then works offline and updates itself at most once a day.
2. The club entry
Committee, town, licensed players, ground and club contact — never a person's. Directions only appear if the ground address is known: a town-level location would lead to the town hall. An entry to be checked, or a club the FFPJP lists twice, is flagged at the top.
3. Venue of a tournament
In a tournament's setup, the directory icon in the "Venue / Club" field opens the search: choosing a club fills in the venue, the ground address, the postcode and the town. Everything can still be edited by hand.
4. Suggest a correction or a club
At the bottom of the entry, choose what needs correcting — town, ground, the club's phone, e-mail or website, or a club that no longer exists — and give the new value. For the ground, type the address or, on site, take your location. A missing club is suggested from the search. Nothing changes right away: every suggestion is checked before it enters the directory. Do not include any person's name or mobile number.
More
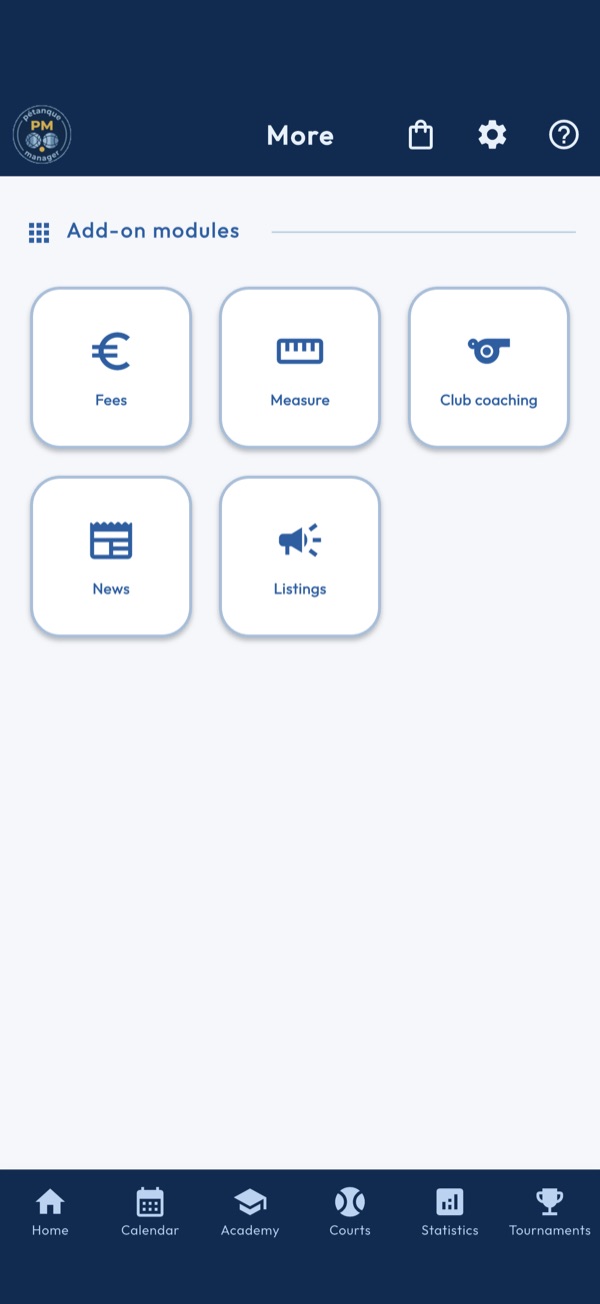
1. The grid of secondary modules
More gathers the modules that have neither a tile on the home screen nor a place in the bottom bar. Tiles go in rows of three; which ones appear depends on the app and on what the home screen already shows.
2. Locked tiles
A padlock and the PREMIUM or PRO label mark a module outside your plan. Tapping opens a box that says what is needed to unlock it and leads to the shop, or to the club code entry in the club app.
3. Expenses and Measure
Expenses opens the Expenses & Finances module, the sharing of a day's costs. Measure opens the ruler, which settles which boule is closest to the jack. Both belong to the PREMIUM plan.
4. Coaching
The tile opens coaching: sessions, drills and follow-up of the players you train. It belongs to the PRO plan in Pétanque Manager, to the club licence in Pétanque Club.
5. News
The tile opens the news feed of the last thirty days, the same as the home carousel. A message replaces it while loading, when the feed is unavailable or when it is empty.
6. Listings and Video library
A module without a tile on the home screen finds it here: Listings, and the Video library in the club app. Its content does not change, only its entrance.
7. Club access
In the club app, the tile opens the access code screen. It is never locked: this is where the device is attached to the club, and where it can be detached.
Calendar
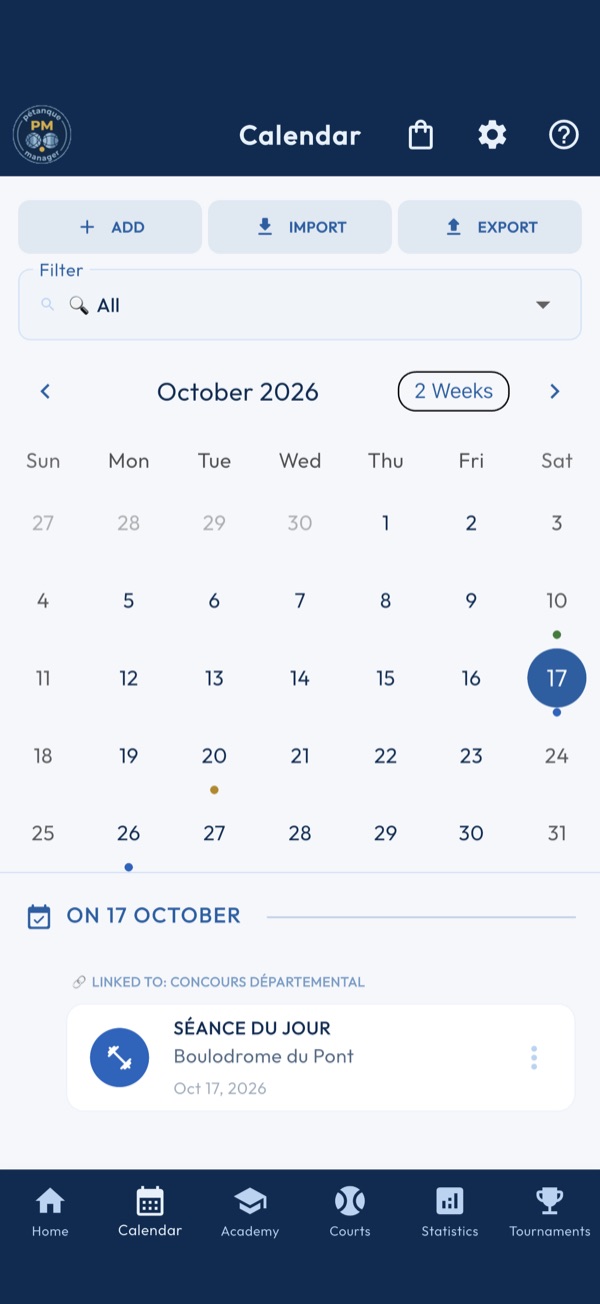
1. Add
"Add" opens the choice of type, training, game, tournament, precision or expenses, of recurrence and number of occurrences, then the set-up of the activity on the selected day. "Free note" just sets a title and a place.
2. Import
"Import" opens the search of published tournaments: department, type, format, category, formula and dates. A tournament is imported with one tap and lands in the calendar.
3. Export
"Export" sends activities to the phone's calendar or to an .ics file, over a date range and a type of your choice. The number of events kept is shown before sending.
4. Filter by type
The drop-down list restricts the grid and the day's list to one type of activity. Each type has its colour, the one of the dots in the grid.
5. The grid
Tapping a day shows its activities below; the format button switches from month to two weeks or to week. Up to three coloured dots mark a day's activities.
6. The day's list
Tapping an activity does what is expected: start an upcoming game or session, open its results once it is over, open an expense folder. The card's menu gives details, editing, attaching and deletion, after confirmation.
7. Attach to a tournament
An activity can be attached to a tournament and is then shown indented under it; a refused attachment says why. A long press on a tournament opens its summary: preparation, match day and expenses.
Workshop detail
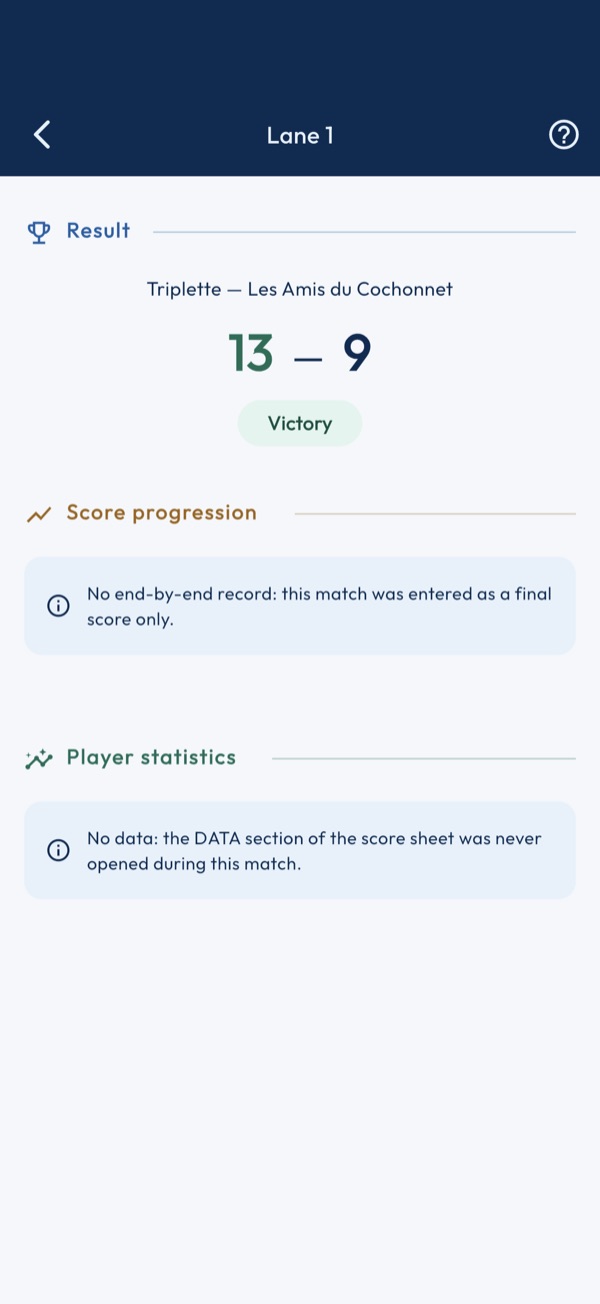
1. The result
The final score is the fixture's. The won or lost badge only shows if the workshop is finished: a workshop in progress is neither.
2. The score curve
Both scores end after end. Press or drag on the curve: a tooltip gives the touched end and its score.
3. The sequence
One line per end, with the points scored and the running total. Without any recorded end, the workshop was entered at its final score only, and the section says so.
4. Per-player records
One card per player of the line-up: boules played, pointed and shot, successes, rate. A player with no recorded boule stays listed, with the matching notice.
5. Open the radar
Tap a player's card to open their skills radar, computed over all their records.
Raw results
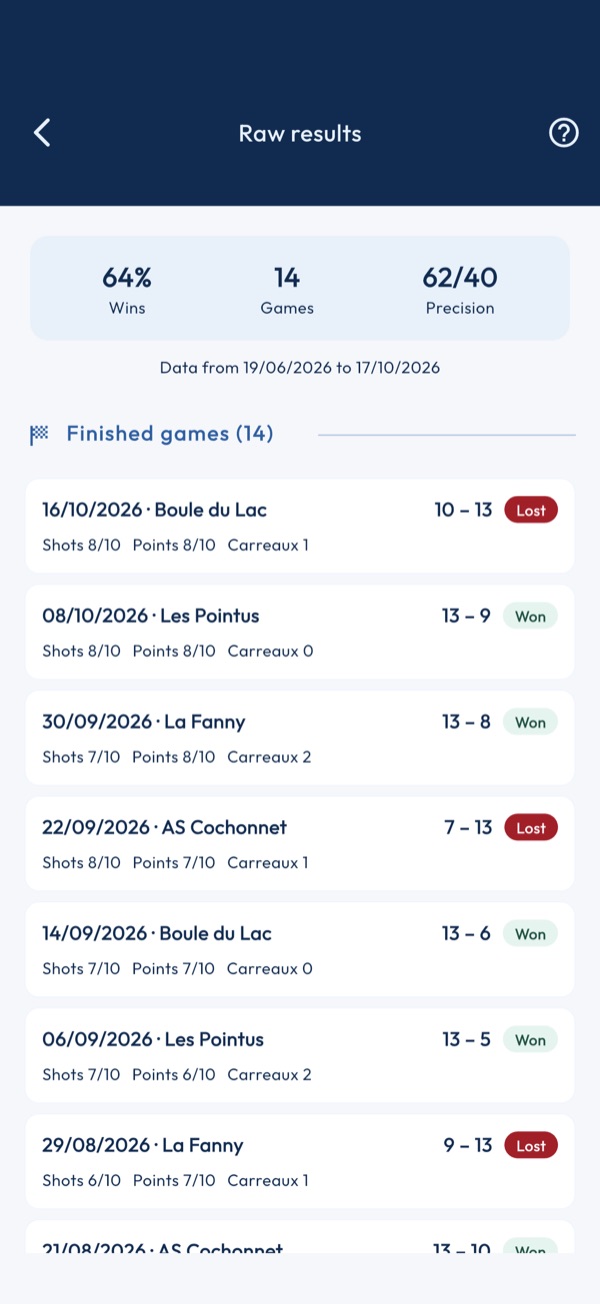
1. The summary
The three figures of the header — games, success rate, precision average — are exactly those of the player's card, and the sum of the lines shown below. Nothing is recomputed.
2. The period
The one the dashboard selector kept: received packs, six months, twelve months or the whole history. It is recalled under the summary and applies to both lists.
3. The games
Each finished game with its score and raw record, successes over boules played. Victory is read from the score, as on the dashboard. A game without a date shows "No date" rather than vanishing.
4. The precision series
Each shooting series with its score over the event maximum. A series still in progress carries its status: it already counts in the average.
Team Composition
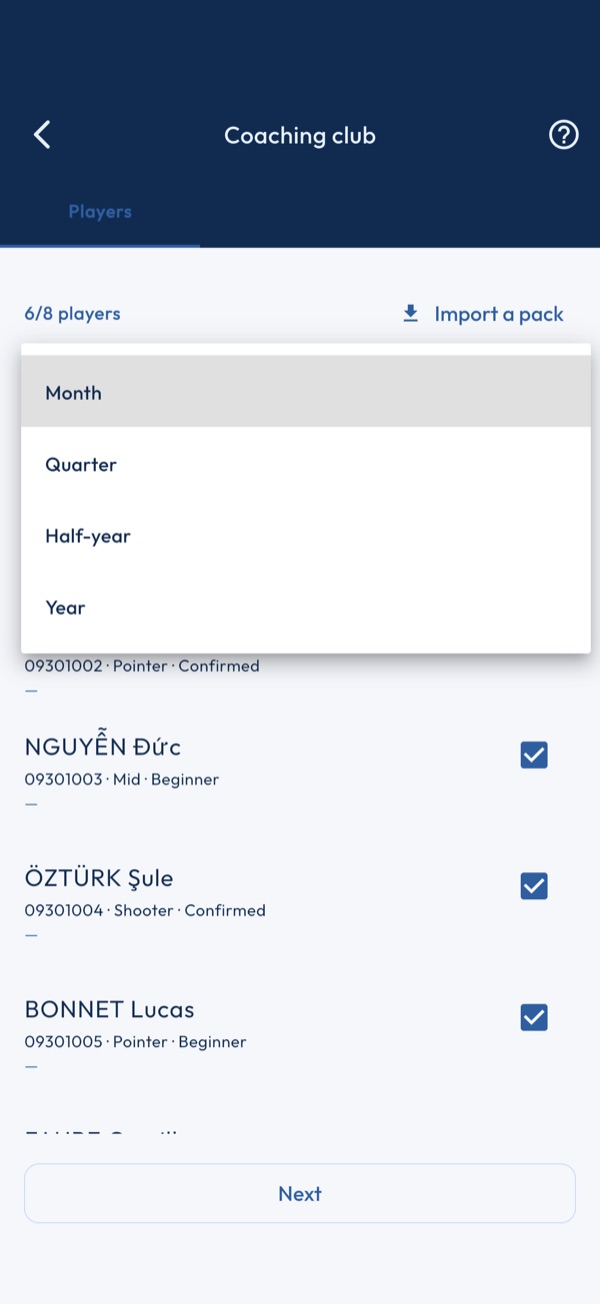
1. Step 1 — Roster selection
Select up to 8 players for this match from your squad. Players without a valid FFPJP licence are flagged with an orange badge. With a single club team, it is selected automatically; with several, pick yours first.
2. Step 2 — Composition assistant
Set each player's position (Shooter, Pointer, Middle). All three phases are recommended: the six singles from each player's singles record, doubles and triples from results obtained together in that format, a team with its positions covered being favoured. Each line says why, and substitutes are listed. "Play the whole roster" gives priority to players not yet lined up. "Apply suggestions" fills the courts.
3. Step 3 — Assignment by court
Assign a player to each court for H-t-H, Doubles and Triples. A player can only be assigned once per phase. Opponents are optional.
4. Start the match
The 'Start' button activates when all courts are assigned. It automatically creates the 3 CNC tournaments and takes you to the live view.
Dashboard
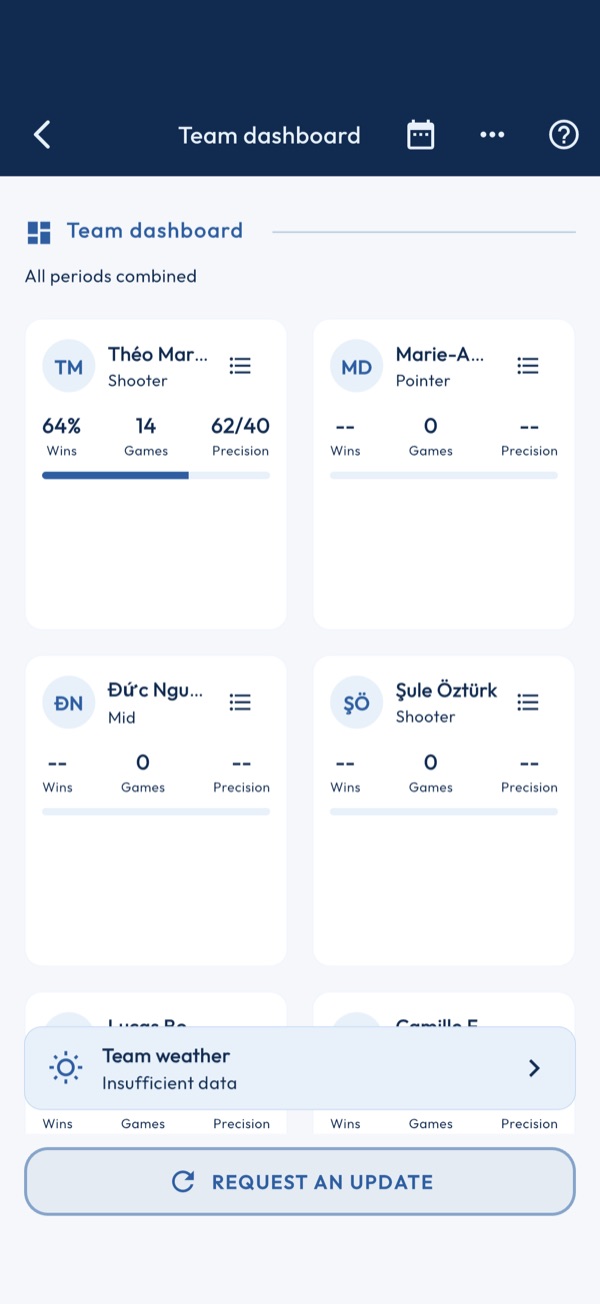
1. Receive a Data Pack
Ask each player to go to Settings → Send my stats to coach. They select the period and send you their file via WhatsApp, Mail or AirDrop.
2. Import a pack
Tap 'Import' and select the JSON file received from the player. Their stats are integrated into your dashboard. Repeat for each player.
3. Analyze performance
The grid compares imported players: win rate, ends played, accuracy. 'In form' and 'Declining' badges are calculated automatically.
4. Skills radar
Tap a player to see their 5-axis radar (Shooting, Pointing, Consistency, Mental, Wins). Tap 'View full stats' to access their Stats module.
Debrief
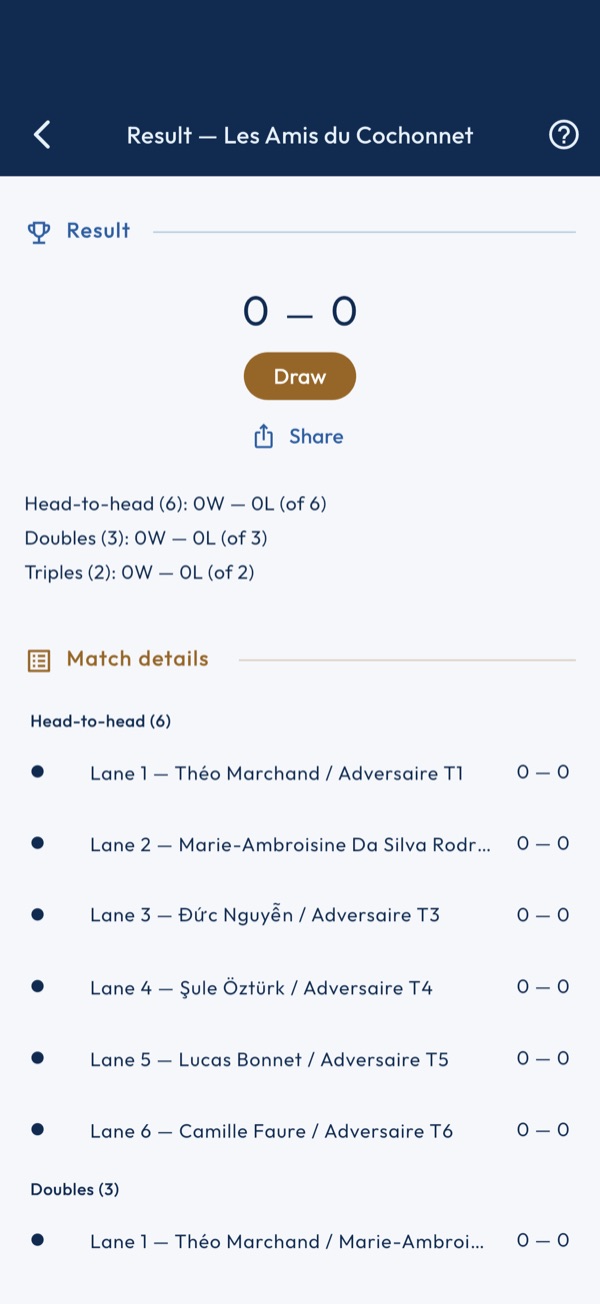
1. Match result
View the final score and breakdown by phase (H-t-H, Doubles, Triples). Tap a court to review the end details.
2. Share the match
The Share button of the debrief, under the result, and the share icon in the live bar open the Club match card: our club against the opposing club, the score out of 36 and the three phases; in portrait and story, the eleven pitches with our players. Live, the card shows the secured score, the points at stake and the finished games. Neither the coach's notes, nor the recorded stats, nor the opponents' names appear on it. A finished match can also be shared from its ⋮ menu in the list of matches.
3. Coach notes
Record your observations about the match: areas to improve, successes, context (court, weather, morale). These notes are accessible later.
4. Mental report
Rate 3 axes out of 5: Combativeness, Cohesion, Overall level. This data enriches the team profile over the season.
History
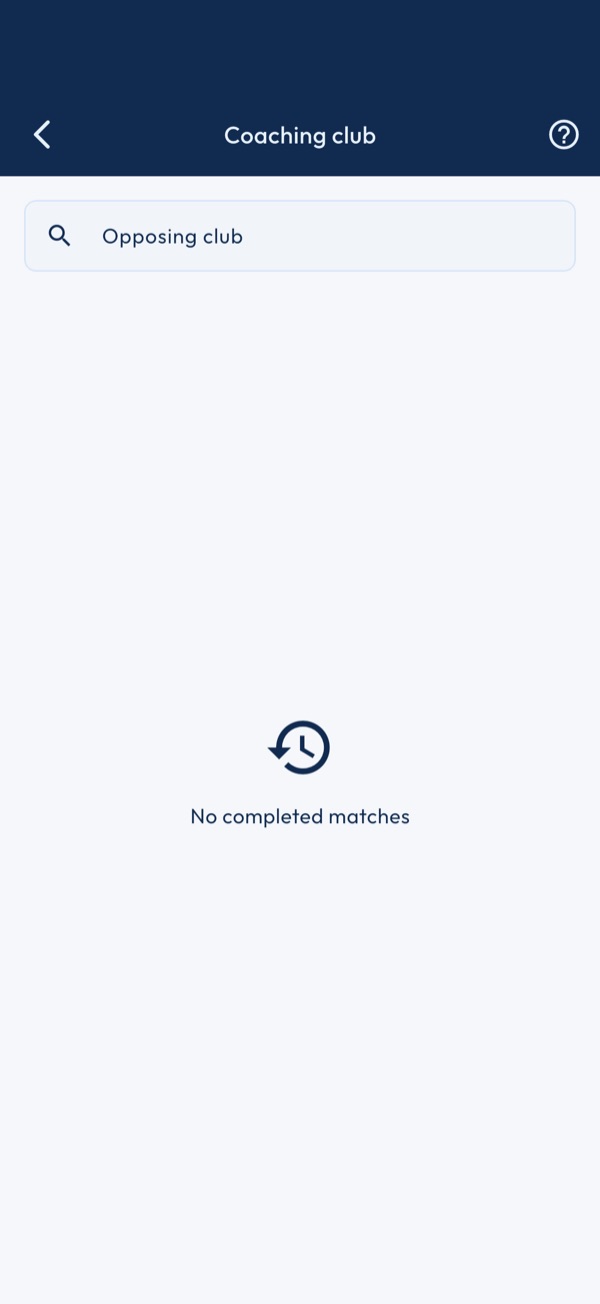
1. Filter by club
Enter the name of an opposing club to filter the history. The Wins / Losses / Draws counter appears automatically when a filter is active.
2. Prepare a return match
Review past matches against a club to adapt your strategy. Tap a match to access its full debrief.
Coaching Home
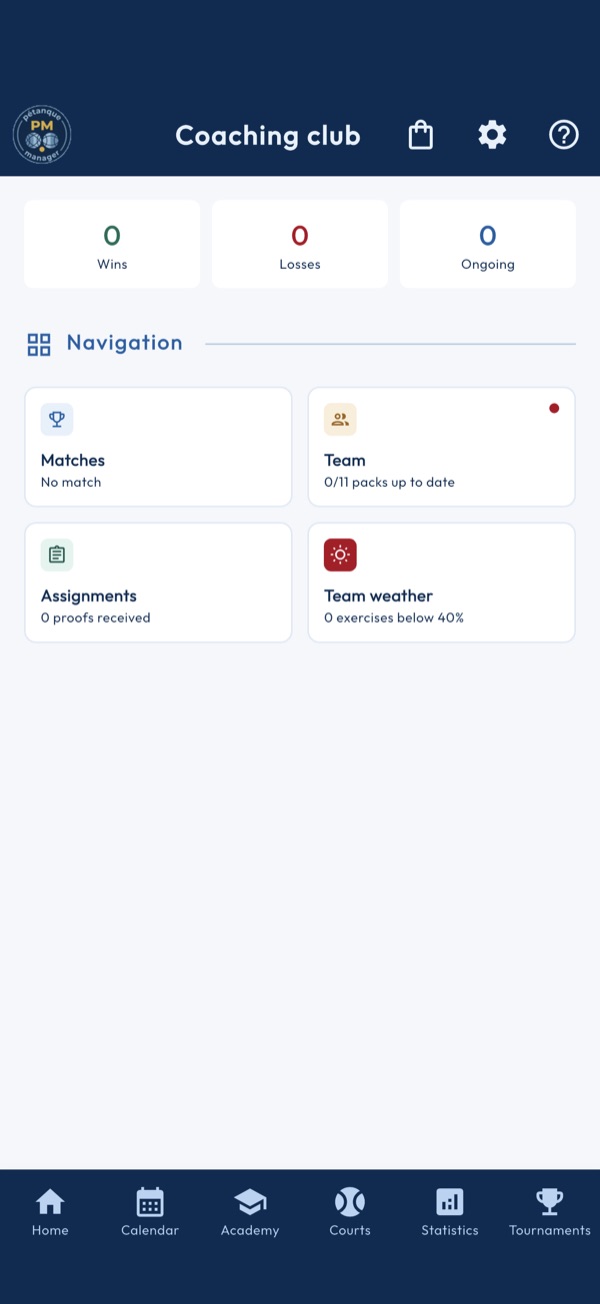
1. Your role
The app automatically detects whether you are a coach or a player based on your Club team. Coach if you are designated as team trainer · Player if you are in the squad.
2. CNC Matches
Manage your club championship matches. Create a match, compose your teams and track scores live on each court.
3. Team
View your team dashboard. Ask your players to send their statistics via a Data Pack to analyze their performance.
4. Assignments
Assign training exercises to your players. Create a session with a 6-digit code and track who has completed their assignments.
5. Group Weather
Analyze your team's collective performance. Identify common weaknesses and the workshops to prioritize.
Live Tracking
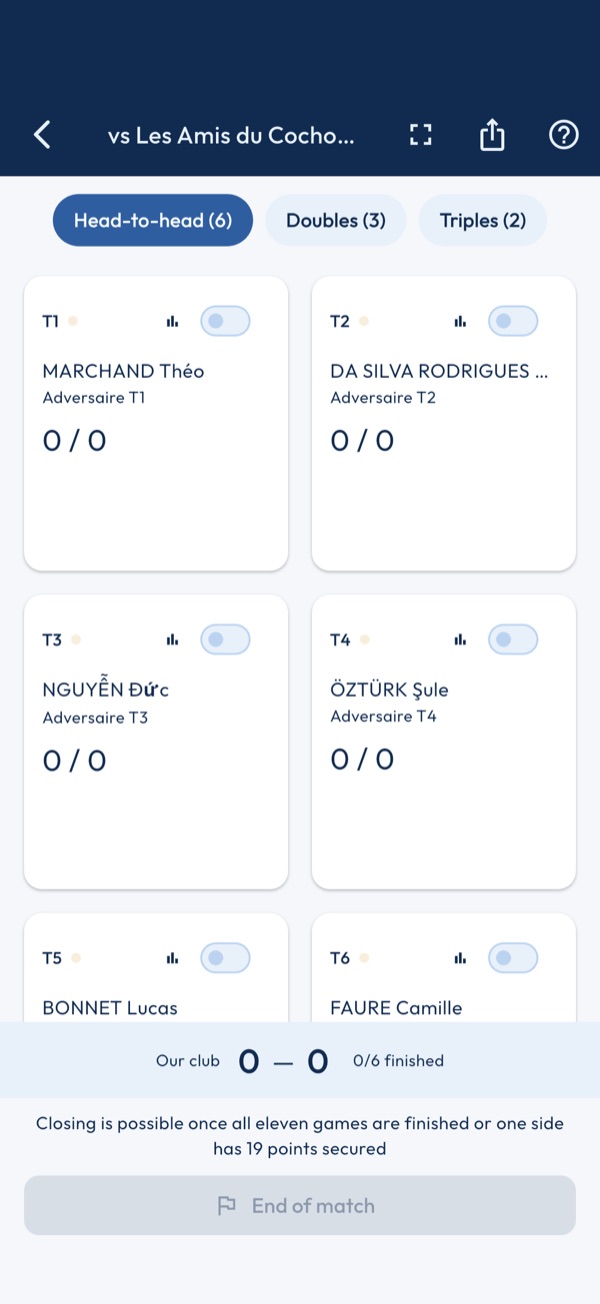
1. Mosaic view
Track all courts simultaneously. Green tiles indicate an ongoing game, faded tiles a finished game. The overall match score is shown at the bottom.
2. Enter a score
Tap a tile to open end-by-end scoring for that court. In carousel mode (fullscreen icon), swipe between courts.
3. Change phase
Use the H-t-H / Doubles / Triples selector to navigate between the 3 match phases. The grid adapts to the number of courts. Phases are played in order: scoring a doubles game opens only once all six singles are finished, and a triples game only once all three doubles are finished. An upcoming phase can still be viewed and its players substituted.
4. Substitute a player
Long-press a tile to change a player. Incoming players are ranked by the recommendation, the first one marked “Recommended”. In doubles and triples, a substitution is allowed mid-game; a started singles game and a finished workshop are locked. Closing affinities follow the final line-up: a pair split mid-game gets nothing.
5. End the match
The “End of match” button becomes active once all eleven games are finished or one side has secured 19 points out of 36 (a win is worth 2 in singles, 4 in doubles, 6 in triples). Only finished games count; the bar shows separately, in italics, what the games in progress would bring at the current score. You are then taken to the debrief.
6. Share the match
The Share button of the debrief, under the result, and the share icon in the live bar open the Club match card: our club against the opposing club, the score out of 36 and the three phases; in portrait and story, the eleven pitches with our players. Live, the card shows the secured score, the points at stake and the finished games. Neither the coach's notes, nor the recorded stats, nor the opponents' names appear on it. A finished match can also be shared from its ⋮ menu in the list of matches.
Group Weather
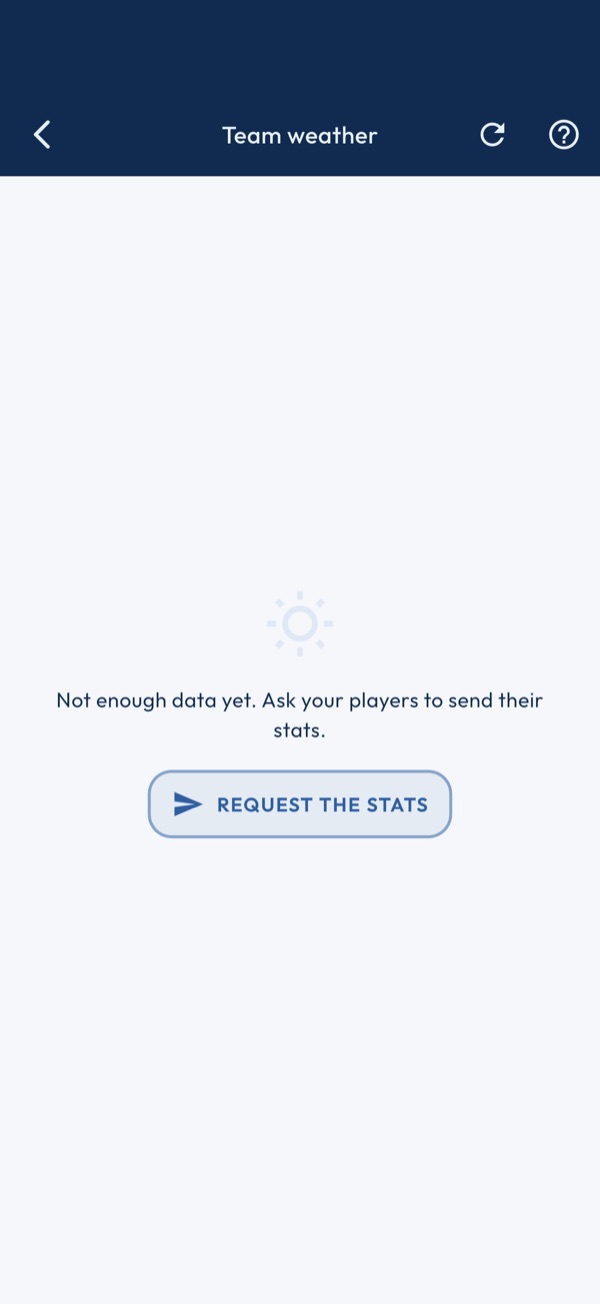
1. Data source
The weather is calculated from Data Packs imported from your players. The more players with recent packs, the more precise the analysis.
2. Strengths and weaknesses
The summary identifies workshops where the team excels (≥ 70%) and those to improve (< 40%). The priority recommendation is the weakest workshop with at least 2 players concerned.
3. Drill-down by module
Tap a module to see workshop-by-workshop details with each player's score. An orange block signals a large gap between players on the same workshop.
4. Access full stats
From a workshop's detail view, tap 'Open Stats module' to analyze a specific player's full statistics.
Skills Radar
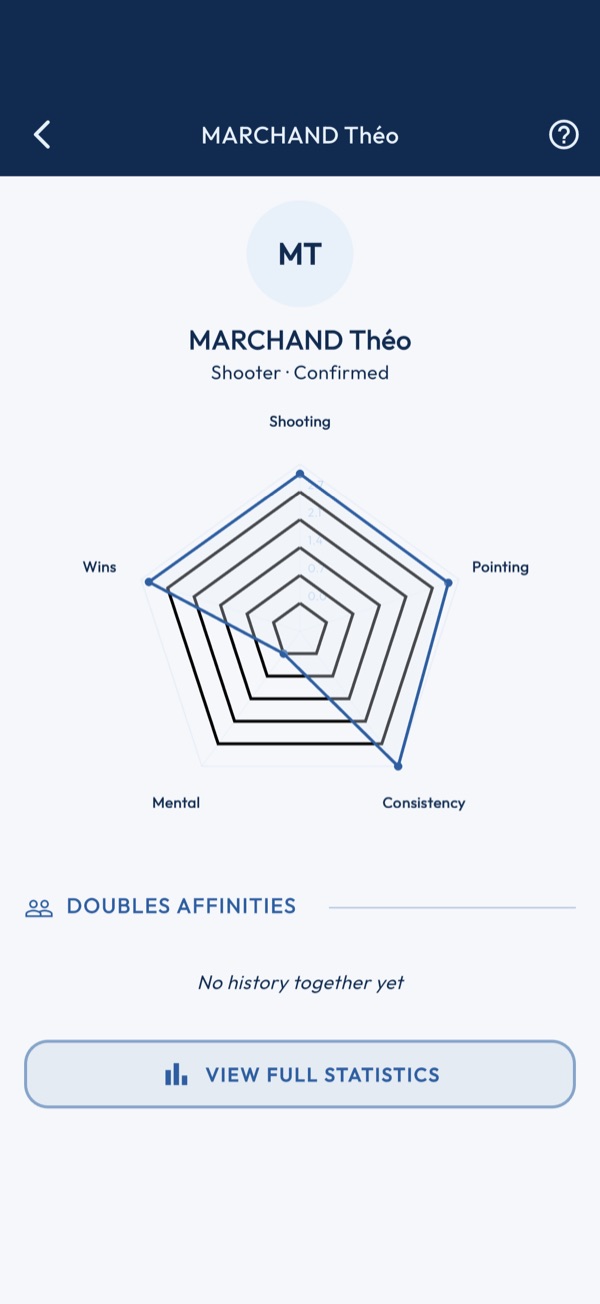
1. The 5 axes
The radar evaluates 5 player skills: Shooting (% shooting success), Pointing (% pointing success), Consistency (score consistency), Mental (handling difficult situations), Wins (% games won).
2. Doubles affinities
The affinities section shows the player's best doubles partners based on actual CNC match results. Shown only from 2 games played together.
3. Full stats
Tap 'View full stats' to access the player's complete history in the Statistics module: matches, accuracy, trends.
CNC Matches
1. Create a match
Tap + to create a new match. Enter the opposing club name and date. The match stays in 'Preparation' status until started.
2. Phase 1 — Head-to-head (×6)
6 individual games played simultaneously. Each win earns 1 point for your club. Enter scores court by court.
3. Phase 2 — Doubles (×3)
3 doubles games. Each win earns 1 point. Compose your pairs by matching a shooter and a pointer to maximize your chances.
4. Phase 3 — Triples (×2)
2 triples games to close the match. Maximum 11 points per side (6 H-t-H + 3 Doubles + 2 Triples). The club with the most points wins.
5. View history
Find all your past matches. Filter by opposing club to analyze your performance and prepare the return match.
Assignment session
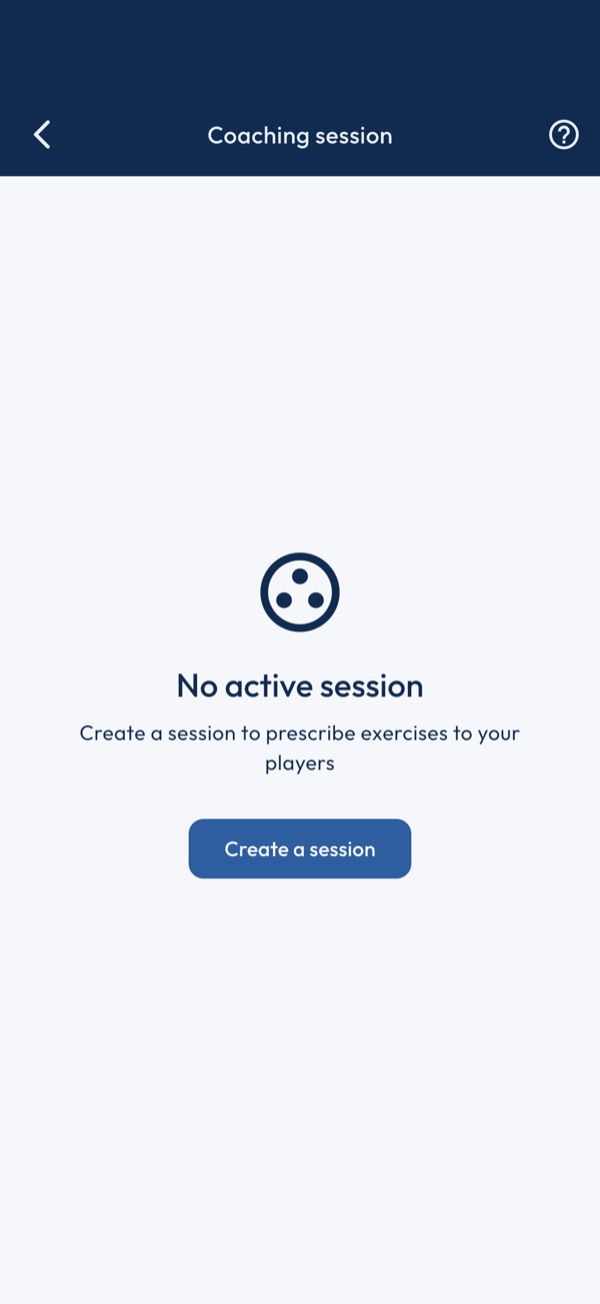
1. Create a session
Tap 'Create a session' to generate a 6-digit code valid for 24h. Share this code with your players — they enter it in their app to join.
2. Prescribe an exercise
Tap + to prescribe an exercise from the Training catalog. Choose the category, module, exercise, number of sets and an optional instruction.
3. Proofs tab
Sync received proofs via the 'Sync' button. You see who submitted their assignments and the score for each exercise.
4. Players tab
List of players who joined the session with a summary of their completed / pending assignments.
My assignments
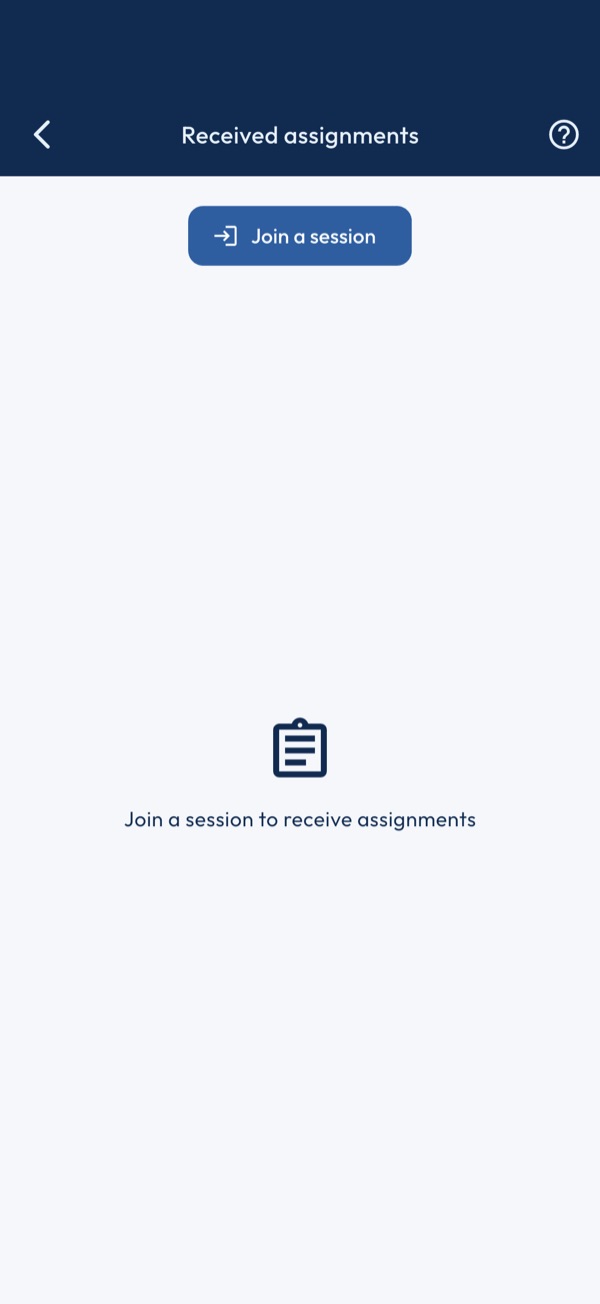
1. Join a session
Ask your coach for the 6-digit code. Tap 'Join a session' and enter the code to receive your assignments.
2. Start the exercise
Tap 'Start exercise' to open the prescribed exercise directly in the Training module. Your score will be automatically recorded in your stats.
3. Submit proof
Tap 'Submit my proof' to send your score to your coach. Set the slider to your score and add a comment if needed. Your result is also recorded in your Training stats.
4. Completed assignments
Completed assignments appear at the bottom with your score and a progress bar. Your coach can view them from their session.
Send my stats
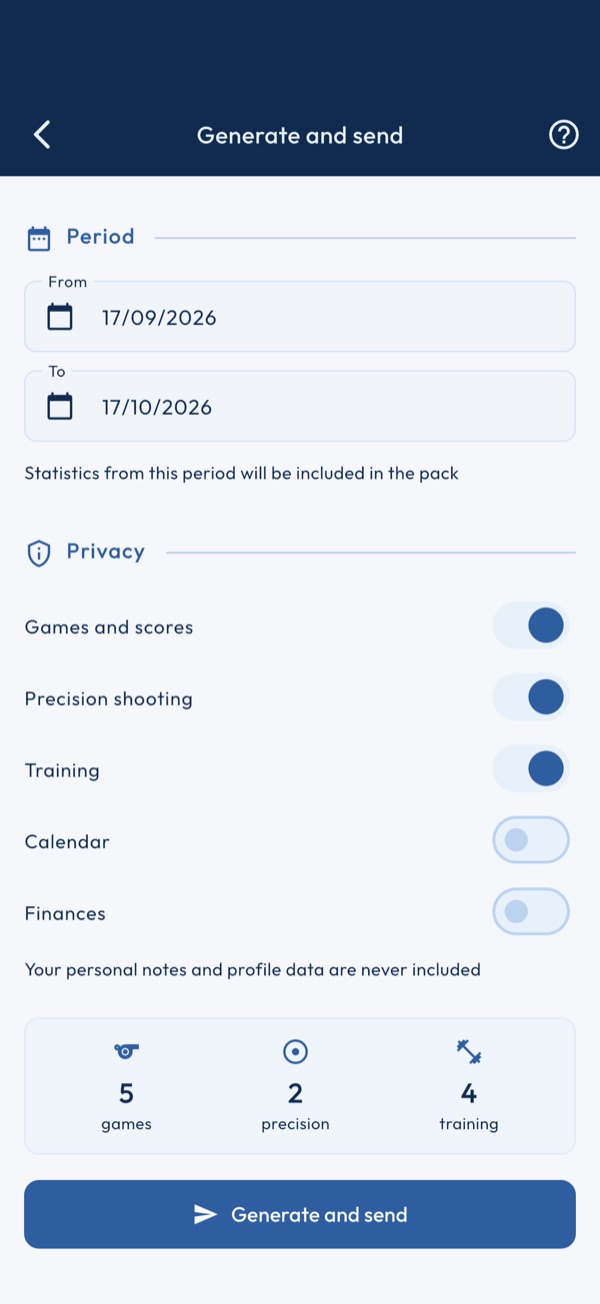
1. Choose the period
Select the date range to include in your pack. The last 30 days are selected by default. Adjust according to your coach's request.
2. Privacy
Choose what you share: games, accuracy, training, calendar. Your personal notes, finances and profile data are never included.
3. Generate and send
Tap 'Generate and send' to create the JSON file and open the native share sheet (WhatsApp, Mail, AirDrop). Send the file directly to your coach.
Import stats
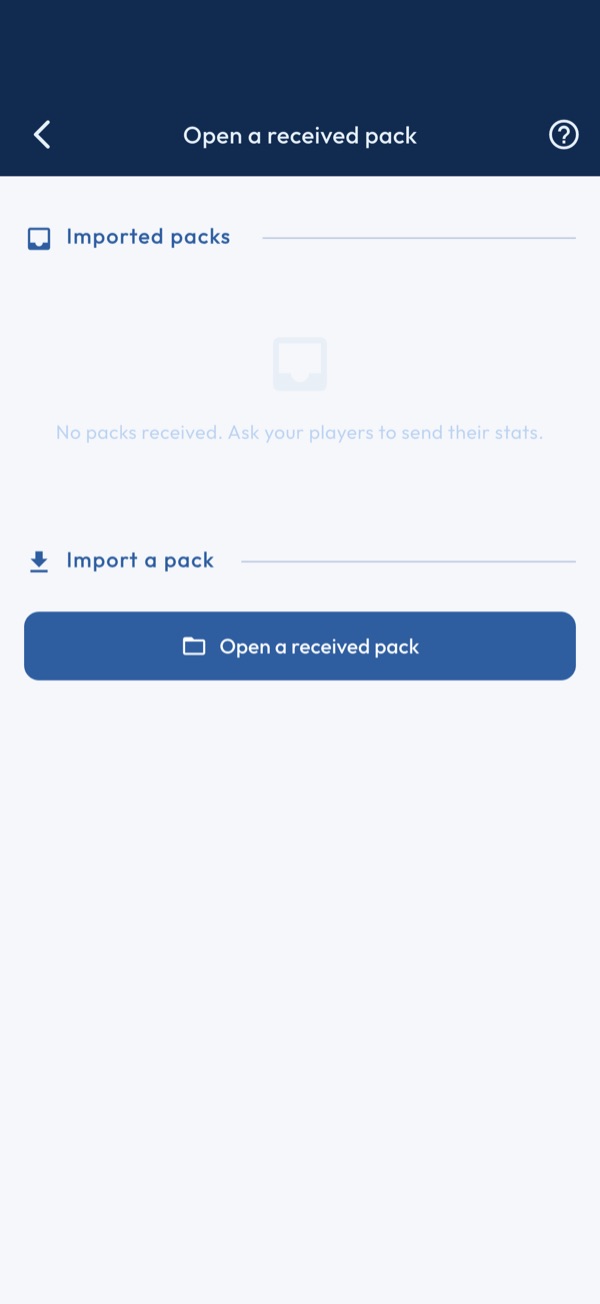
1. Open a received pack
Tap 'Open a received pack' and select the JSON file sent by a player. The player must already exist in your local database (identified by their FFPJP licence number).
2. Import history
The list shows all imported packs with the covered period and number of games. An 'Active' pack is used in the dashboard and group weather.
3. Update a player
When a player sends a new pack, import it — it automatically replaces the old one. The 'Up to date' badge appears in the composition matrix if the pack is less than 30 days old.
Nearby transfer
1. The ⇄ button
The ⇄ button is hidden by default: turn on “⇄ button on screens” in Settings, Nearby transfer section. The ⇄ button floats above the screens that have something to exchange. Its actions follow the open screen: on a tournament, “Send this tournament”; on its teams, “Send the teams”; on the player directory, “Choose players…”. “Send…” offers everything else: games, expenses, sessions, club teams, events, CNC fixtures (a fixture's menu: “Send this fixture”, with its three tournaments).
2. Receive: show the code
On the receiving phone, tap ⇄ then “Receive”, or, with the button hidden, Settings › “Receive or send…”. A six-digit code appears, valid for ten minutes; “New code” draws another one. Keep the screen open: it stays on until the exchange ends.
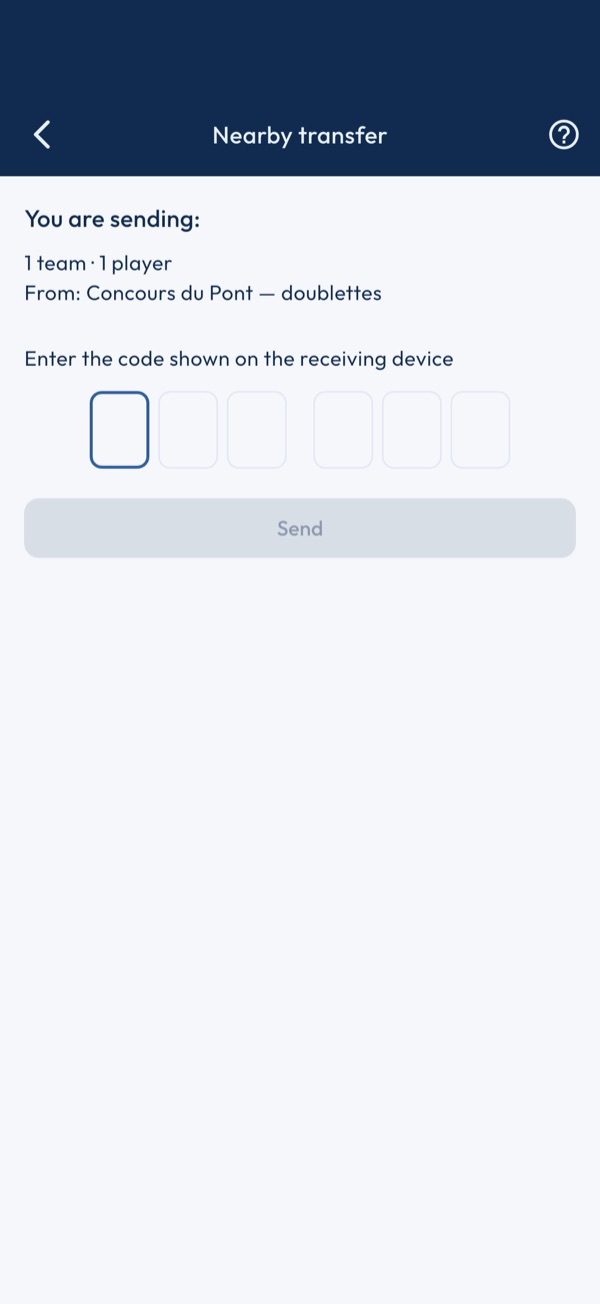
3. Send: enter the code
On the sending phone, choose what to send, then type the code read on the other screen. The two phones find each other over Bluetooth, a few metres apart. A bar tracks the transfer; with a wrong code, the package stays unreadable and nothing is written.
4. Review the preview, then import
Nothing is written before you agree. The preview shows the sender, the content, and what you already have. A player already present and ticked then opens in the record merge screen: field by field, the received value is offered where your record is empty, yours everywhere else; you confirm or cancel. Unticked, it stays as it is. For a tournament, “Create a copy” keeps both. A team with a player already registered is unticked. Entries arrive as “to pay” unless you tick “Keep the payments received”, which also brings the cash records. A tournament's poster comes along, without its images.
5. Bluetooth and privacy
Bluetooth must be on on both phones, and the app allowed to use it; otherwise a message says what to do, and points to the settings if permission was refused. Data travels encrypted with the code and goes through no server. Players' phone numbers, emails, addresses, notes and photos are never sent.
Folder balance
1. Reading the report
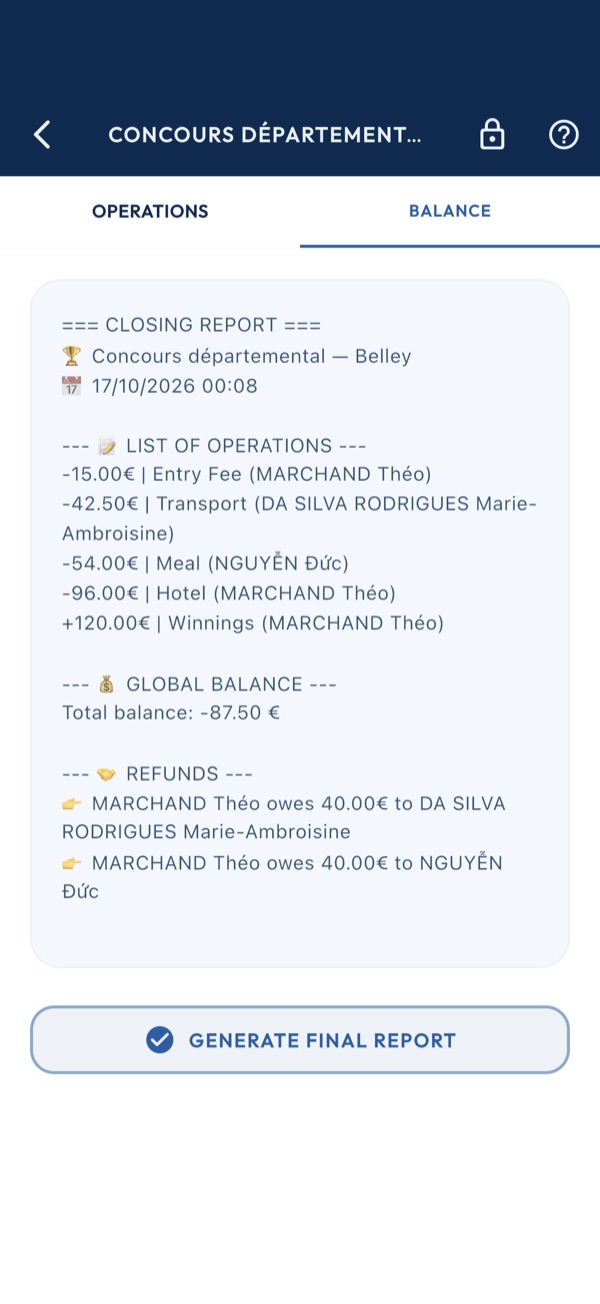
The provisional report is recomputed at each operation: the list of operations, the overall balance (winnings minus expenses) and each member's balance.
2. Refunds
The refund plan says who owes how much to whom, with as few transfers as possible, like an expense-sharing app. When everyone is even, it says so.
3. Closing
Generate the final report, or the padlock in the bar, asks for confirmation then closes the folder: the report is frozen and no more operations can be added. This cannot be undone.
Expenses & Finances
1. Set up a folder
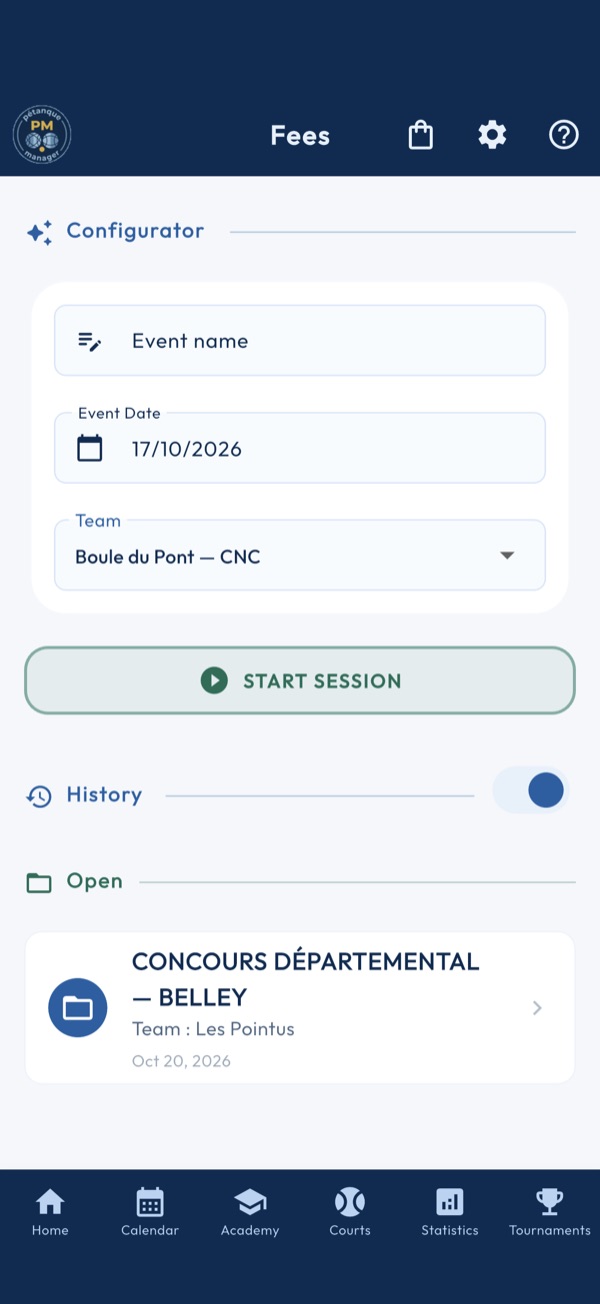
A folder has a name, a date and a team, whose members will share the expenses. The first team is preselected; without a team, create one in Players, Teams tab.
2. The action button
Its label follows the date: "Start", for today, opens the folder right away; "Create", for another date, files it in the history. From the calendar it schedules; when editing, it saves. It stays greyed out while the name or the team is missing.
3. History
The switch opens the history, closed by default, in two groups: open folders, then closed folders.
4. Open a folder
A tap opens the folder: its operations and its balance, with the closing that freezes the report to share among the players. On a closed folder, the document icon shows that report again.
5. Reopen or delete
A long press offers to reopen a closed folder, or to delete the folder with its operations, after confirmation.
Folder operations
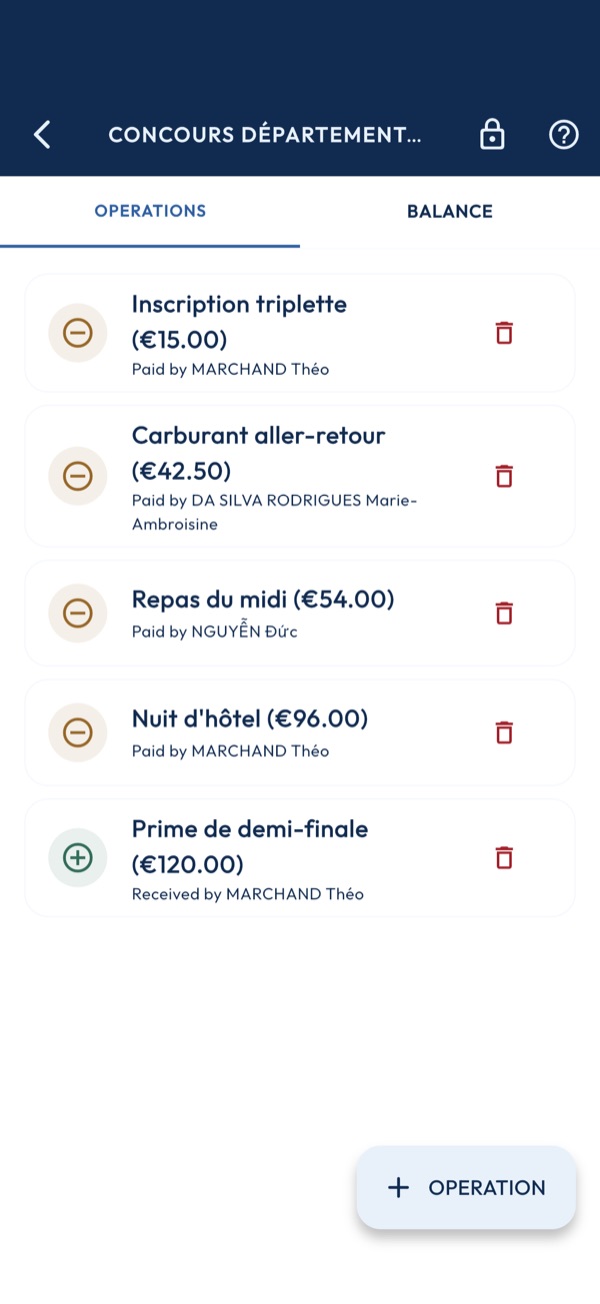
1. Add an operation
The + button opens the entry: amount, category (entry fee, meal, transport, accommodation, winnings, other), who paid or received, and for whom: the whole team or a single member.
2. Expenses and winnings
The Winnings category records money coming in, received by a member; the other categories are expenses advanced by them. The direction matters for the balance and the refunds.
3. Delete
A line's bin deletes it without confirmation and the list reloads at once. An operation deleted by mistake is entered again.
4. Closed folder
Once the folder is closed, the add button disappears and the operations no longer change; the final report is frozen in the Balance tab.
Home
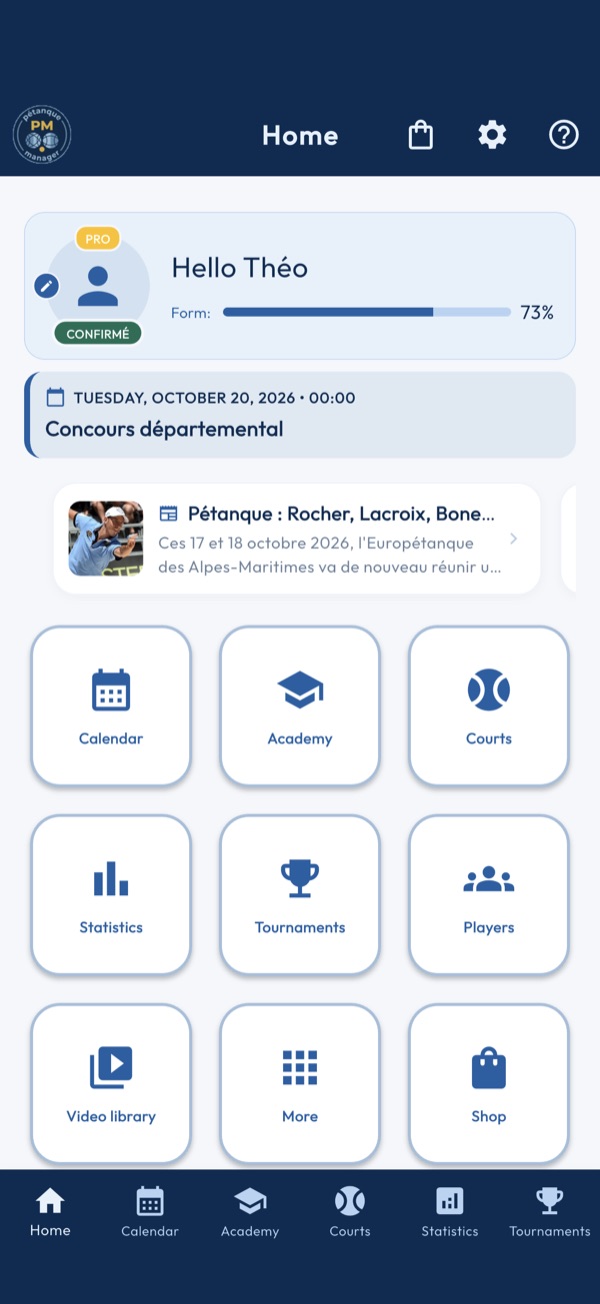
1. Your profile at the top
The avatar is the owner player chosen in the settings. Tap it to open their profile, or the Players module if there is none yet. The top badge shows your tier, LITE, PREMIUM or PRO; the bottom one, your licence level.
2. The form indicator
The "Form" bar compares your successful shots and points with all your recorded attempts, across games, precision shooting and training. It fills up as you enter results. The Leisure profile does not show it.
3. The next event
On the Competition profile, the card below your profile announces the next event planned in the calendar: today, tomorrow or on its date. Tap it to open the calendar.
4. News
The banner scrolls through pétanque news from the last thirty days. Tap one to read the article in your browser.
5. The quick access grid
Each tile opens a module. A greyed tile with a padlock requires a higher tier: tap it to find out which, and go to the offers or enter your club code.
6. Partners
The "Partners" frame presents those who support the application; tapping a logo opens their website.
7. Recent notices
The three latest notices scroll at the bottom of the page. "All" opens the Notices module; tapping a notice opens its details.
Bulk export
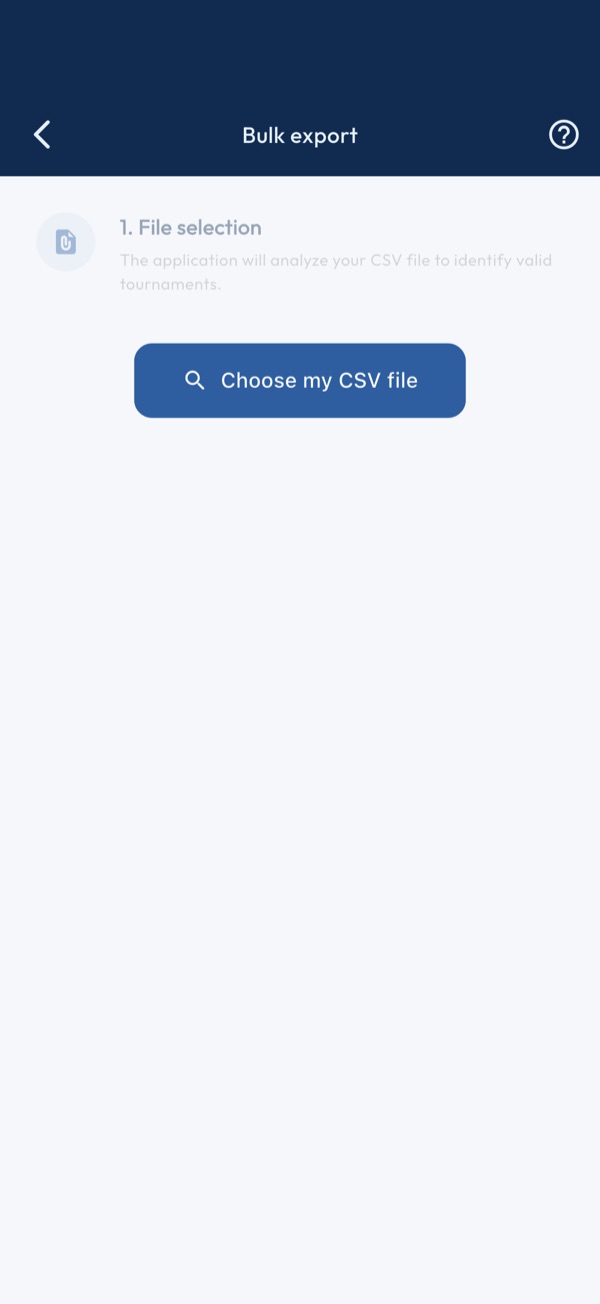
1. Preparing the file
A semicolon-separated CSV file, one header line then one tournament per line. The first three columns are required: name, date, venue. Then come format, formula, description, category, address, postcode and city. The Hub template fits.
2. Analysing
"Choose my CSV file" reads the file and shows the summary: the number of valid tournaments and the number of lines ignored for lack of name, date or venue. The export button only appears with at least one valid tournament.
3. Sending
Enter your email: the "Start export" button is only active with it. Tournaments are sent in batches of 100, each one reviewed by a moderator like a share. The progress bar counts the tournaments sent. Keep the screen open until the summary. The send also carries your name and licence from Settings.
4. The summary
At the end, a dialog counts the tournaments sent and the failures, then returns to the control centre; a batch refused by the server (too many sends in the day, unreadable tournament) shows its reason. You receive an email for each decision, and the status of each tournament can be followed in "My suggestions". The server does not deduplicate: sending the same file again presents each tournament to moderation a second time.
Import and export
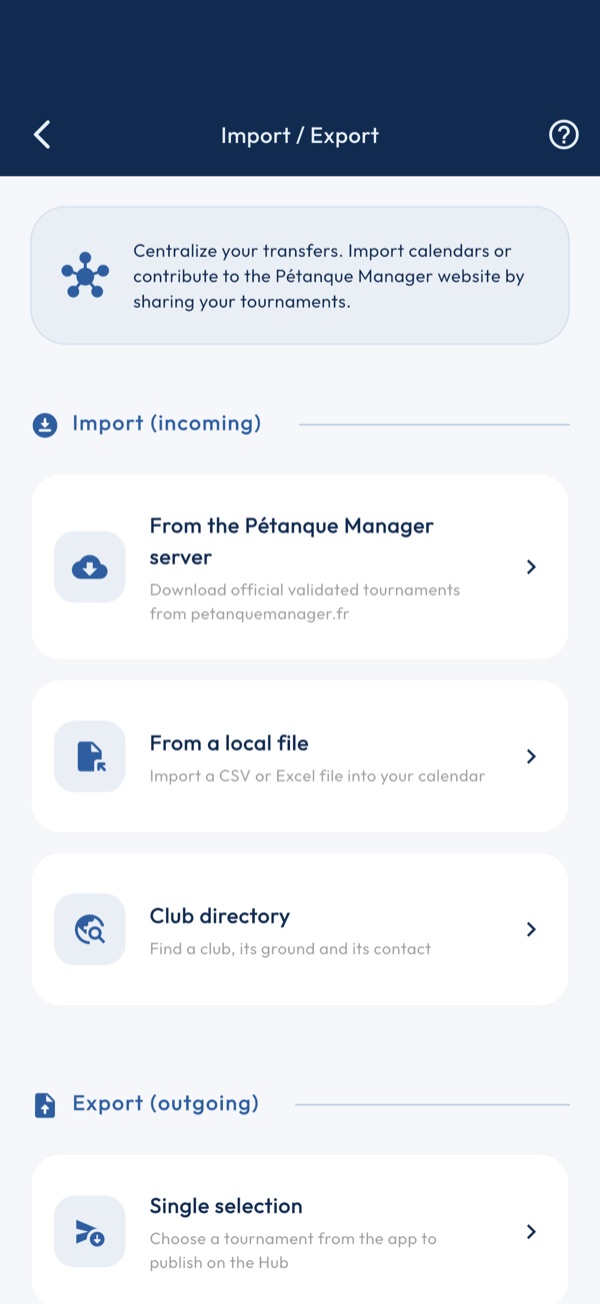
1. Two directions
The Hub links your calendar to the petanquemanager.fr website. Inbound, you fetch tournaments to add to your calendar; outbound, you share yours to enrich the public database.
2. From the Pétanque Manager server
Browse the national and departmental calendars published on the site, filter them and import a tournament with one tap. This tile is reserved for PREMIUM and PRO plans: on LITE it opens a reminder that leads to the Store.
3. From a local file
Import into your calendar a CSV file you prepared, such as your committee's calendar. The file follows the 23-column template; the screen reminds you of it before the analysis.
4. Single selection
Pick a tournament created in the app, review its sheet and send it to the site's moderation. Once approved, it appears in every user's catalog.
5. Bulk export
Send a whole CSV file of tournaments to the site at once, one tournament after another, with a progress bar and a summary of successful sends and failures.
6. File template
Downloads the official CSV template from the server, then opens the share sheet so you can save it or send it wherever you will fill it in. Fill it in a spreadsheet, keeping the column order.
File import
1. Expected format
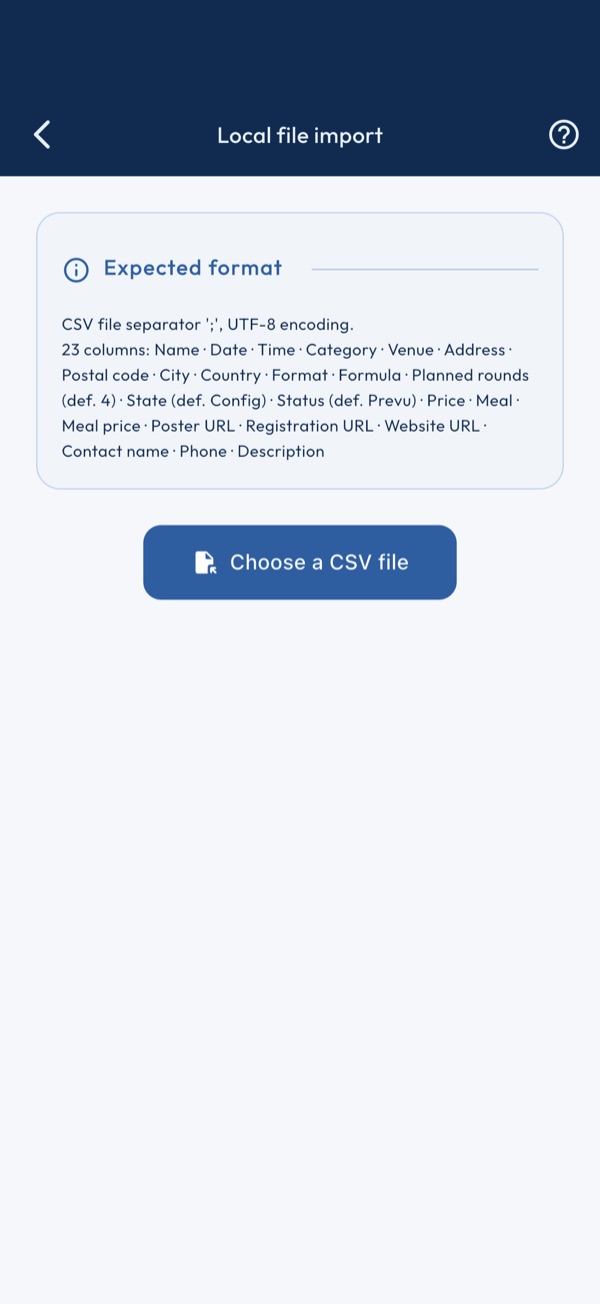
A UTF-8 CSV file, columns separated by semicolons, 23 columns in the template order: name, date as dd/mm/yyyy, time hh:mm, category, venue, address, postcode, city, country, format, formula, then the optional fields. The template can be downloaded from the Hub.
2. Analysing the file
"Choose a CSV file" opens the file picker, then the app reads every line. The first line is the header and is skipped. The result counts valid tournaments and lists rejected lines with their number: missing name or date, invalid date.
3. Importing
The "Import N tournaments" button adds them to your calendar one by one, then refreshes it. Rejected lines do not block the others: fix them in the file and import only those again.
4. Beware of duplicates
The import does not compare the file with what you already have: importing the same file twice creates every tournament twice. If that happens, delete the duplicates from the Tournaments module.
Server catalog
1. The filters
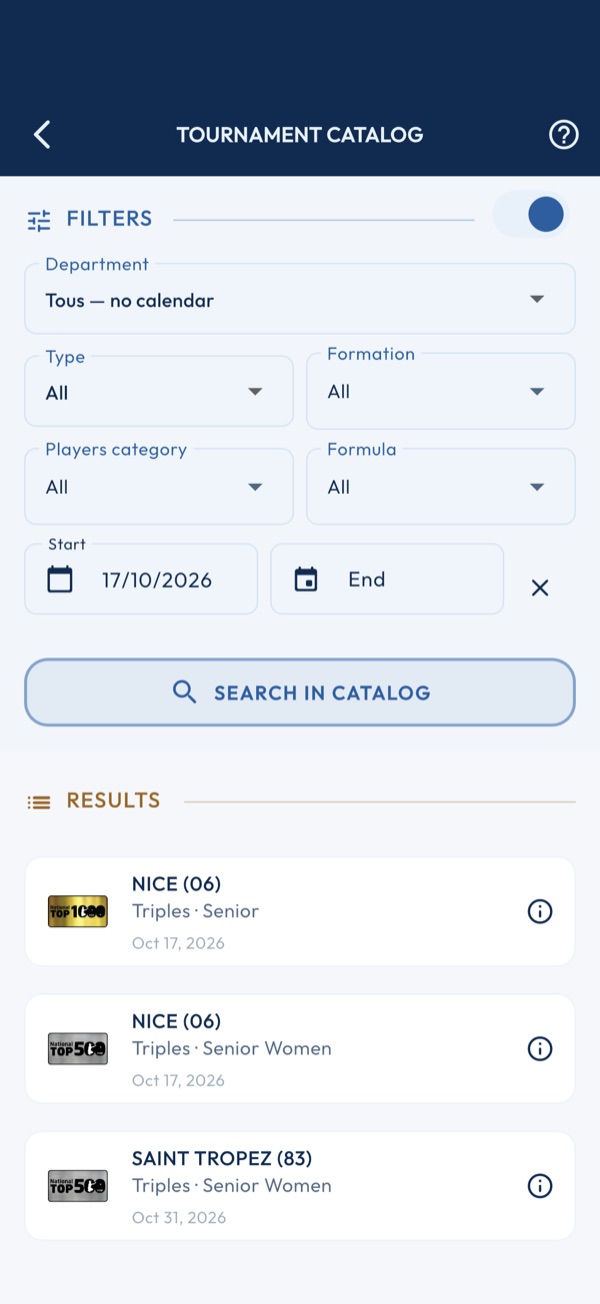
Department and type choose which calendar is downloaded: they stay single. Formation, game category and formula combine: ticking "Doublette" and "Triplette" returns either, and each criterion narrows the previous ones. Dates start from today, the end date included. Every change reruns the search; the Search button is there to retry after a network drop.
2. Collapsing the filters
The switch, or a tap on the FILTERS header, collapses the area to leave room for the results. A line then summarises the criteria set, or says "No filter". Filters are open on every arrival, never remembered.
3. Reading the list
Tournaments are sorted by date, nearest first, national and departmental mixed. A TOP 300, 500, 1000 or 2000 badge marks ranked national tournaments. In the department menu, "no calendar" flags those the server does not publish yet.
4. Importing
Tapping a tournament adds it to your calendar at once. The (i) button first opens its full sheet: venue, organiser contact, registration, poster and official description, with the "Import into my calendar" button at the bottom.
5. When the list is empty
The screen tells four cases apart: the server is unreachable; the department is not published yet; its calendar stops at a date it gives you; or no tournament matches your filters. "Open to all" types only exist at departmental level: the screen then asks you to choose a department.
6. PREMIUM only
On the LITE plan, this screen shows a reminder instead of the catalog and offers to go through the Store. Importing from a local file remains open to everyone.
7. Reporting a mistake
Wrong time, venue or price? In the (i) sheet of a tournament, from the catalogue or already imported, "Suggest a correction" opens a pre-filled form: change what is wrong, add your email and a comment, then send. Only the changed fields are sent. Hub > "My suggestions" then shows where each one stands: Pending, Accepted, Declined (with the reason), then Online once the calendar is corrected. Pull the list down to refresh it.
Share a tournament
1. Choosing a tournament
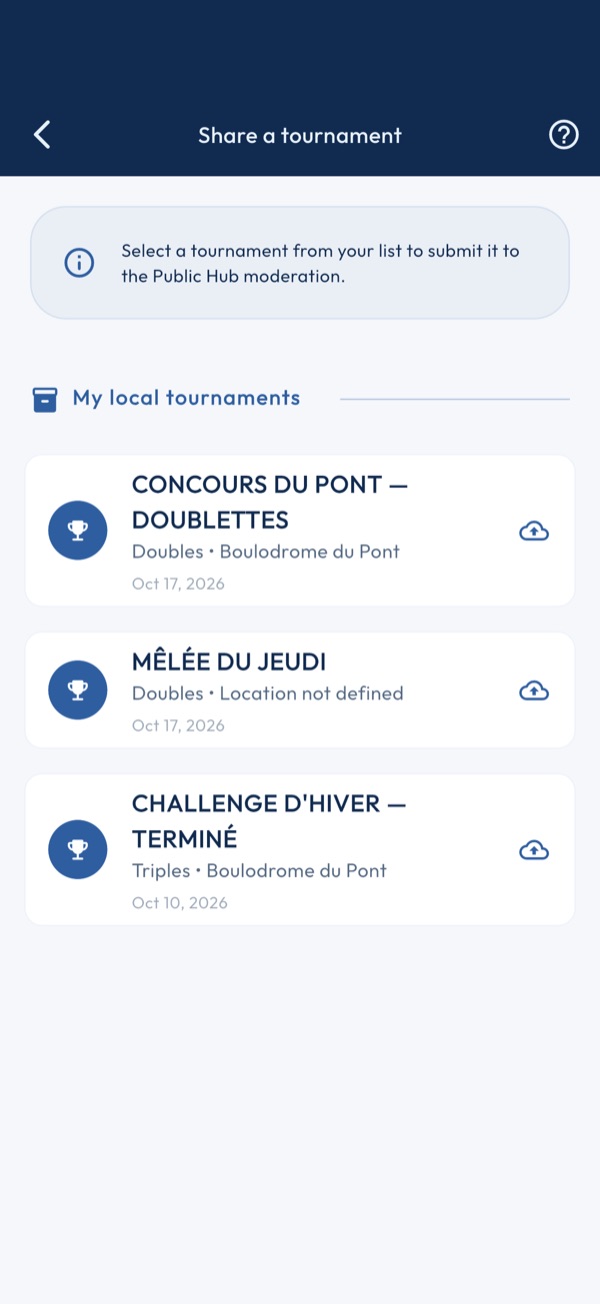
The list shows your local tournaments, newest first. Tapping one opens its preview sheet. If the list is empty, create a tournament in the Tournaments module first.
2. Reviewing the sheet
The sheet shows what the moderators will receive: name, date, format and formula, venue or club, description, and the organiser contact found in the description. Complete the tournament in the app if something is missing: the sheet cannot be edited here.
3. Share on Pétanque Manager
The button sends the sheet to the site's moderation, signed with your name and licence. Without those two fields in Settings, the screen says "Incomplete profile" and sends nothing. The tournament appears in the public catalog once approved.
The question mark
1. Open the help
Tap the [?] at the top right. The page that opens describes the screen you came from, step by step, in the order you use it.
2. One help per tab
When a screen has several tabs, the help follows the tab on display: switch tabs and the [?] changes its content.
3. Online tutorial
When the petanquemanager.fr website publishes a tutorial for the page, a "See the online tutorial" button appears at the bottom of the help.
4. Go back
The back arrow takes you exactly where you were, without losing anything you were doing.
Teams
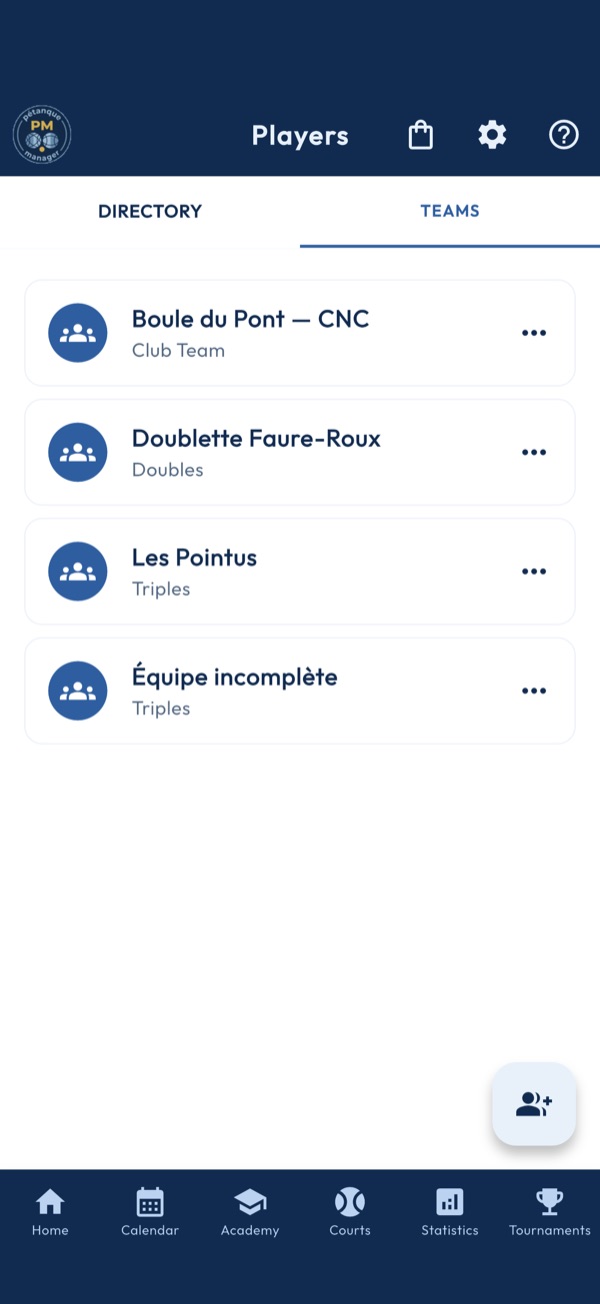
1. Create a team
The round button at the bottom right opens the form: a format, singles, doubles, triples or club team, then the players taken from the directory. An incomplete team cannot be saved.
2. Edit a team
Tapping a card reopens the form with the line-up in place. The format and the players can be changed, then saved.
3. Invite and notify
A long press on the card, or the three dots, opens the menu: WhatsApp invitation, SMS invitation, free message, or the team's game record sent by SMS. Messages go to the members who have a phone number.
4. QR Pass and sharing
The team's QR Pass encodes its members' licence numbers, to be scanned at the scoring table; a member without a number is left out. "Share" sends the team sheet, format and players, through the app of your choice.
5. Delete
The last line of the menu deletes the team after confirmation. The players stay in the directory.
Player profile
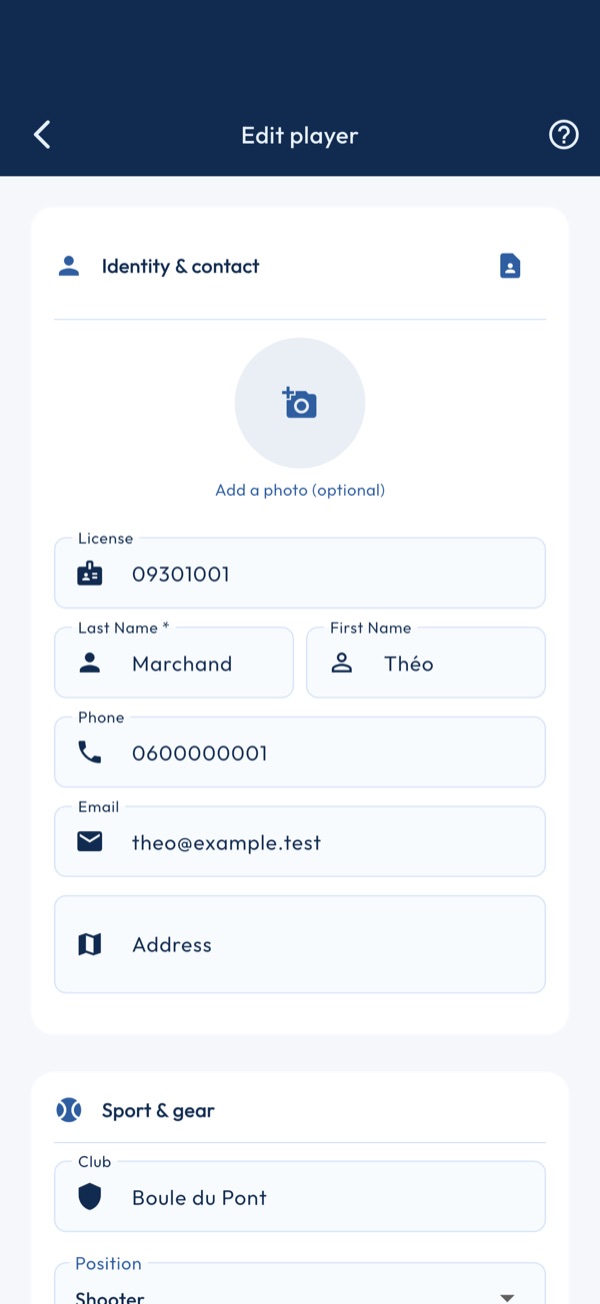
1. Identity
Licence, last name, first name, phone, e-mail and address. A player without a federal licence gets a 999… number automatically; replace it with the real number if you know it. The last name is stored in capitals.
2. Federal suggestions
If departments have been downloaded in Settings > Licensee data, three letters of the last name are enough to suggest matching licensees. Picking one fills in the licence, club and level; if the profile already had another federal licence, a confirmation is requested.
3. Photo and phone contact
The avatar opens the gallery or the camera. The contact button takes a contact from the phone: their phone, e-mail and address are copied into the profile.
4. Sporting profile
Club, position (pointer, middle, shooter), level (NC, Promotion, Honneur, Élite) and age category. These fields feed team building and statistics. A free notes field completes the profile.
5. Boule sets
Up to three sets: brand and model from the catalogue, weight from 600 to 800 g in 5 g steps, diameter from 70 to 80 mm. A brand or model missing from the catalogue can be typed freely.
6. Saving and duplicates
On saving, the profile is compared with existing players. If a close match exists, a merge dialog lets you choose, field by field, what to keep; when editing, it also offers to delete the original profile.
Import by club
1. Choose the department
The drop-down lists the departments whose licensee data has been downloaded in Settings > Licensee data. Without a download, the screen stays empty and points you there.
2. Find the club
The search field filters the department's clubs as you type. Tapping a club shows its licensees; the back arrow returns to the club list.
3. Choose the players
Tick the licensees to import. The name search and the sex, age (juniors, veterans) and level filters narrow the list; All, None and Invert act on the displayed selection.
4. Import
Each licensee becomes a player with their federal licence, last name, first name, club and level. At the end, a message counts the imported, merged and skipped, then the screen closes.
5. Duplicates
A licensee already present with the same last name, first name, club and level is skipped without asking. If they differ, the merge dialog lets you decide field by field; cancelling the dialog skips that licensee.
Import contacts
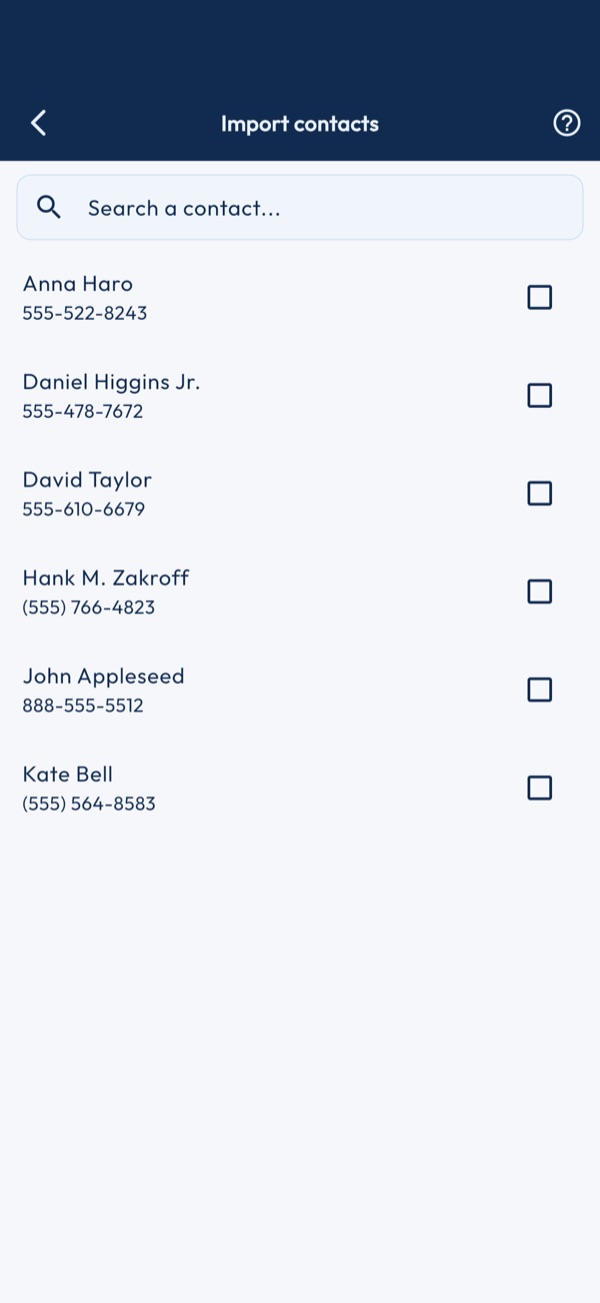
1. Allow access
On first opening, the phone asks for access to contacts. If you refuse, the screen says so: the permission is restored in the phone settings, the app does not ask again.
2. Tick the contacts
The list shows every contact, with their photo when they have one. Tick those who become players; an unticked contact leaves the selection.
3. Confirm
The confirm button appears at the top right as soon as a contact is ticked. Each contact becomes a player with their phone, e-mail, address and a 999… licence; if they resemble an existing player, the merge dialog lets you decide.
Player directory
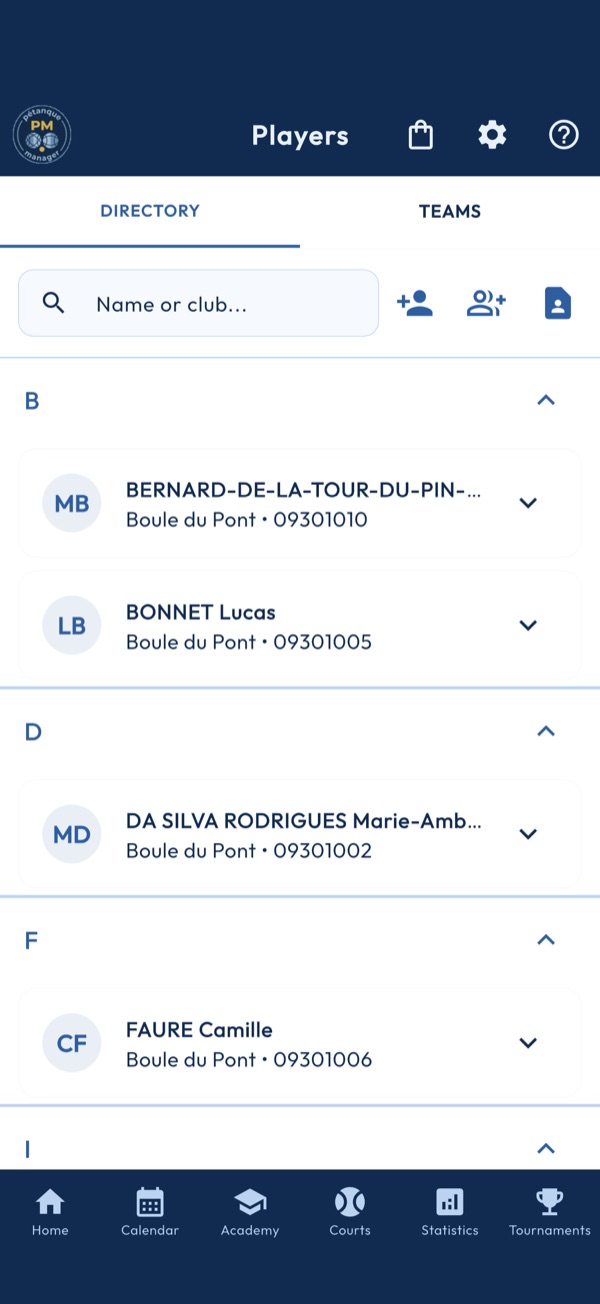
1. Find a player
The top bar filters the list as you type. Players are sorted alphabetically and grouped by the first letter of their last name.
2. Add a player
The silhouette with a plus opens the creation form: identity, licence, club, contact details and photo. The same form is used to edit an existing player.
3. Import by club
The group with a plus imports a club's licence holders from the federal file of its department. When newer data exists for players already listed, a message says so and offers to update them.
4. Import from contacts
The address book opens the phone's contacts; several can be picked at once. If one looks like a player already listed, a merge dialog asks which details to keep.
5. What a card offers
Tapping a player unfolds their card: edit, call, directions to their address, a QR Pass with their details, and ready-made texts: logistics, ground, licence, delay, cancellation or free message. Call and directions only appear if a phone number or an address is filled in. The Season icon posts the player's year review: games, wins, sessions, tournaments played.
6. Delete
The bin at the bottom of the unfolded card, or a long press on the player, deletes them after confirmation. Their statistics and game history go with them, for good.
AI background
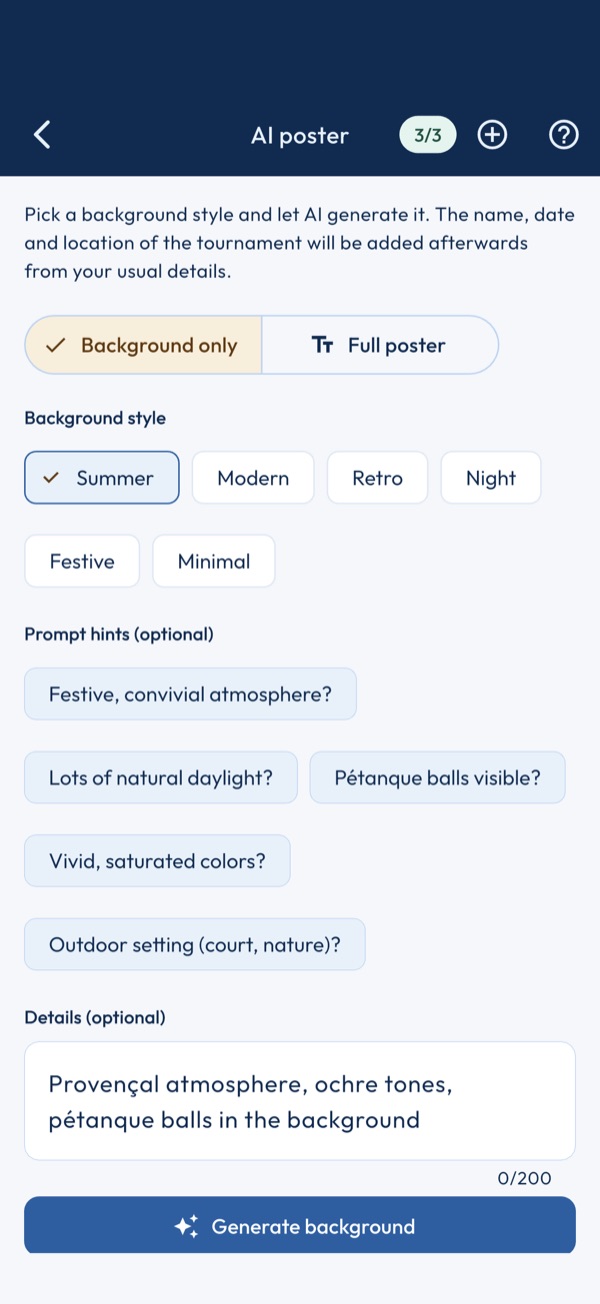
1. Choose a style
Six moods: summer, modern, retro, night, festive, minimalist. The style guides the model; it sets neither the exact colours nor the subject, which change from one generation to the next.
2. Background only or full poster
In "background only", the image carries no text: your lines are placed on it in the editor. In "full poster", the model also draws the texts you tick: name, dates, venue, formula, prices, contact… Always proofread them before using the image.
3. Refine
A free text and fragments to tick — outdoor, daylight, boules, vivid colours, festive — complete the order, within 200 characters. The free text comes first.
4. Generate
Each generation or regeneration uses one credit, without confirmation. The badge in the bar shows the balance. At zero, the button is disabled.
5. Use this background
The preview shows the latest result. "Use this background" closes the screen and hands it to the editor, which caches it on the device.
6. Buy credits
A credit pack is bought in the shop, at the price shown by the store. Where the shop is unavailable, the button is absent.
Poster editor
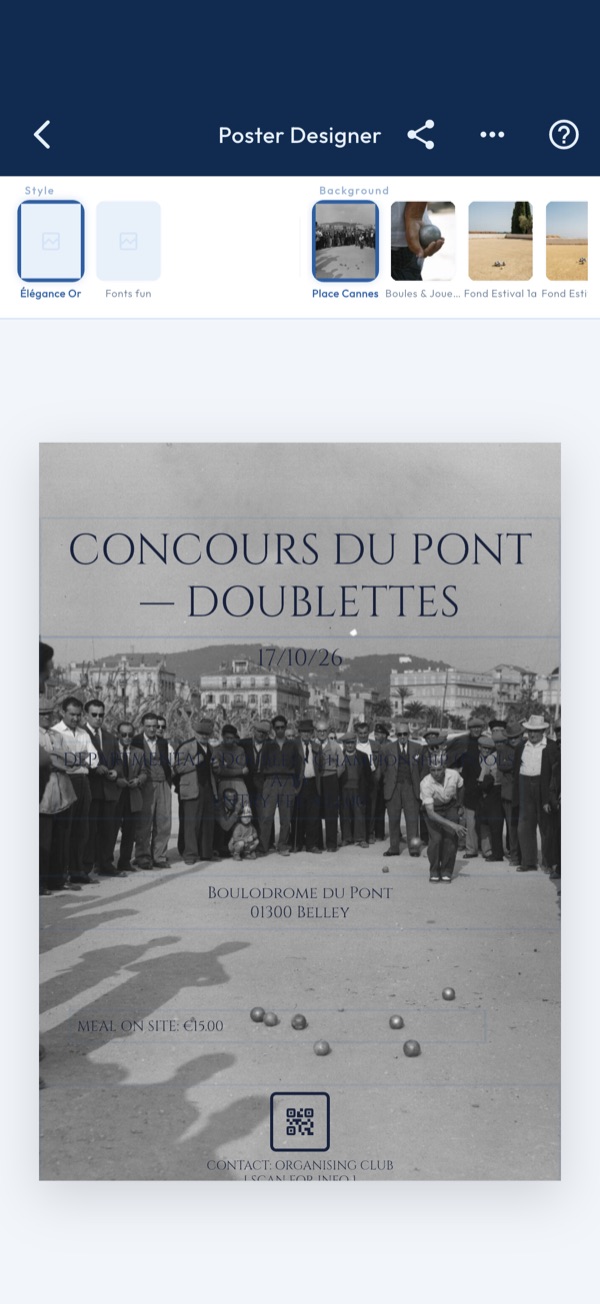
1. Choose a style and a background
The two selectors at the top. The style places the tournament lines on the poster and suggests its fonts; the background changes the image behind. Catalogues come from the server: without network, the screen has nothing to offer.
2. Move the tournament lines
Name, date, venue, formula, entry fee, meal, contact: each line comes from the tournament sheet. Drag it to place it. Tap it to open the floating bar.
3. The floating bar
Font, size, bold, italic and colour of the selected line, or hide the block. "Reset" starts again from the style's layout and erases the one kept for this tournament.
4. Free text and images
In the ⋮ menu of the bar, “Add text” adds a line of your own, written in the floating bar. “Add an image” adds a logo or a sponsor from your files: drag it to place it, set its width in the bar.
5. An AI background
In the ⋮ menu, “Generate an AI background” opens the ordering of a generated background, which comes back here once chosen. The entry only appears if this device has access to AI backgrounds: through the shop or, in a club, through the committee code.
6. Share the poster
The share button renders the poster as a PNG image and opens the device's share sheet: messaging, social networks, saving to photos.
7. Automatic saving
Nothing to save: the layout is kept on the device, for this tournament, when leaving the screen and after each share. If saving fails, the screen says so before closing.
Backup
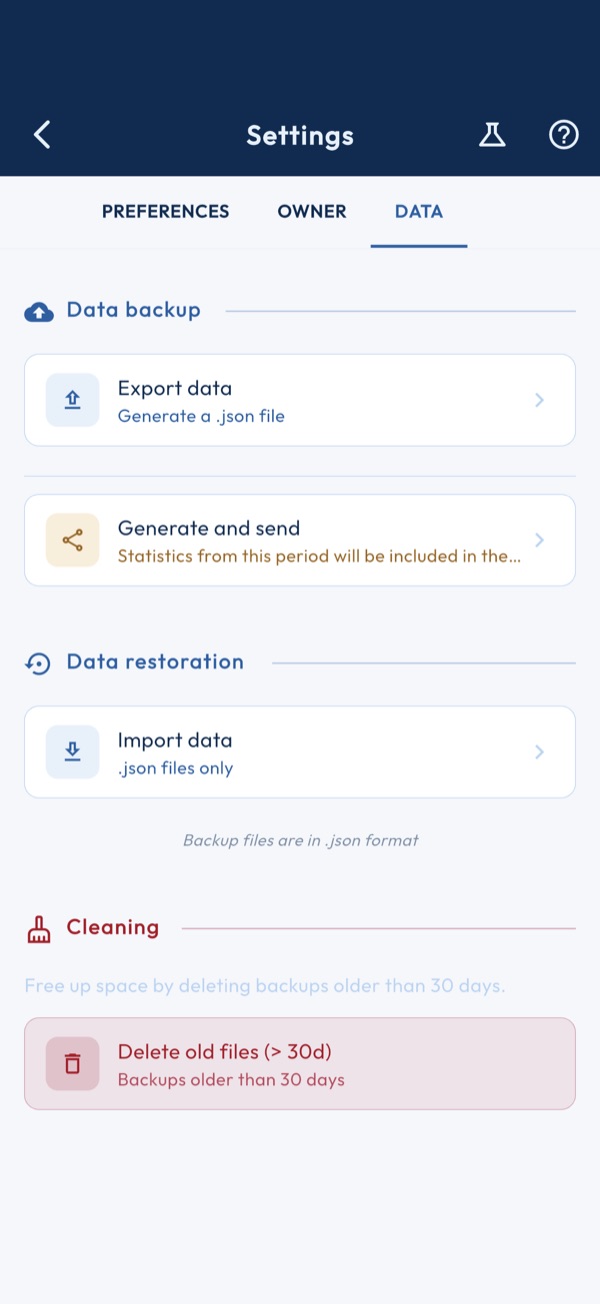
1. Export your data
Generates a JSON file containing all your data: players, matches, tournaments, calendar and finances. Share it by email, AirDrop or save it in your files as a backup.
2. Import a file
Merges data from a backup file with your local database. New data is added and data already present is not duplicated: re-importing your own backup changes nothing. If you tick only part of the data, the data it depends on (players, calendar, budgets…) is added automatically. For a player already present under another licence, a conflict may appear (see next card).
3. Conflict management
If a player in the file looks like a player already present under another licence, the app shows both profiles side by side. Choose, field by field, what the merged profile keeps, licence included: the two profiles become one, and its games, statistics and payments follow the chosen licence. “Cancel” stops the whole import: nothing is written.
4. Before importing
Always export before importing an external file. In case of an unexpected error, you will be able to restore your previous state.
5. Send the coaching pack
Exports training sessions and progress over a chosen period, to share with a coach or another device, without going through the full export.
6. Cleaning backup files
Finds the backup files present on the device and offers to delete them. This is the only irreversible action in this tab: check the list before confirming.
Owner profile
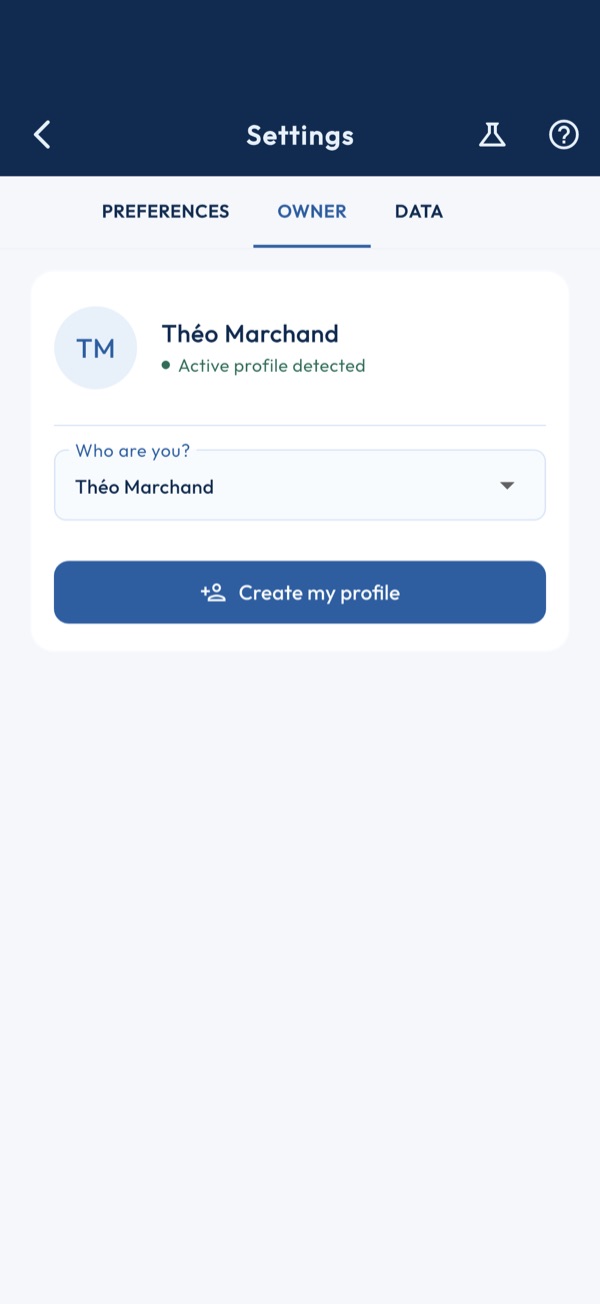
1. Link your profile
Select your name from the list to link the app to your player profile. Your personal stats will then be highlighted in dashboards and analyses.
2. Create a profile
If you are not yet in the players list, use the "Create a profile" button: it opens the creation screen. Back here, select yourself in the dropdown afterwards to become owner — creating the profile alone is not enough.
3. Impact on the app
This setting identifies who you are in the app: it drives your login, the author shown on your published announcements, and the profile used by coaching. It is not limited to how your statistics are displayed.
Preferences
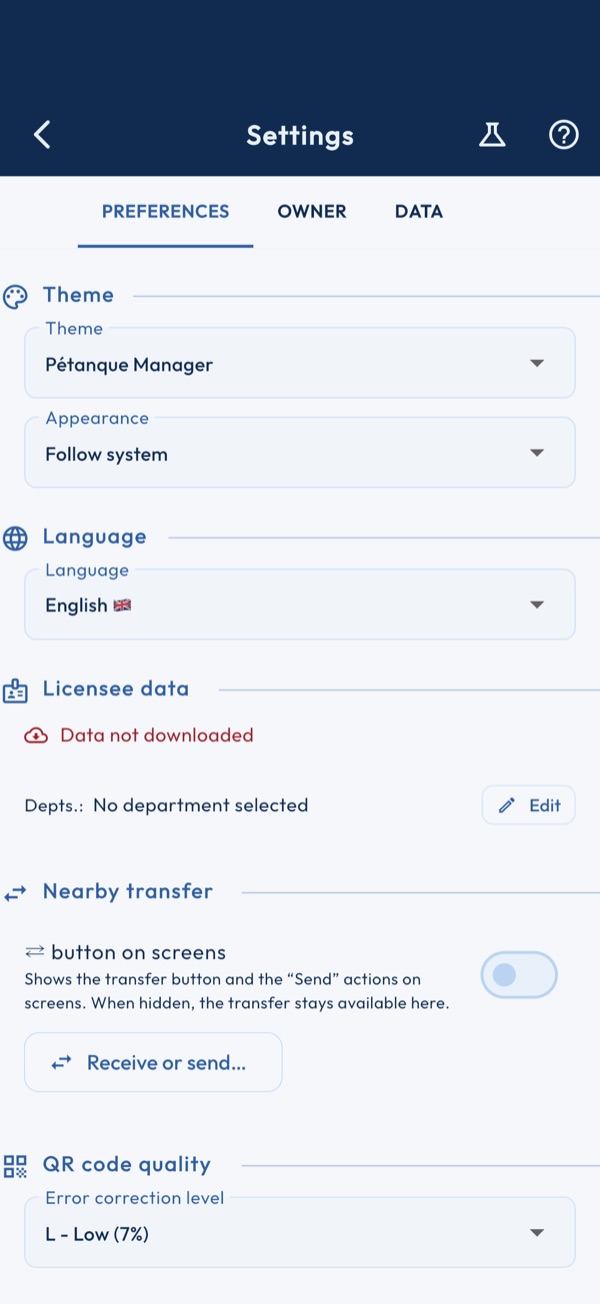
1. Visual theme
Choose from 16 preset themes. The "Pétanque" theme is the app's official look. Each theme applies instantly.
2. Custom color
Select the "Custom" theme to pick any color from the palette or by entering a hex code (#RRGGBB).
3. Language
Changes the language of the entire interface. Available in French, English, Spanish, Italian and German.
4. FFPJP licensed players data
Select your departments to download the official licensed players database. This enables name search when adding players. Data is cached locally for 15 days.
5. Nearby transfer
The “⇄ button on screens” switch, off by default, shows the transfer button and the “Send” actions on screens (a player's row, a team's, a game's details…). “Receive or send…” opens the transfer from here, switch on or off.
6. QR code quality
Sets the error correction level among Low, Medium, Quartile and High. Medium is recommended for standard use. High makes the QR more resistant to physical damage but increases visual density.
7. Ergonomics options
Extended mode: shows more information in lists. Left-handed: moves main actions to the left. Sounds and vibrations: two separate switches, toggle each on its own.
Share on social media
Available from version 1.0.1 of the app.
1. Where to share: games and sessions
The share button sits wherever there is a result. Statistics: a button in each of the four tabs opens that tab's Player card (overview, games, precision shooting, training). Game: at the end and on its sheet (Match); a milestone reached during the game — new rank, first win, streak — is shared from its window (Milestone). Precision shooting and training sessions: at the end of the session and on its sheet in the history. Measuring: the Share button of the measuring screen. When greyed out, a long press tells you why. Season review: from the button of the Global tab of the statistics, or from the Season icon of a player's unfolded card in the Directory, open to everyone.
2. Where to share: tournaments and club
In the ⋮ menu of a tournament's dashboard, under “Social media”: “Announce the tournament”, the “Provisional standings” after the last complete round, “The final” of each bracket, then “Share the podium” and “The tournament in numbers” once the tournament is over; a greyed-out entry says why underneath. In the calendar, “I'm going” on an upcoming tournament. “Card for social media” in the live window and in the club ranking share window, which gives the top eight and the QR code of the permanent link. In that same window, “Season review”: the club's year in tournaments, teams, games and points, with the top three of the club ranking. In Coaching, the Club match card: from the debrief, the live bar or the ⋮ menu of a finished match. And the poster, from the Poster Designer.
3. Choose the card
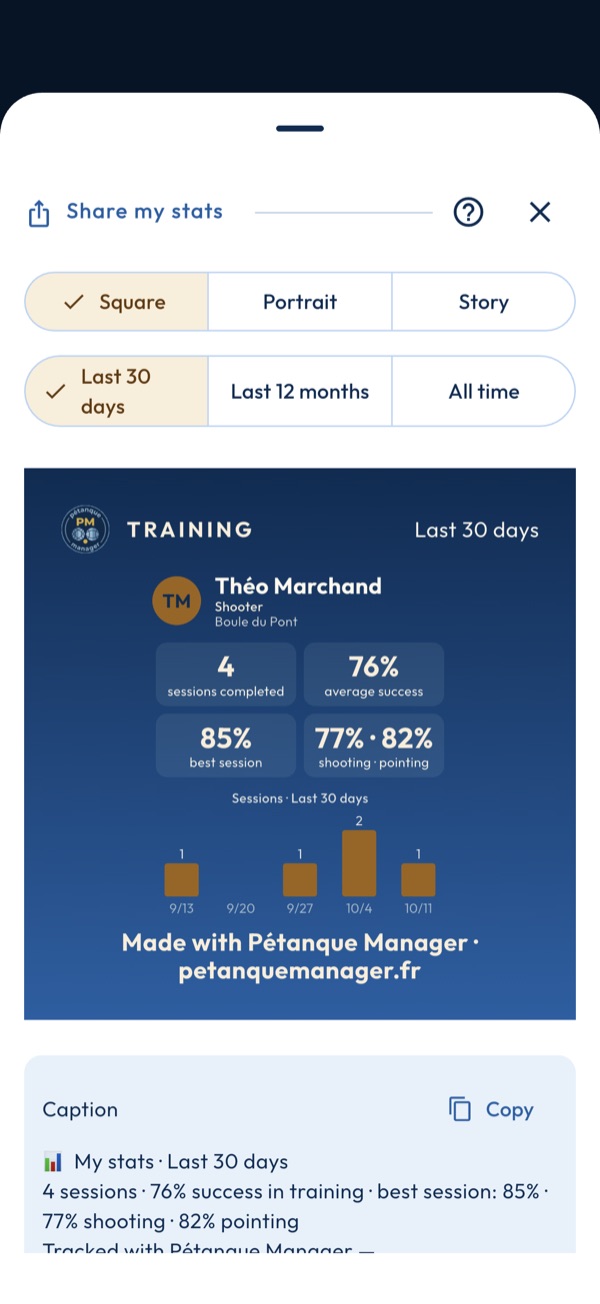
Square, portrait or story: the preview is exactly the image that is sent. Depending on the card, also pick the period or how names are shown. Every card carries the Pétanque Manager brand.
4. The caption
The text that goes with the card is copied to the clipboard on every send: Instagram and Facebook do not pick it up on their own. Paste it into your post. The Copy button copies it again at any time.
5. Share or Instagram story
Share… opens the phone's share sheet: Facebook, Instagram, WhatsApp, Messages, Mail or Save image. Instagram story sends the card in story format; this button only appears when Instagram is installed. The app never posts anything itself and sends nothing to a server. To change your mind, tap the cross at the top of the sheet: nothing is posted.
6. Respect for players
Tournament results are public, but an image travels far and lasts. Ask before publishing another player's name; on any card that names them, choose first name + initial or initials if they prefer. A licence number is never published. Be careful with minors: their parents' consent comes first.
Training statistics
1. Overall
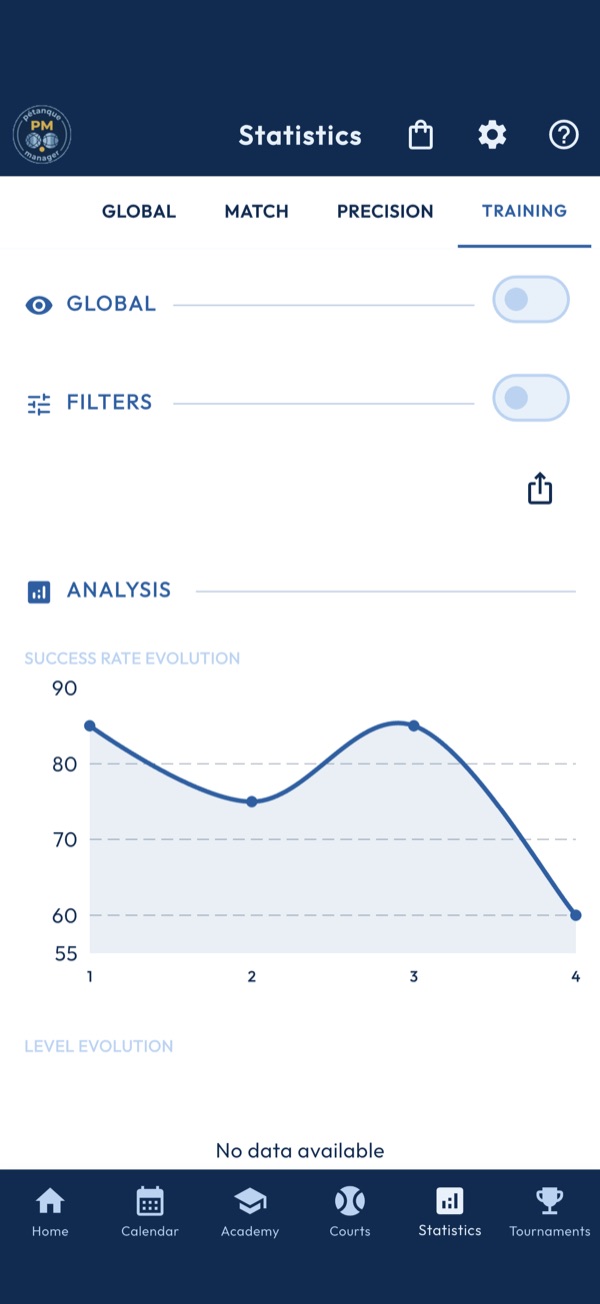
The switch opens three cards: the average success rate, the record and the number of sessions, over the finished sessions of the period. A planned session does not count. With "Expanded display" in Settings, switch sections open by default.
2. Filters
The switch opens the period, week, month, year or all, and the session type: overall, pointing or shooting. The share icon, to the right of the filters and visible even when they are closed, posts the player's Training card for the chosen period.
3. Analysis
Two curves: the success rate session after session, and the evolution of the sessions' level, from beginner to expert. With no known level, the second stays empty.
4. History
The switch opens the sessions kept. A tap opens the detail exercise by exercise; a long press deletes the session, after confirmation.
Overall statistics
1. Choose the player
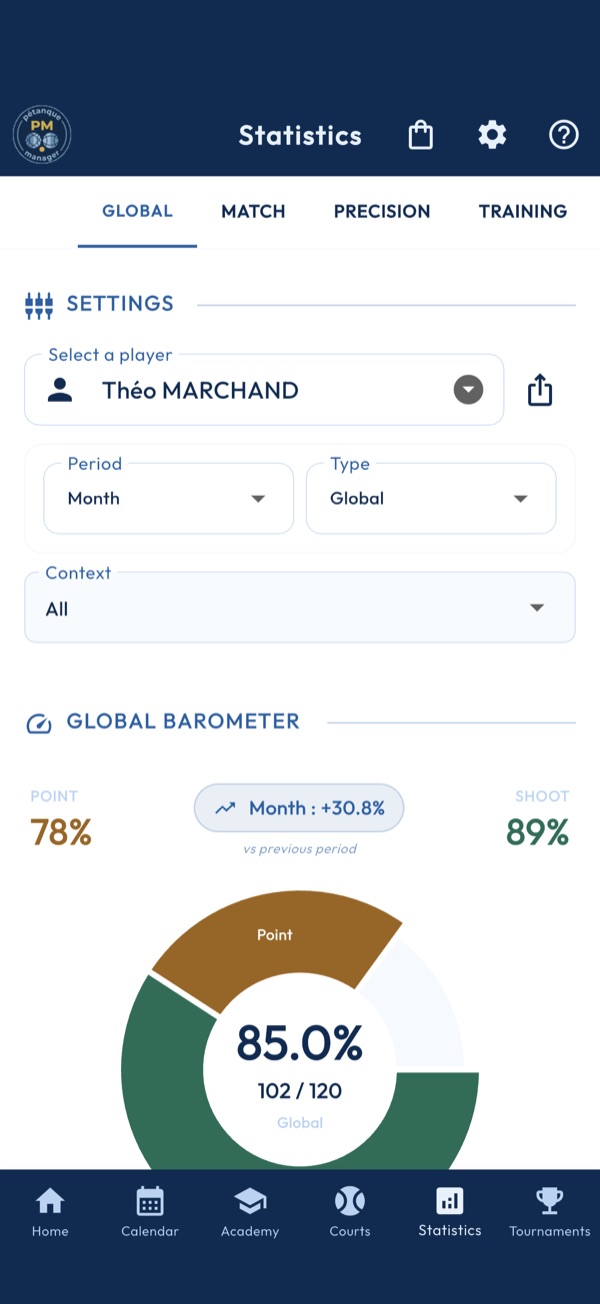
The selector at the top sets the player being analysed; the owner is preselected. This choice applies to all four tabs: Match, Precision and Training follow the player chosen here. From coaching, the followed player is imposed. The share icon, to the right of the player, posts their Overview card for the chosen period. The same sheet also offers the review of the current season and the previous one, over the calendar year: games, wins, sessions, records, tournaments played and rank.
2. Set the scope
Three filters frame the barometer: the period, week, month, year or all; the type, overall, pointing or shooting; and the context, training or competition. Every change reloads the figures.
3. Read the barometer
The success rate for pointing and shooting, the trend against the previous period, then the ring of successes over attempts, split between shooting and pointing in overall mode. With no game or session recorded, the section stays empty.
4. Terrain analysis
The switch opens the radar of the success rate by ground type: sandy, gravel, soft or hard. Only games whose terrain was filled in count.
5. Weather impact
The switch opens one card per sky encountered, with the gap in percent against your average. Weather only counts if it was entered in the game's advanced setup; otherwise the section reports insufficient data. With "Expanded display" in Settings, both analyses open by default.
Match statistics
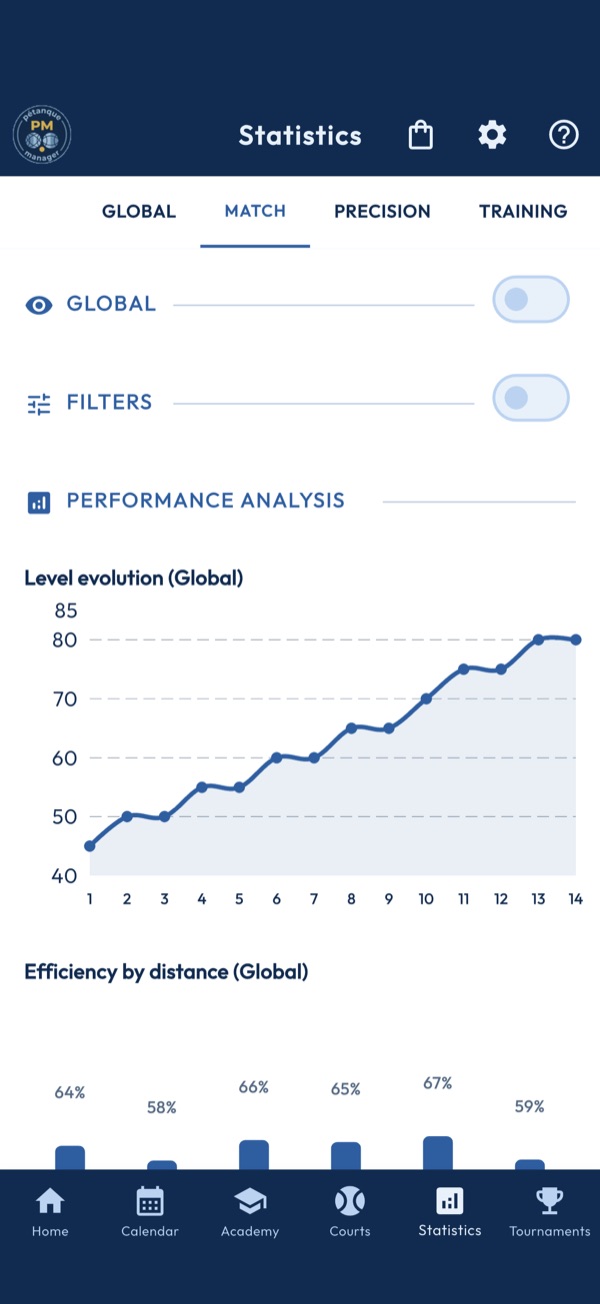
1. The player and their games
The tab analyses the player chosen in Overall; without a player, it asks you to choose one. For the device owner, every game is kept; for another player, only the games of their teams and those where they have statistics. Only finished games count: a game in progress or planned is left aside.
2. Overall
The switch opens three cards: the win rate, the number of games and the average points scored, computed on the games kept by the filters. With "Expanded display" in Settings, switch sections open by default.
3. Filters
Context, period and type apply to the charts and the history. Two switches add the Terrain filter, difficulty, condition and ground type, and the Weather filter, sky, wind and temperature: an active filter keeps only games whose three values match the selection. The share icon, to the right of the period, posts the player's Games card.
4. Performance analysis
The curve follows the level game after game for the chosen type; the bar chart gives the success rate at each playing distance. With no shot or point recorded, each chart says so in its place.
5. History
The switch opens the list of games kept, most recent first. A tap opens the game's detail. Nothing is deleted here: a game is removed from the Game tab of the Field.
Precision statistics
1. Overall
The switch opens three cards: the average score, the record and the number of sessions, over the finished sessions kept by the filters. With "Expanded display" in Settings, switch sections open by default.
2. Filters
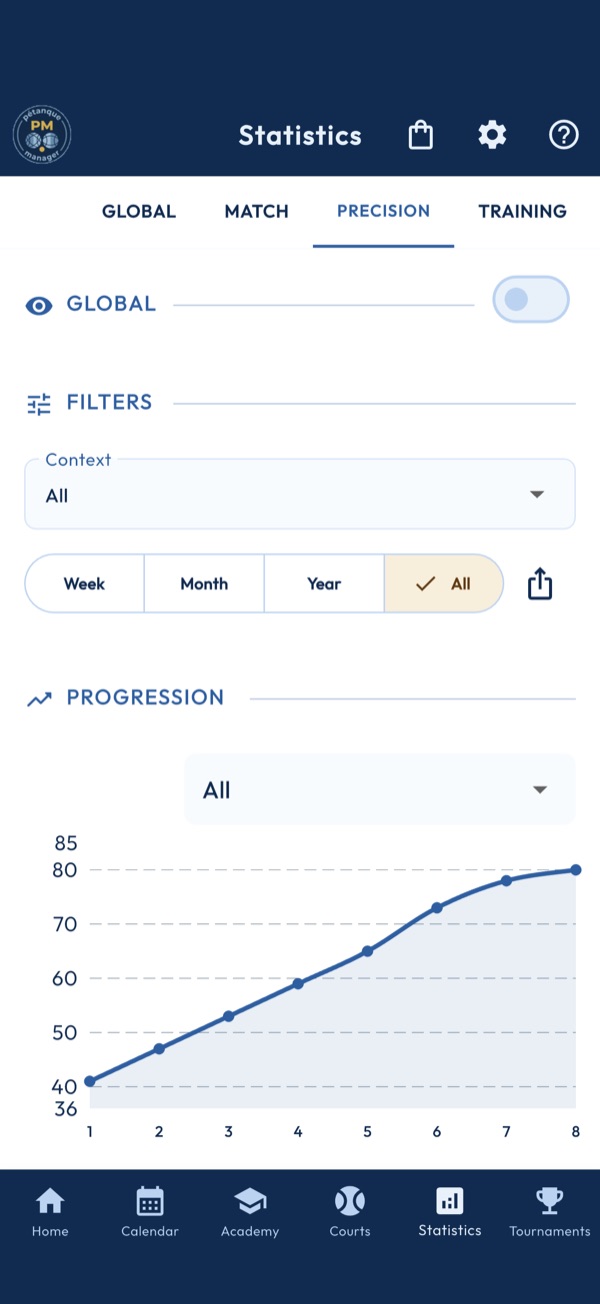
The context, training or competition, then the horizon: week, month, year or all. They apply to the cards, the curve, the heat map and the history. The share icon, to the right of the horizon, posts the player's Precision shooting card; week and month give the last 30 days.
3. Progress
The curve follows the total score session after session. The menu on the right isolates one workshop: its score is then scaled to the total so it stays comparable.
4. Heat map
The table crosses workshops and distances: each cell gives the average points obtained, from red below one point to dark green from four and a half; a dash marks a cell never shot. This is where the distance to work on can be read.
5. History
The switch opens the sessions, most recent first. A tap opens the detail workshop by workshop; a long press deletes the session, after confirmation.
Points calculator
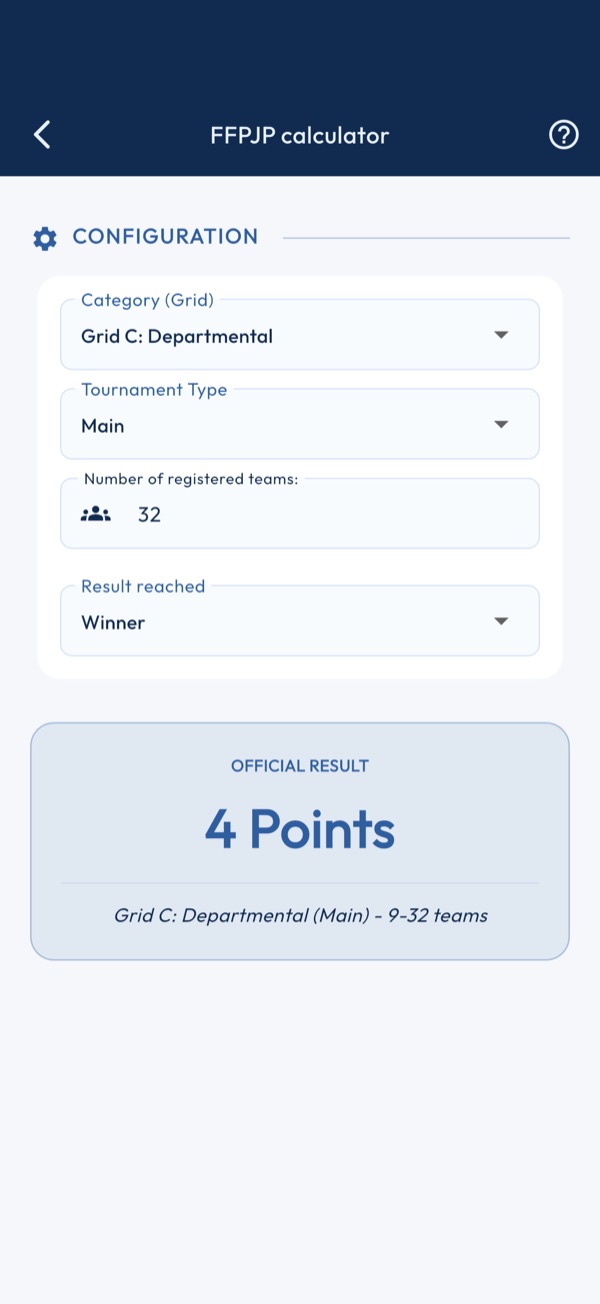
1. What the tool computes
The ranking points an FFPJP tournament earns a team, from the official scale: tournament category, type, number of teams entered and result reached. Nothing is saved; it is a referee's memo.
2. Category and type
The category (E, D, C or A) is the tournament's, not the player's. The type tells the main tournament from the secondary one, which pays less.
3. Number of teams
The number of teams entered picks the bracket of the scale: the bigger the tournament, the more each round pays. A number outside the known brackets returns a message instead of a figure.
4. Result reached
Winner, finalist, semi, quarter, round of 16, round of 32 or loser: the points show at once, with no button, and the message below recalls the bracket applied. A round not rewarded in that bracket is worth zero points.
How to use the scorer?
Available from version 1.0.1 of the app.
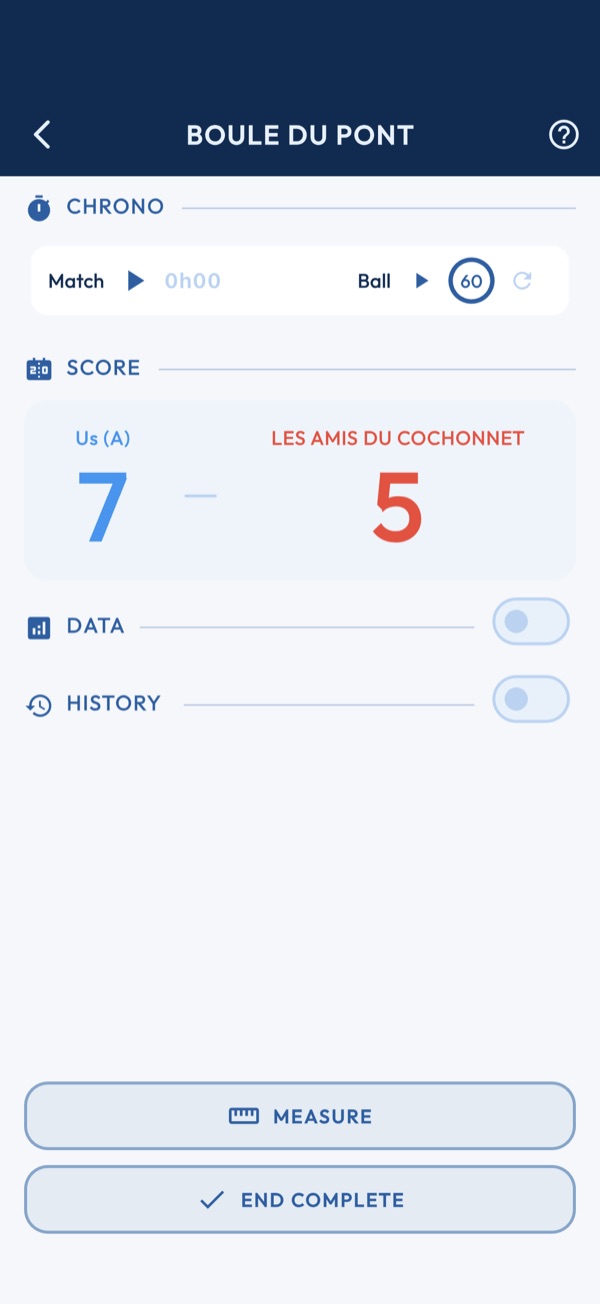
1. Chrono
Enable/disable the match timer and ball timer (60 s per throw). Tap ▶/⏸ to start or pause.
2. Score
Live scores. The game ends automatically when a team reaches the target score.
3. Data
Scorer mode: select a player, then log their actions ball by ball. ⚠️ Action buttons are only active when the match timer is running (▶ started). • Shots — Bouchon: jack shot out / Carreau: in place / Hit / Miss • Points — Jack-point: on the jack / Devant: in front of ball / Won / Lost
4. Them (B)
Observe and record the opposing team's actions (shots and points) to track their stats.
5. End complete
At the end of each end, tap "End complete" to enter the winning team and the points scored. If the jack goes out of play while both teams still have balls, choose "Void end": nobody scores, and the balls played stay in the statistics. Not allowed after the whistle in a timed game.
6. History
Summary of all ends played. Tap an end to edit or delete it.
Game
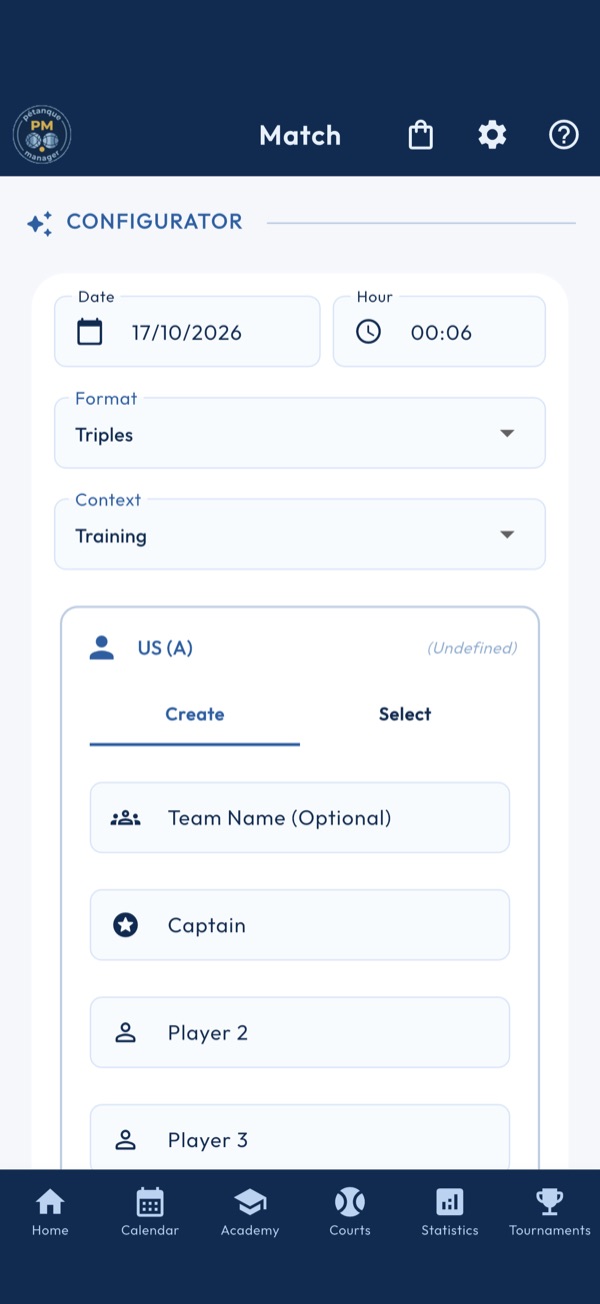
1. Set up the game
Choose the date and time, the format, singles, doubles or triples, and the context, training or competition. Compose "Us (A)"; "Opponent" is optional and opens with its switch.
2. Start or schedule
The button follows the chosen date: within half an hour, "Start the game" opens the score sheet right away; further ahead, it saves the game as planned, to be resumed on the day. It stays greyed out until "Us (A)" has a name.
3. Settings
The "Settings" switch reveals the time limit, which arms a timer during the game, and the playing conditions: ground, state, sky, wind, temperature. This data enriches your statistics; with the switch off, it is not saved, so a value you did not choose is never counted.
4. Tools
Under "Tools": the animated toss, the points calculator, camera measuring and the official rules, without leaving the tab. Measuring requires the Premium tier.
5. History
Recorded games are listed under "History". Tapping a game in progress resumes it; tapping a finished game opens its summary, from which its settings can be edited. A long press deletes the game, after confirmation.
6. Edit mode
From the calendar or a game summary, the tab opens in edit mode, flagged by a banner: the same fields, and the button saves the changes instead of creating a game. "Cancel" leaves the mode.
Coin toss
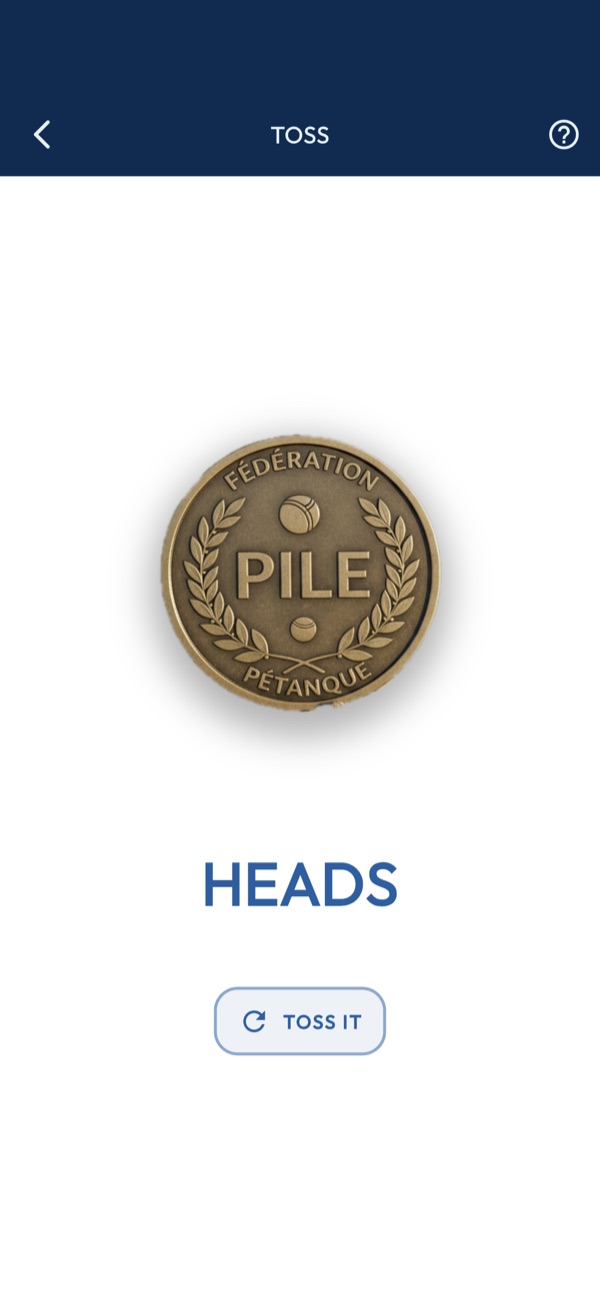
1. Flip the coin
Tapping “Flip” spins the coin for a second and a half. The result is drawn at random on every flip, and you can flip again as many times as needed.
2. Read the result
Heads or tails shows in large type under the coin as soon as it stops. While it spins, an ellipsis stands in for the result.
3. What next
The app does not record the toss: say before flipping who takes heads. The team that wins the toss chooses the ground and throws the jack for the first end.
How to measure?
1. Photograph the end
Position yourself above the balls, phone facing down. A moving circle indicates your phone's tilt — center it within the target circle until the outline changes color. The photo is taken automatically after a short stabilization. You can also press the camera button manually.
2. Automatic detection
The app automatically analyses the photo and detects the jack and balls in 1 to 2 seconds. If everything is detected, distances are displayed immediately. If detection is incomplete, two actions are available: adjust the detection sensitivity in the settings (⚙) — the photo is re-analysed in real time with each change. You can also add a ball manually by tapping on the image; the app then checks if a nearby detection exists and uses it automatically if so.
3. Read distances
Balls are ranked from closest to farthest from the jack. The first one is the pointing ball.
4. Place the jack manually
Tap directly on the jack in the photo. A yellow circle appears — drag it to adjust its position. Use the slider to adjust its size. The magnifier next to the yellow circle enlarges the photo six times to fine-tune its position and size.
5. Correct balls
Tap an empty area to add a missing ball. Long press on a ball to remove it.
6. Field tips
• Top-down view for more precision • Avoid shadows on the balls • Phone flat during capture • The jack must be fully visible
Precision shooting
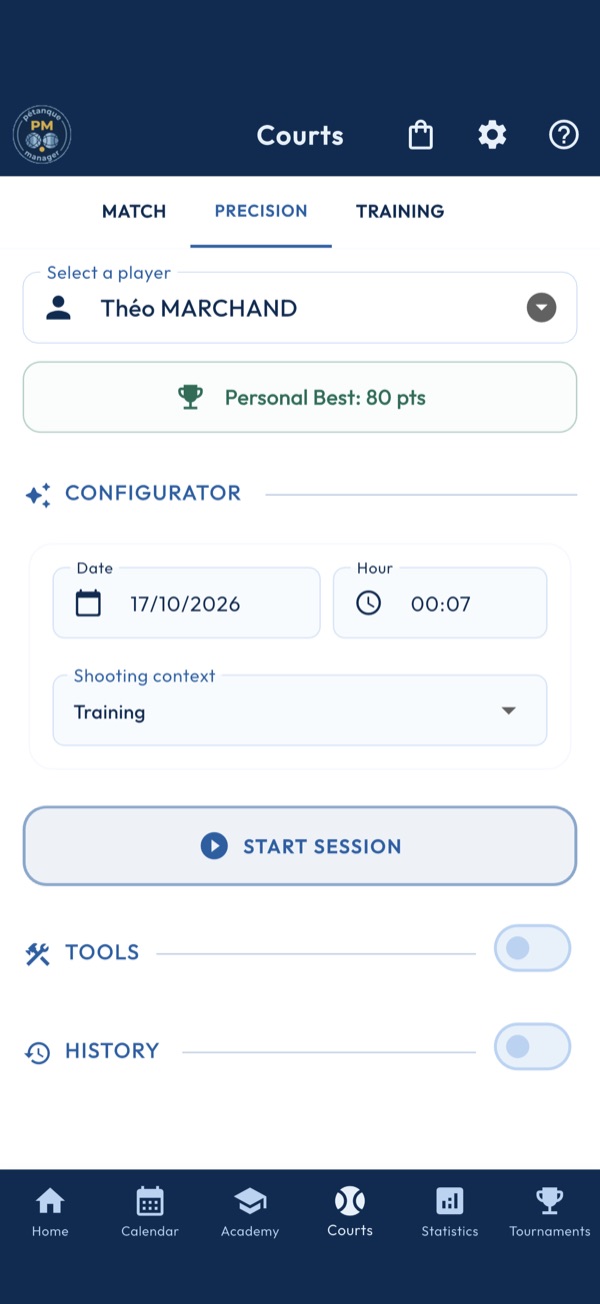
1. Choose the shooter
The selector at the top designates the player for the session; the owner is preselected. Their personal best appears just below, and the history reloads for them.
2. Set up the session
Choose the date and time, then the shooting context, training or competition. The context is saved with the session and separates your statistics.
3. Start or schedule
Within half an hour of the chosen time, the button opens the score sheet, workshop after workshop; further ahead, it creates a planned session, which the history and the calendar pick up. A planned session is played the same way: launched on its day, or opened at its time from the history or the calendar, the score sheet completes it instead of creating a second one.
4. Tools
Under "Tools": the precision shooting rules, distances and workshops, and the shooter's statistics, workshop by workshop.
5. History
A planned session opens on a sheet that lets you edit it; a played session shows its results workshop by workshop. A long press deletes the session, after confirmation.
Precision shooting entry
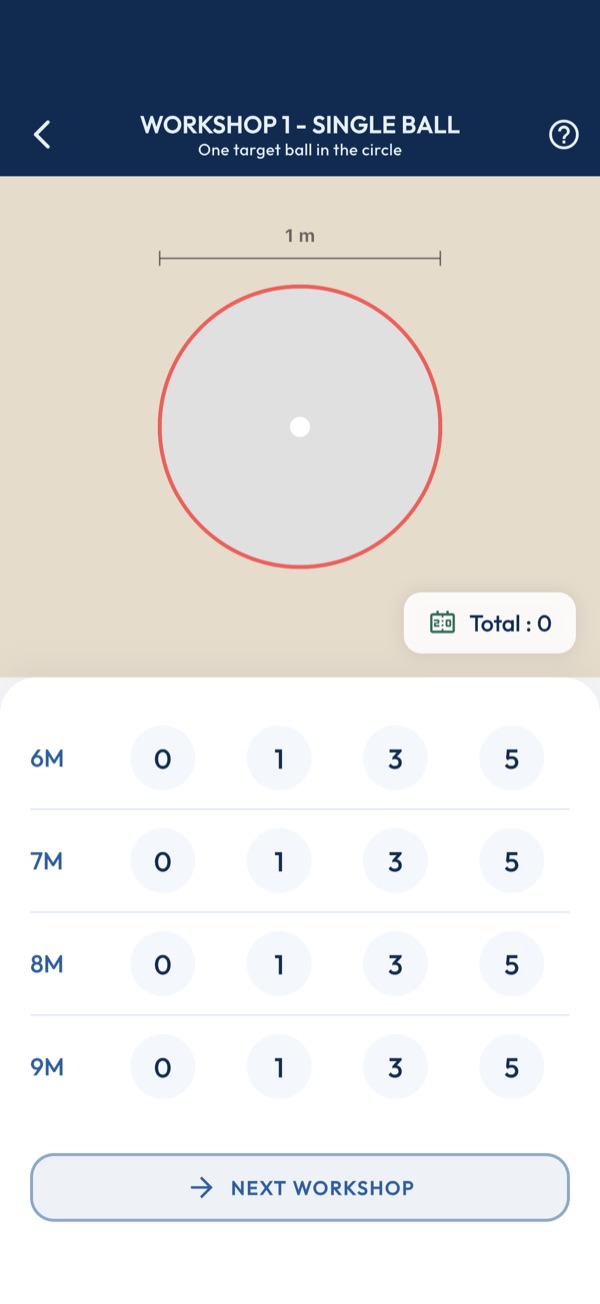
1. Five stations in order
The bar shows the current station and its instruction, the diagram draws it: lone boule, hidden boule, surrounded boule, boule to jump, then the jack. The session total reads at the bottom of the diagram.
2. Four distances
For each station, one shot at 6, 7, 8 then 9 metres. Each row of the panel takes the value of one shot; a row left empty counts as zero.
3. The points
0 for a miss, 1 for a target boule hit that leaves the circle, 3 for a target hit that stays inside, 5 for a carreau. Tapping the row again replaces the value. Runs of three and five hits are cheered.
4. Moving between stations
The bottom button moves to the next station. The arrow at the top of the diagram goes back to the previous one, from the second station on; the values entered are kept.
5. Finish the session
At the last station, the button saves the session in the shooter's history and statistics, then shows the total with a word on the progress against previous sessions.
Training
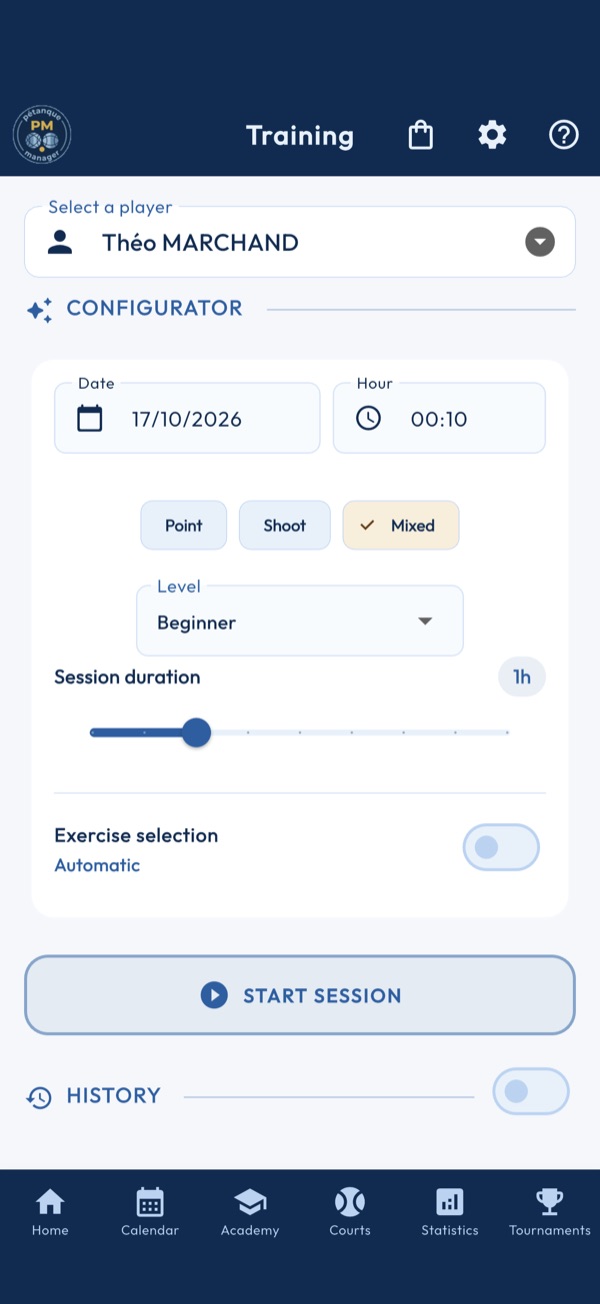
1. Choose the player
The selector at the top designates who is training; the owner is preselected and their history loads.
2. Compose the session
Choose the date and time, the type, pointing, shooting or mixed, the level and the duration. The session is composed automatically from the exercises of your unlocked modules. "Beginner" is the only level stocked at every tier: if a session comes out empty, go back to it.
3. Manual selection
The "Exercise selection" switch opens the list: tick your exercises, the cumulative duration is shown against the target duration. Locked modules appear there too, with their price; add them to the cart to unlock them.
4. Start or schedule
Within half an hour of the chosen time, the button starts the session, exercise after exercise; further ahead, it creates a planned session. From the calendar with a recurrence, it saves the whole series.
5. Available modules
The list of exercise modules, by category: a tick for yours, a padlock and a price for the others. Tapping a locked module presents it and offers to buy it; the bottom button opens the shop.
6. History
A planned session opens on a sheet that lets you edit it; a completed session shows its exercises and scores. A long press deletes the session, after confirmation.
Training session
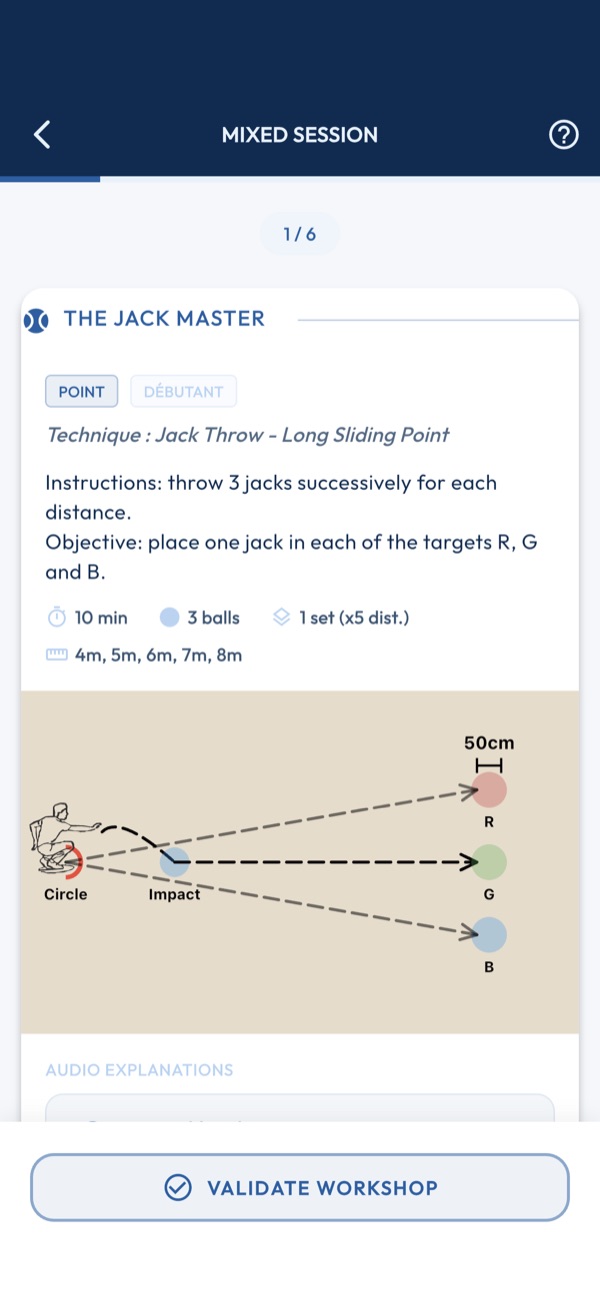
1. One exercise at a time
The session runs its exercises in the order they were composed. The bar under the title shows the progress; the exercise's name and number are recalled at the top.
2. The exercise card
Technique worked on, duration, boules per set, number of sets and distance multiplier, the ground diagram, then the videos, pictures and audio tips when the exercise has any. Tapping a video opens it, tapping a tip plays it.
3. Score the result
The slider goes from zero to the exercise's maximum score, boules × sets × distance multiplier, one notch per point. Count your successes at the end of the exercise and set the slider.
4. Validate the exercise
“Validate the exercise” freezes the score and moves to the next one; any sound playing stops. There is no going back: a forgotten score is fixed before validating.
5. Finish and save
At the last exercise, the button saves the session — score, maximum score and detail per exercise — in the history and the calendar, then a summary compares it with sessions of the same level. “Back to the ground” returns to the tab.
Linked activities
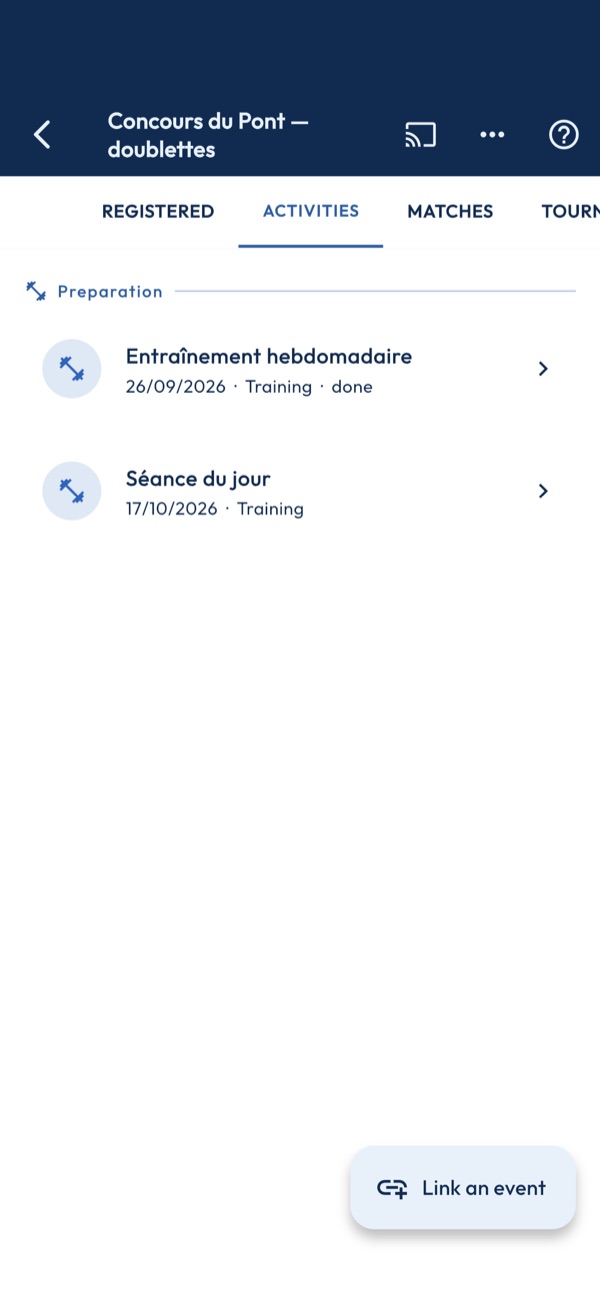
1. Three sections
Preparation gathers the training sessions, friendly matches and precision shooting before the date; Day D, those of the day itself; Linked fees, the attached expenses. An event after the tournament is flagged.
2. Linking an event
The button opens the list of existing training sessions, friendly matches and fees: choosing one attaches it to the tournament. So the activity is created first, from the Ground or Finances. A tournament created before the calendar link has no activities: recreating it is enough.
3. Opening an activity
Tapping a row opens the module that holds it — the session, the game or the fee — with its status: planned, in progress or finished.
4. Detaching
Swiping a row detaches the event after confirmation. It is not deleted: it stays in its module and in the calendar.
PDF preview
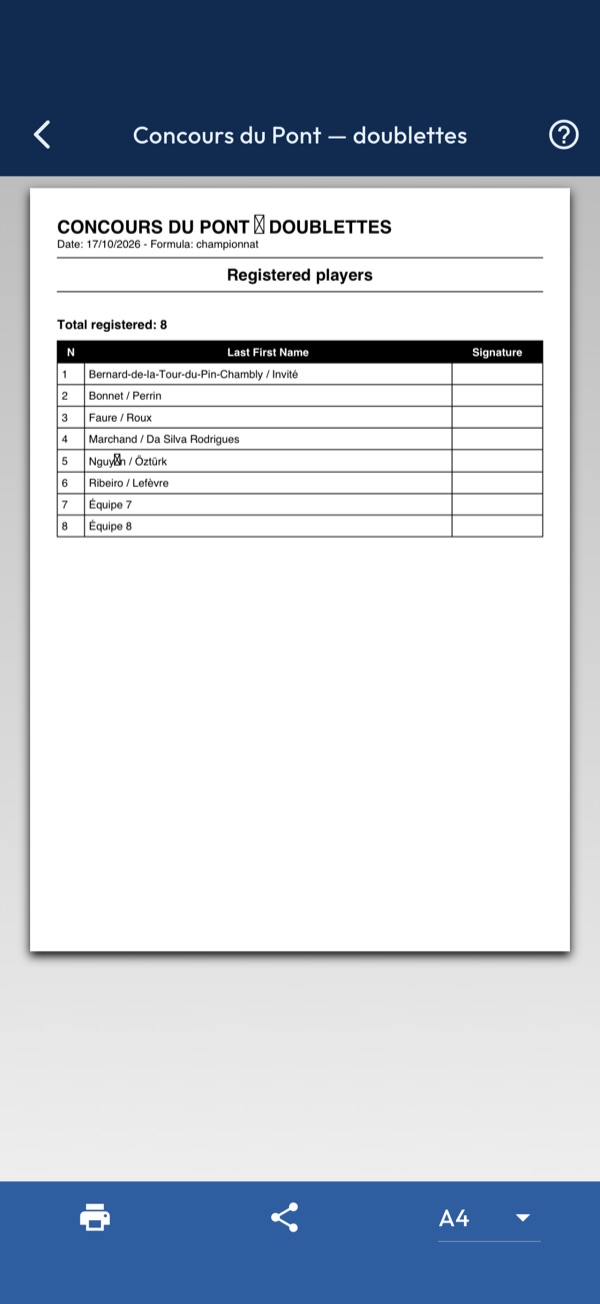
1. The document
The page composes the requested document — entries, match sheets, ranking, badges — from the current state of the tournament. A score entered afterwards only shows up by reopening the preview.
2. Printing and sharing
The bottom bar prints the document or sends it, as a PDF, through the device's share sheet. The page orientation is set by the document.
3. Nothing is saved
The preview does not change the tournament; the back button returns to the dashboard without leaving anything.
Club ranking
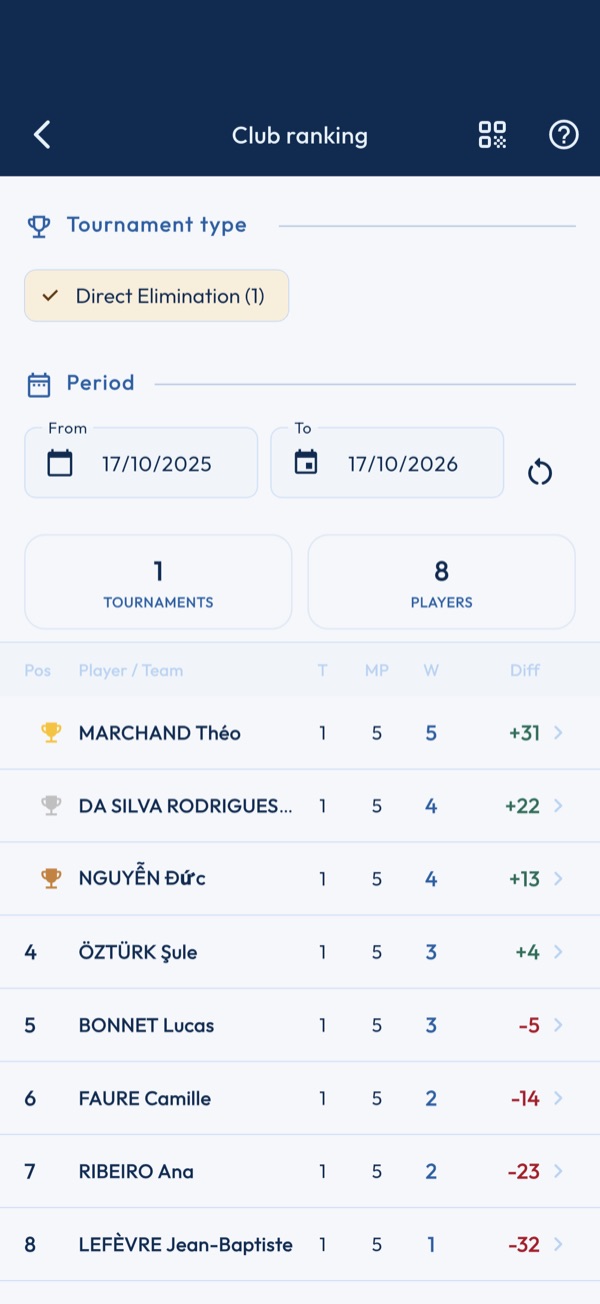
1. Who counts
The ranking accumulates the tournaments whose “Count in the club ranking” option is on, and credits only participants with a player record. As long as no tournament has enabled it, the page stays empty.
2. By tournament type
The chips filter by formula, and formulas are never mixed: a melee and a championship do not compare.
3. Period
From and To bound the tournaments counted; by default, the last twelve months, which the button restores. The banner counts the tournaments and players retained.
4. A player's detail
Position, number of tournaments (T), matches played (MP), wins (W) and difference (Diff). Tapping a row unfolds the player's history, tournament by tournament.
5. Sharing
The QR code in the bar gives the public address of the ranking, updated with each counted tournament, to copy or share. The link is permanent. The same window opens the ranking card for social media and the club's “Season review”: tournaments, teams, games, points and the year's top three.
Ranking
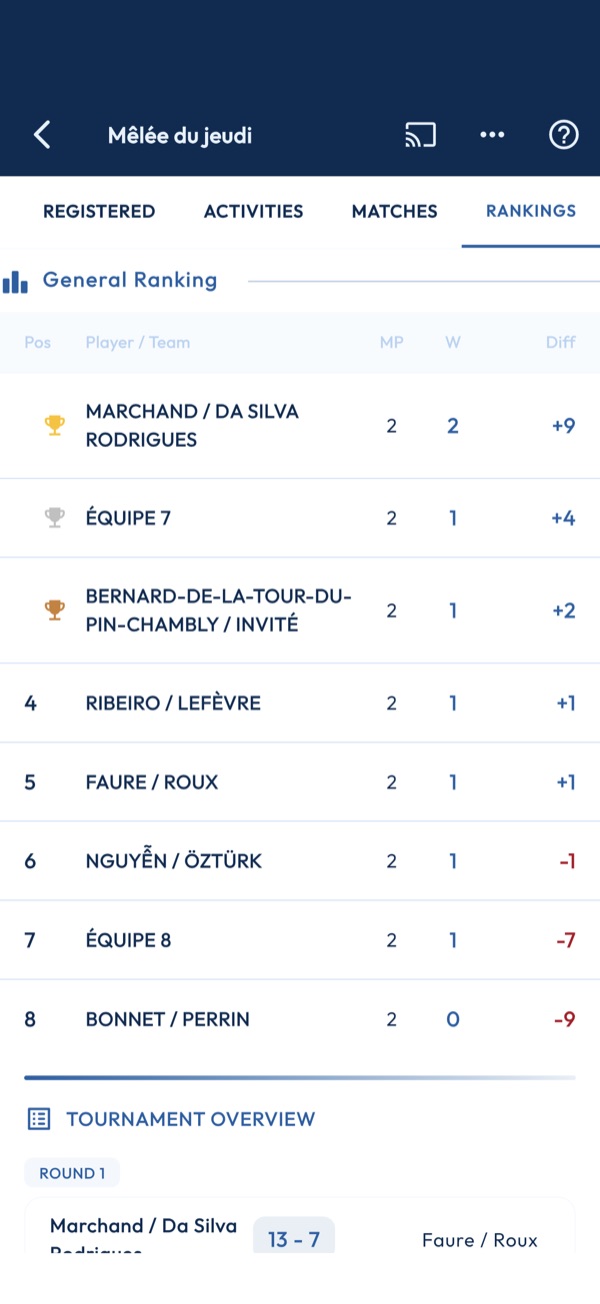
1. Reading the table
Each row gives the wins (W), the matches played (MP) and the points difference (Diff). The Swiss system adds the Buchholz, the sum of the wins of the opponents met; the rotating melee counts points per player; round robin separates wins, draws and losses.
2. Updated with every score
The ranking is recomputed with each validated score. Below the table, the match sheets retrace each round, game by game.
3. Podium
When the last game is entered, the tournament becomes Finished and the podium appears: gold, silver, bronze, then the rest of the ranking. The file joins the archives of the tournaments menu.
4. Documents
“PDF Documents”, in the bar's ⋮ menu, gives the entry list, the match sheets, the ranking and the team badges, to print or share from the preview.
5. Ties
Two tied rows are separated in this order: wins, points difference, points scored. In melee, fixed melee, winners/losers and rotating melee, if the tie remains, the difference of game 1 is compared, then of game 2, and so on; a bye counts 13-7 in its round. If everything is equal, the rank is shared and marked with an asterisk (tied).
Tournaments
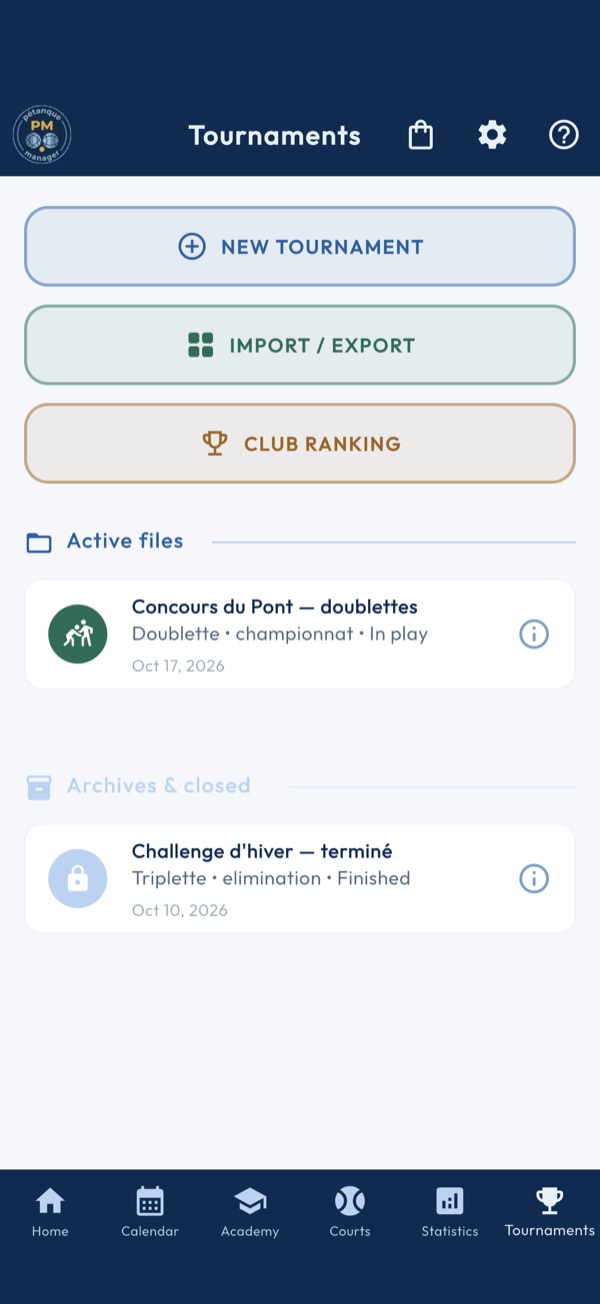
1. Create a tournament
“New tournament” opens the setup form: name, date, venue, team format, game formula, entry and meal fees, contact and communication links. Once saved, it places the tournament among the active files, at the registration stage.
2. Hub & sync
The Hub gathers exchanges with the outside: import a tournament published on the server or a CSV file, export one tournament or all at once, download the file template. It is also where a tournament is shared.
3. Cumulative club ranking
The ranking adds up the results of every tournament per licensed player. It reads by formula, never mixed, and by period; tapping a player details it tournament by tournament.
4. Active files
A tournament in registration or in play appears here, with its format, formula and state. Tapping opens its dashboard: the tabs specific to its formula, live mode, the poster, the PDFs and the podium as soon as it ends.
5. Archives
A finished tournament goes to the archives, locked. It remains readable: ranking, games and documents no longer change.
6. Details, sharing and deletion
The i button of a row opens the tournament's details, from which it is exported or shared. A long press offers to delete it, after confirmation, with everything it contains.
Setting up a tournament
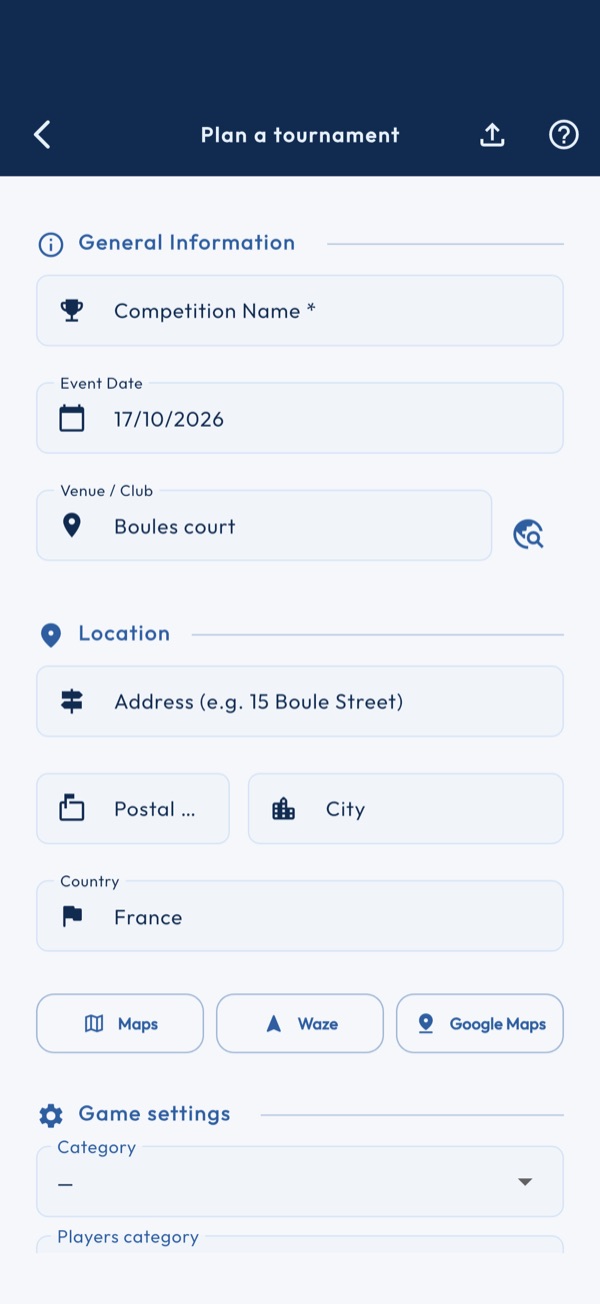
1. General information
Competition name, event date, venue or club. The name is the title of the dashboard; the date places the tournament in the calendar as soon as it is saved.
2. Formula and format
The draw formula sets how games follow one another: melees, championship in pools then A/B or A/B/C brackets, Swiss system, single or double elimination, round robin, precision shooting. The format gives the team size; precision requires singles. Some formulas need the PREMIUM plan.
3. Number of rounds
For melees and winner/loser, the selector sets the number of games guaranteed to everyone; the other formulas derive it from their bracket. The Swiss system chooses its final score here, on time or in points, and the rotating melee can complete oversized teams.
4. Pricing
Entry fee and meal price, in euros. They set what each entrant owes in the Entries tab: a participant with nothing to pay is settled at once.
5. Courts
Automatic assignment draws a court for each match as soon as it is ready, within the number of available courts. Without it, the court is chosen by hand from the score dialog.
6. Club ranking
The switch counts this tournament in the cumulative club ranking. Only participants with a player record are credited; a guest typed as free text is left out.
7. Extras and saving
Personal notes, poster, registration and website addresses, contact name and phone. An imported tournament keeps its official description, read-only. “Validate and create” saves and opens the file; when creating, the import icon in the bar creates the tournament from two CSV files.
Precision duel
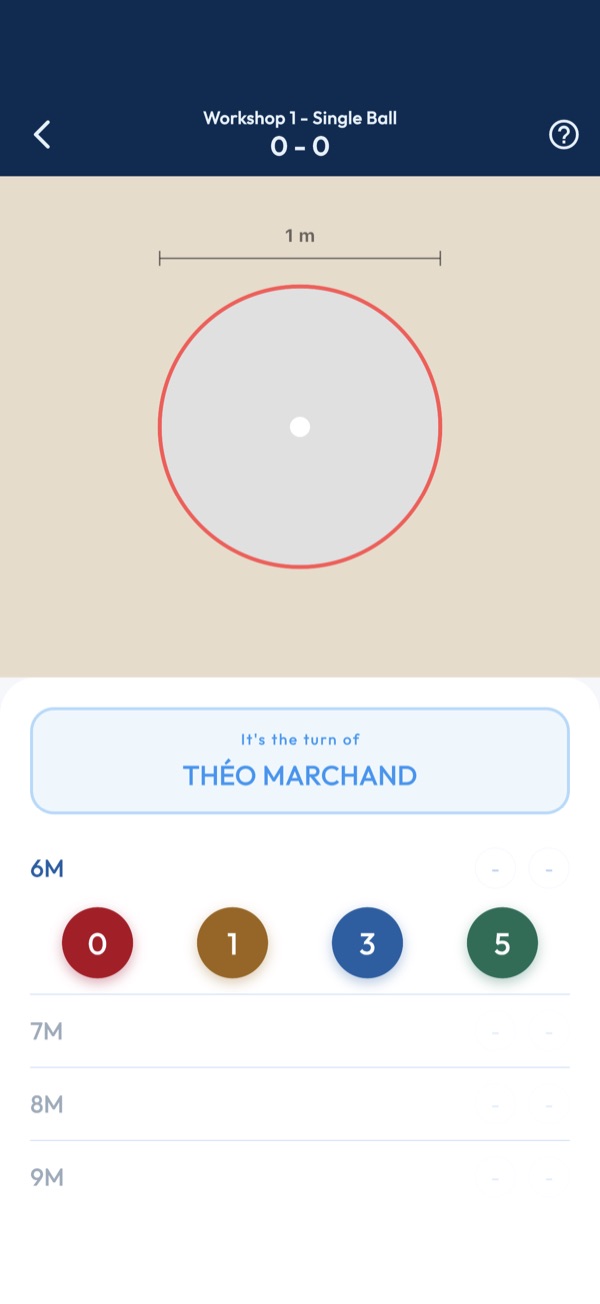
1. Taking turns
The two shooters alternate at each distance; the “It's the turn of” banner says who plays. Each station has four distances, from 6 to 9 metres, and the duel chains five of them.
2. Scoring
A shot is worth 0, 1, 3 or 5 points: missed, target hit but left in the circle, target out of the circle, carreau. The diagram recalls the layout of the station.
3. End of station
After the four distances, a summary compares the two totals; “Next station” goes on. The bar shows the current station and the cumulative score.
4. Result
After the fifth station, the two totals are returned to the final bracket, which records the match. A duel left before the end records nothing; a tie calls for a tie-break, entered from the bracket.
Importing a tournament
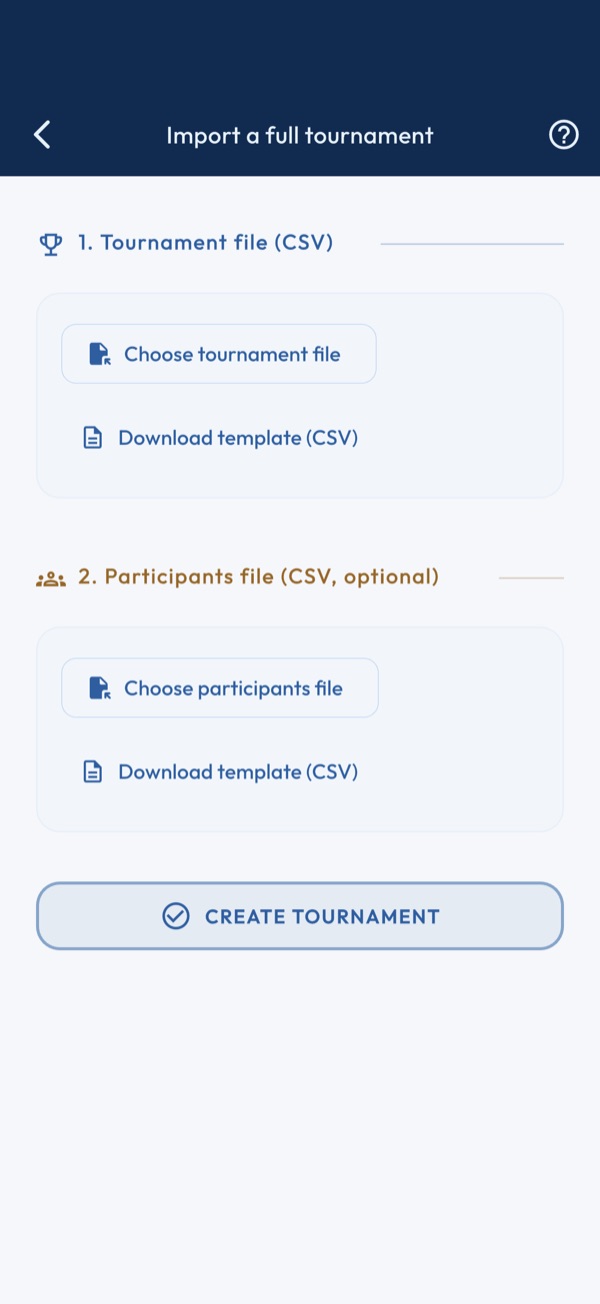
1. 1. Tournament file
A CSV describing the tournament: name, date, venue, formula, format, prices. Only the first valid row counts; the following ones are ignored, with a warning. “Download the template” gives an empty file with the right columns.
2. 2. Participants file
A second CSV, in the format of the Entries tab import, enters the participants in one go, with their players if the joueur1 to joueur3 columns are filled in. Without it, the tournament is created empty and entries are made afterwards.
3. Payment status
Each imported participant arrives “to pay” if the entry or the meals cost something, “settled” otherwise — unless the file itself provides a valid status.
4. Create the tournament
The button creates the file, its calendar event and its participants, then returns to the tournaments menu. It stays greyed out until the tournament file is chosen.
Entries
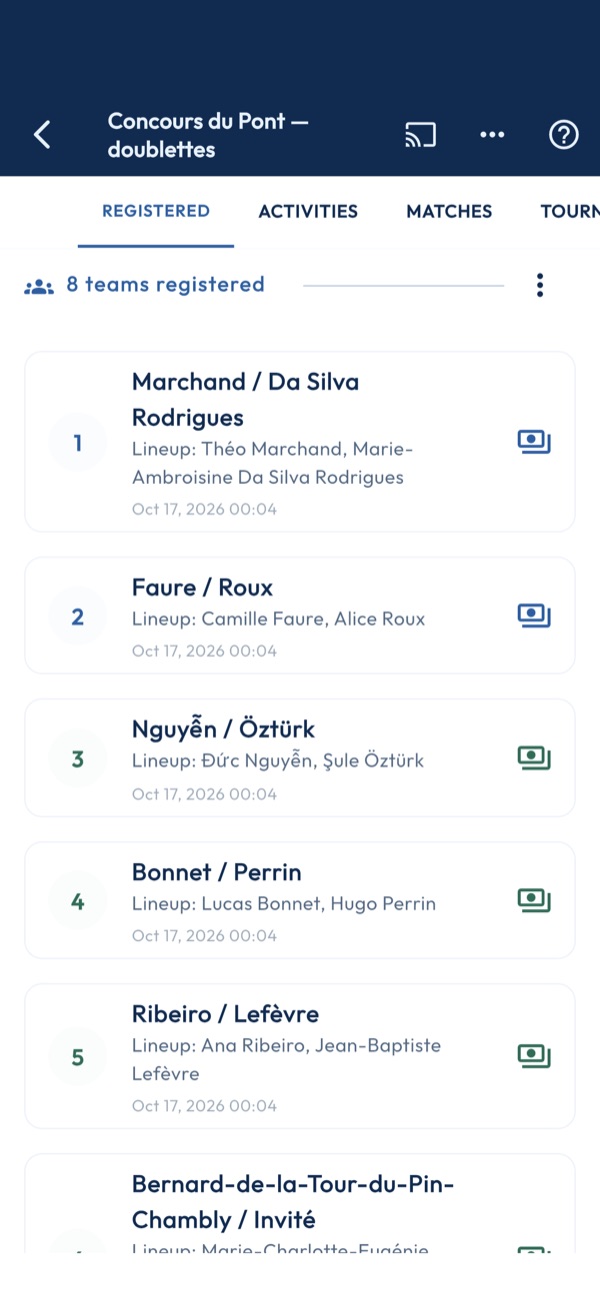
1. Entering
“Enter a player” or “Add a team” depending on the format: the dialog picks players from the directory, composes the team, adds meals and flags a player already entered. “Enter & Next” goes on without closing. “Import by club” enters all the players of a club at once.
2. Number and seed
Tapping a row's number changes it: it orders the teams and serves as seed for the bracket draw. Two rows cannot carry the same number.
3. Payments
The badge says what the entrant owes — to pay, partial or settled — from the tournament prices. Tapping the row opens the payment: amount, payment method, remaining balance.
4. CSV menu
The bar menu imports or exports the participants, downloads the template, or exports the whole tournament as an archive. The joueur1 to joueur3 columns ("Last name First name" or licence) link each team to its players: a summary shows the records to create, the close names and the teams left out, and nothing is saved before you agree.
5. Removing an entrant
The bin removes the entrant after confirmation, along with their payments.
6. Launching the tournament
“Launch the tournament” locks the list and opens the draw in the matches tab; unlocking puts the tournament back in setup. The number of teams is capped by the plan: 8 in LITE, 32 in PREMIUM, unlimited in PRO. In A/B/C, a warning offers to switch to A/B when tournament B would have no match.
Matches and brackets
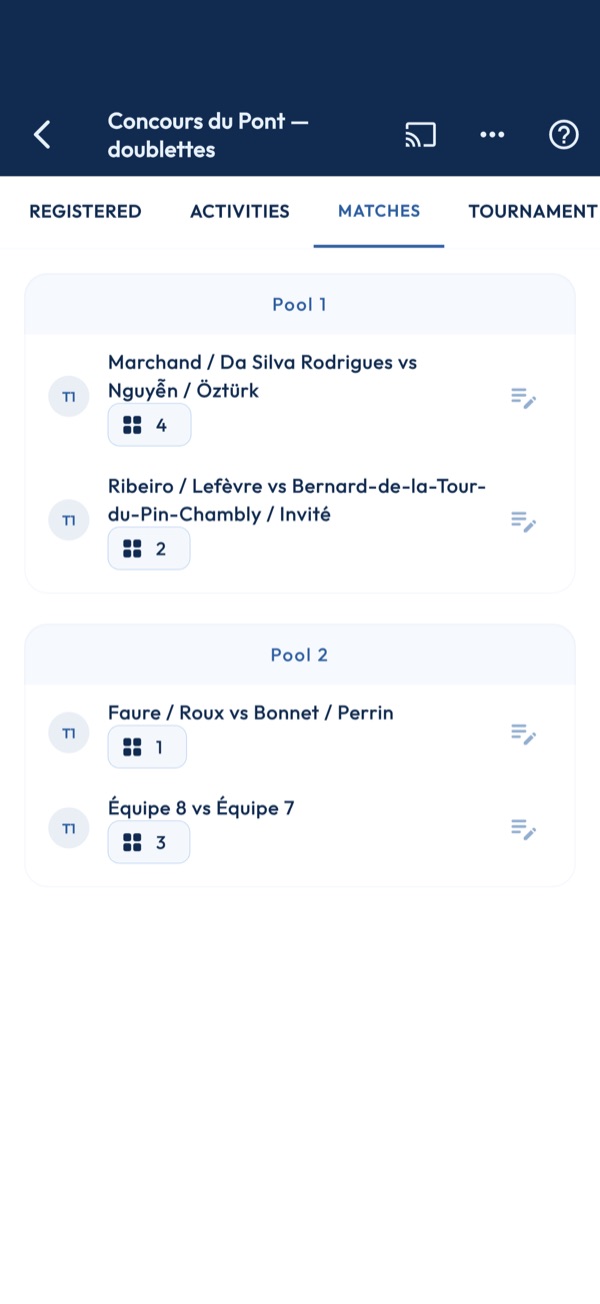
1. Drawing a round
In a melee, the round is drawn by itself when the tab opens; the arrows move from one round to the next, the next one opening only once all games are finished, and a bye team is flagged. The other formulas have their button: draw the pools, launch the draw, generate the round or all the matches.
2. Entering a score
Tapping a match opens the entry: each team's score, no draws; the Swiss system imposes the final score or leaves it free on time. The court is chosen in the same dialog, or assigned by itself if the tournament asked for it.
3. Reopening a match
A finished match reopens with a tap: the score is corrected, the ranking follows. After the end of the tournament, a correction also rewrites the club ranking.
4. Pools and A/B/C brackets
In a championship, the pools are played first; “Close pools” qualifies the leaders into Tournament A, the others into B — and into C for the A/B/C formula. Each bracket has its matches and its ranking, from the round of 32 to the final; a match waits for its qualifiers as long as the previous round is not over.
5. Swiss, eliminations, round robin
The Swiss system pairs, each round, teams with the same record without replaying an opponent, then “Launch the final phase” opens a snake bracket, first against last. Double elimination plays a Winners bracket and a Losers bracket up to the grand final. Round robin generates all the matches at once.
6. Precision shooting
Qualifications: a score out of 100 per player, in quick entry or detailed by station; a tie on the qualification line is settled by a tie-break. “Generate the final bracket” opens the final phase: each duel is entered directly or played station by station with “Launch the duel”.
Video player
1. Playback in the app
The video plays in its platform's embed page — YouTube, Facebook, Dailymotion — with that platform's controls. Nothing is downloaded.
2. Landscape and back
Turn the device: the screen follows. Going back stops playback and cuts the sound at once; the original orientation is restored.
3. Open the original
The open button, when present, opens the video on its platform's site: the way out if the embedded player misbehaves.
4. When the video will not play
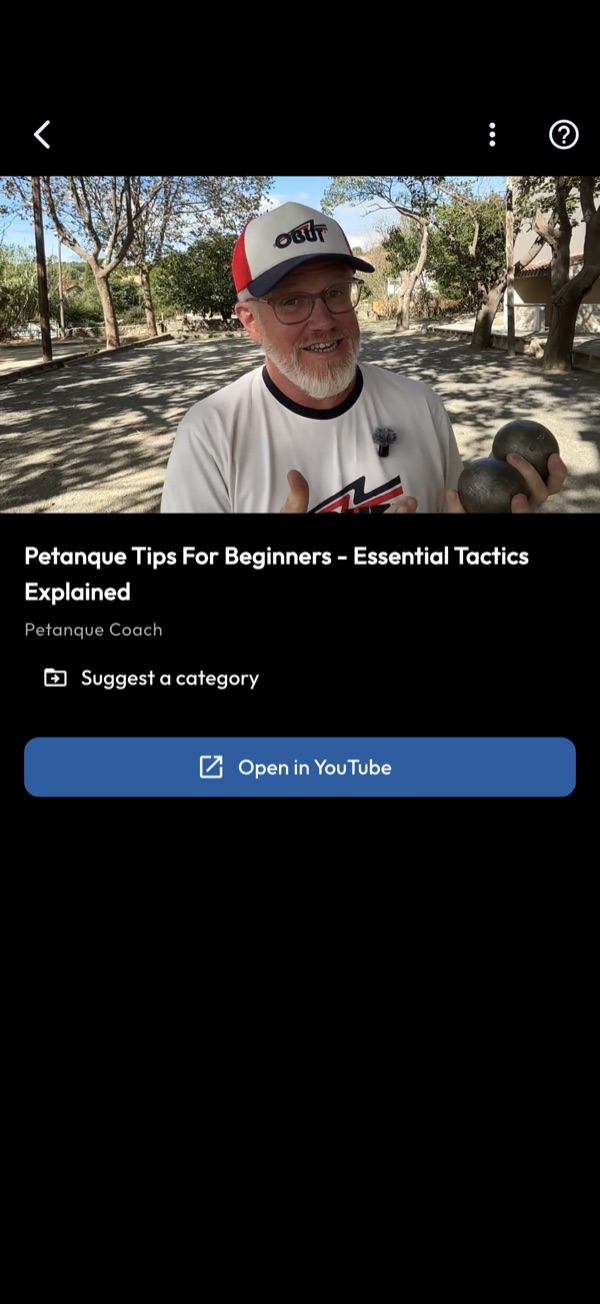
Some rights holders forbid embedding: the page then shows the thumbnail, and you choose between “Watch in the app” (YouTube's mobile site) and “Open in YouTube”. A removed or missing video, or a loading failure, shows a fallback screen with a link to the original. A video filed in the wrong place or with the wrong year? “Suggest a category” reports it, with the category or the year of the event; nothing changes until it is approved.
5. The ⋮ menu
Opens the "About" sheet: the notices required by YouTube's terms of service and their two links.
Video library
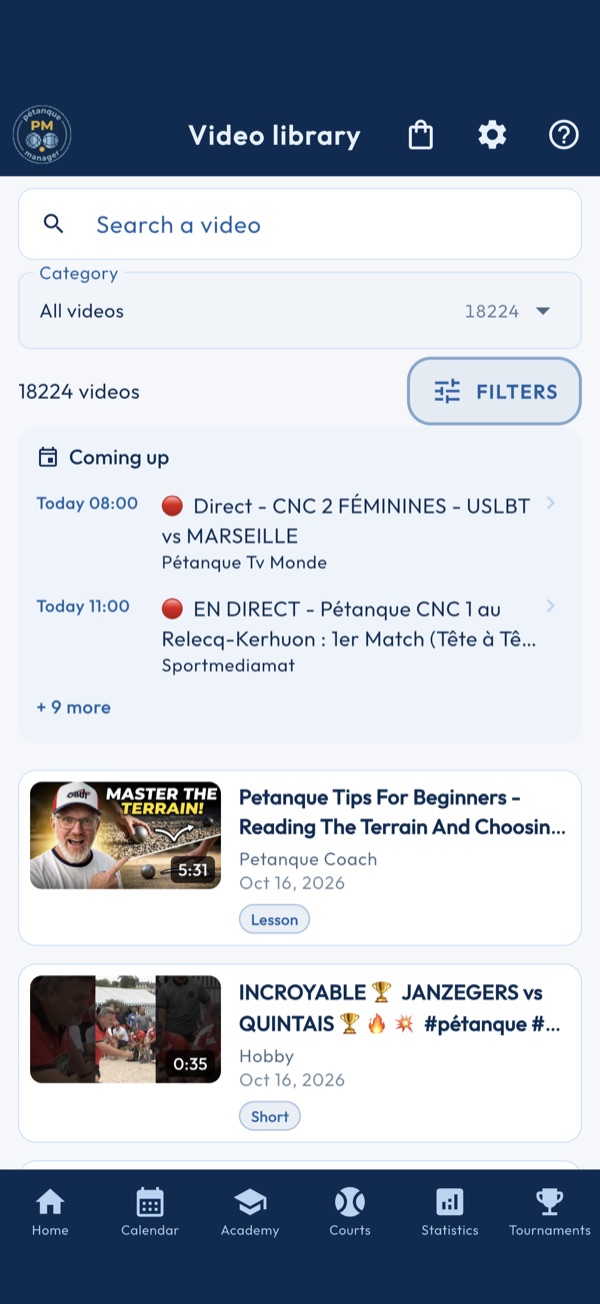
1. Search and pick a section
The search filters the list with every letter typed. Below it, two selectors say where you are in the catalogue: the section, then its subsection, each with its number of videos. A section without subsections only opens the first one.
2. Refine with filters
Each criterion set appears as a chip under the selectors, with its cross, and “Clear all” removes them at once. The Filters button opens the panel: year, format and discipline first, the rest under “More criteria”. The year is the event's when the title gives it — a 1997 final uploaded in 2026 is filed under 1997 —, otherwise the publication year. The list updates behind the panel, and the bottom button says how many videos await you.
3. Live and upcoming broadcasts
When a match is being broadcast, a banner at the top of the list takes you there in one tap; a second one announces the broadcasts of the next seven days. They scroll with the list and do not depend on the filters: a live stream stays visible even when the search returns nothing.
4. Watch a video
A card shows the thumbnail, the title, the channel, the date — followed by the event year when it differs — and the first tags. A tap opens the player; a video its platform does not allow embedding plays on that platform's site, and “Open in” hands over to the original app.
5. Offline and refresh
The catalogue is kept on the device: without network, a banner shows the date of the last update and the list stays readable. Pulling the list down refreshes it; if loading fails with nothing cached, “Retry” starts it again.
6. Nothing matches
When the criteria leave no video, the screen says so and “Reset” clears the search and all filters in one gesture. The counter above the list says at any time how many videos match the criteria set.
Shop, à la carte
1. Three shelves
Features, Training and Courses: each shelf unfolds with its switch. They start closed so the whole catalogue is not loaded at once.
2. Selecting
Ticking an item adds it to the selection; an item already owned is greyed out. The price shown is the store's, in its currency.
3. Cart
The floating button shows the total of the selection and opens the cart, from which the purchase is paid in one go on the store.
4. What unlocks
An à la carte purchase unlocks the item for good: the feature, the training module or the course chapter, without a subscription.
Shop, subscriptions
1. Three plans
LITE is free; PREMIUM and PRO are subscriptions. Each tab details what the plan includes, line by line.
2. Current status
The header shows the current plan. On that plan's tab, the button reads “Current plan” and stays inactive.
3. Changing plan
“Choose” starts the subscription on the store, at the price it shows. Everything the plan includes opens as soon as the payment is confirmed.
4. Restore purchases
On a new device, or after reinstalling, “Restore my purchases” asks the store again for what this account already owns: subscriptions and à la carte purchases.
5. Storefront diagnostic
A long press on the tab bar opens the storefront diagnostic: store country and recognised products, useful when a price is missing.
Cart
1. The lines
One module per line, with its price as the store charges it, in its currency. No price is written in the app.
2. The total
It reads "…" until the store has answered for every line, then shows in the prices' currency. "Unavailable" flags a line without a price or two currencies in the same cart.
3. Pay
"Proceed to payment" chains the purchases on the device's store. Each unlocked module leaves the cart at once; the page closes when everything is paid.
4. Cancellation or failure
The page stays open with the remaining modules only: nothing already unlocked is offered for payment a second time. A purchase is never taken back on a second attempt.
Academy, builder
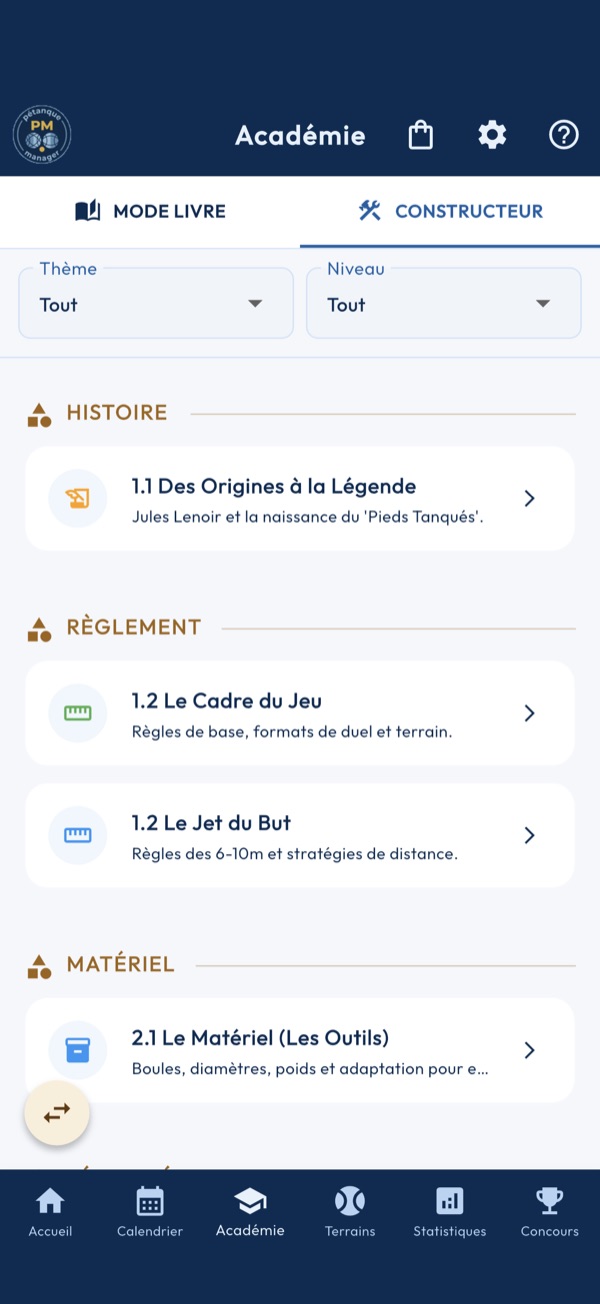
1. Building your own path
The builder shows every lesson of the catalogue flat, grouped by theme, to build a path your own way rather than follow the book order.
2. Filtering
The two lists at the top filter by theme, then by level; both filters combine. Clearing a filter brings the whole list back.
3. Reading a lesson
A tap opens the lesson, the same one as in book mode: progress and scores are shared between both modes.
4. Locked lessons
A locked lesson belongs to a chapter that is not unlocked: its chapter is bought individually from the shop or opens with Premium.
Academy, book mode
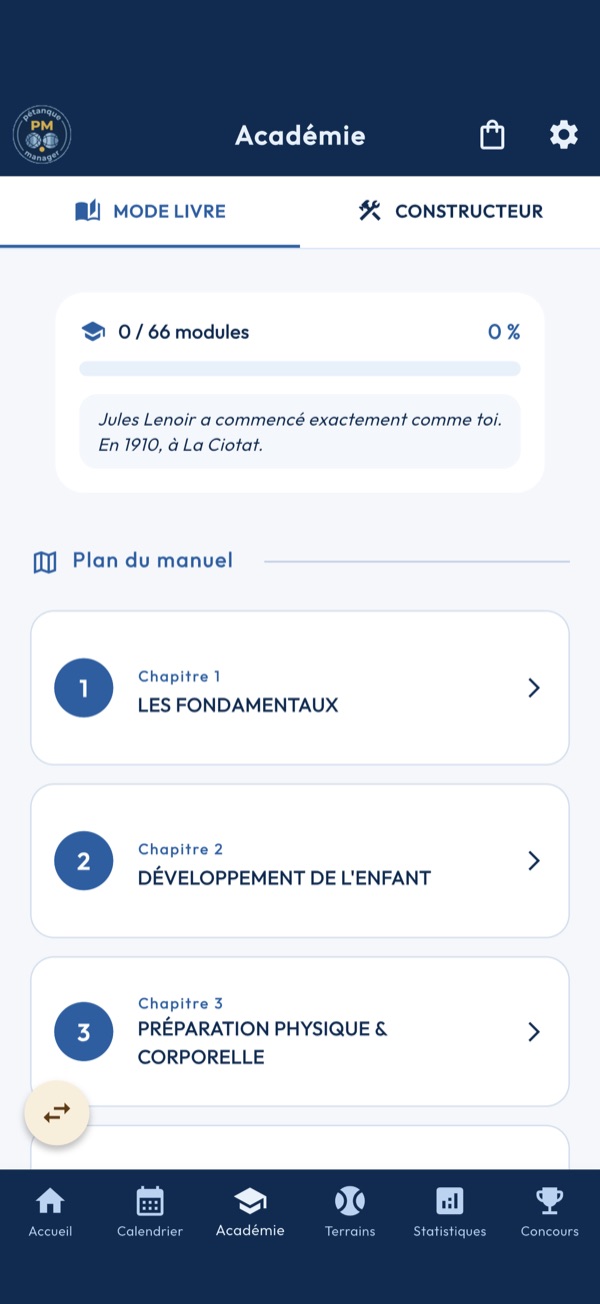
1. Table of contents
Book mode presents the courses like a manual: chapter by chapter, in teaching order. Tapping a chapter opens its sections and their lessons.
2. Moving through a chapter
At the top of a chapter, the return bar offers Outline to go back to the contents, and Previous and Next to move between chapters without going through the list again.
3. Opening a lesson
Each lesson opens with a tap: content, video, workshops and quiz. A completed lesson shows a check mark, its best score and its date.
4. Progress
The chapter bar counts completed lessons. A lesson is completed through its quiz or, if it has none, through the completion button at the bottom of the page.
5. Locked chapters
A locked chapter shows its price, read from the store. It unlocks individually from the shop: courses are not part of any subscription.
6. Offline
Without a network, the catalogue is displayed from the last saved copy and a banner says so. The Retry button starts the loading again.
A lesson
1. The content
The lesson text, then depending on the sheet a video, images, an audio and a checklist to tick for yourself. The checklist does not count towards validation.
2. The workshops
Each linked workshop loads its exercise from the Training module and is scored on the spot. The workshop mark is the average of all of them, an undone workshop counting zero. Scores live in memory: leaving the sheet loses them.
3. The quiz
With workshops, the final mark is 70% workshops and 30% quiz; without workshops, the quiz alone. The lesson is validated at 70. The result screen details each answer and offers to try again.
4. Without a quiz
"Mark as completed" validates the lesson directly. The button stays active: you can validate again after redoing the workshops.
5. Offline
A lesson already opened is re-read from the cache, a banner says so. A lesson never loaded needs the network.
6. Locked chapter
If the chapter is not in your licence, the sheet gives way to the access wall and its button leads to the shop.